Change font size
It is currently Fri Apr 19, 2024 1:16 am


Post a new topicPost a reply Page 20 of 54   [ 801 posts ]
Go to page Previous  1 ... 17, 18, 19, 20, 21, 22, 23 ... 54  Next
Author Message
 Post subject: Re: Project Canuck - 1966 Canadian Build Thread ... Finally
PostPosted: Tue May 15, 2012 8:59 am 
Haha, I just built a W24 Octo-Turbo, now what?!
User avatar

Joined: Thu Dec 29, 2005 12:29 am
Posts: 1790
Location: Eating tofu and legumes in my hippie shack
Whoa!!! Sweet! I liiike mooore powa!

_________________
Image


Top
 Profile  
 
 Post subject: Re: Project Canuck - 1966 Canadian Build Thread ... Finally
PostPosted: Tue May 15, 2012 5:41 pm 
Haha, I just built a W24 Octo-Turbo, now what?!
User avatar

Joined: Wed Jun 14, 2006 4:19 pm
Posts: 3131
Location: Lethbridge, AB
Ugly Duck wrote:
Mmm, that head is nice! Our phone convo last night got my juices flowing too - for most of it I was pacing around the back yard, staring at the GT. A few things to get off my plate first and I can start working on bits of it, can't wait!


I think I may have inadvertantly invented something. I like serendipity - but look at the light distribution through the exhaust port. We're looking right down the port and note how the port is shaded.

Image

Could you use the light field distribution as a port guide...and I know it's not a fluid, but have a look at what it's telling us with out me intending on doing it.

Here it is enhanced a little.

Image

Note the strength of the cut on the port roof (darkest area) - no light is getting to these parts, while the floor is receiving a bounce off the rear valve bowl wall. It looks like it's wanting to have area welded on the left side and not on the right.

I'm going to go and put a valve in and see what it looks like. I know light doesn't do curves (unless you're really massive), but random light distributions could show where flow paths are concentrating. Maybe. Time for some experimentation.

_________________
Coburn Performance - OCD comes naturally.


Top
 Profile  
 
 Post subject: Re: Project Canuck - 1966 Canadian Build Thread ... Finally
PostPosted: Tue May 15, 2012 8:47 pm 
Haha, I just built a W24 Octo-Turbo, now what?!
User avatar

Joined: Wed Jun 14, 2006 4:19 pm
Posts: 3131
Location: Lethbridge, AB
Hmmm, a little flat light and this is what we get. Interesting.

Image

Image

Sorry for the blur - it was hard to hand hold the camera.

Image

_________________
Coburn Performance - OCD comes naturally.


Top
 Profile  
 
 Post subject: Re: Project Canuck - 1966 Canadian Build Thread ... Finally
PostPosted: Wed May 16, 2012 7:24 am 
Haha, I just built a W24 Octo-Turbo, now what?!
User avatar

Joined: Wed Dec 21, 2005 8:40 pm
Posts: 3492
Location: Calgary, Ab
Nice pictures, but I think the light patterns are going to be influenced more by surface features than by anything else. Detexture and polish the surface of that port without changing the shape any, and you'll change the light pattern 100%, while the exhaust gasses flowing through the port won't hardly notice your work.

For instance, the light you've shone up through the ports suggests that the flow will be towards the roof up and away from the cylinder centerline, and towards the floor on the cylinder side. But Phil's portwork is opposite to that. The light MIGHT tell you something, but it might be leading us down the wrong path too.

But mostly I think the light is bouncing off of stuff, while gas is supposed to flow along it, and that's why you can't use one to analyze the other.


Top
 Profile  
 
 Post subject: Re: Project Canuck - 1966 Canadian Build Thread ... Finally
PostPosted: Wed May 16, 2012 8:17 am 
Haha, I just built a W24 Octo-Turbo, now what?!
User avatar

Joined: Wed Jun 14, 2006 4:19 pm
Posts: 3131
Location: Lethbridge, AB
I know - but look at what and how much light is bouncing off stuff and compare this to areas that we all agree are the limitations. Look at the valve guide area and how it's lit up. Have a look at the port with the valve in it and note the bright areas around the seat. I also found it weird that with the light evenly distributed in the combustion chamber, it was still illuminated most strongly to the outside edge. Now a gas under pressure is going to favour the opposite side of the valve, but it's still interesting (useful - maybe, maybe not). I'm still looking for the science in all this voodoo.

That being said I'm stealing my wife's leaf blower this weekend.

_________________
Coburn Performance - OCD comes naturally.


Top
 Profile  
 
 Post subject: Re: Project Canuck - 1966 Canadian Build Thread ... Finally
PostPosted: Wed May 16, 2012 9:52 am 
Haha, I just built a W24 Octo-Turbo, now what?!
User avatar

Joined: Wed Dec 21, 2005 8:40 pm
Posts: 3492
Location: Calgary, Ab
:lol: Awesome! Keep in mind the size of the cylinder bore, the height of the piston as we'd discussed (and I'm thinking that a diffuser is indeed a good idea), and that what you eventually do to the combustion chamber shape is going to greatly affect what happens later on in the port.

I like this kind of shape: http://www.topplocksverkstan.se/bilder/ ... %20043.jpg It unshrouds the valve a lot, guides gasses gradually into the port, and generally looks better (to MY eye) than most others. Maybe it's more than necessary on anything but a wild full-race monster, but by starting out that way and then adding putty (on a test bench situation) you can sneak up on what makes the stock port work best, and then fill in the port where the flow is stalled. There's still a ton of quench pad, though you'd have to cut the hell out of the head to get the compression up (further unshrouding the valves as a side benefit).


Top
 Profile  
 
 Post subject: Re: Project Canuck - 1966 Canadian Build Thread ... Finally
PostPosted: Wed May 16, 2012 4:19 pm 
Haha, I just built a W24 Octo-Turbo, now what?!

Joined: Wed Dec 21, 2005 8:03 pm
Posts: 2859
Location: T2C
Fire up one of your miniature goniometers and see what the ports look like from every angle. The shadows will change depending on the angle the light is shone from. Granted, if you assume air moves in a straight line for a limited time/distance and can replicate that orientation, you likely have a reasonable starting point. I think you're miles past that already...

_________________
Dale

'67 123GT
'67 122s
'99 AMG E55T


Top
 Profile  
 
 Post subject: Re: Project Canuck - 1966 Canadian Build Thread ... Finally
PostPosted: Thu May 17, 2012 8:18 am 
Haha, I just built a W24 Octo-Turbo, now what?!
User avatar

Joined: Wed Jun 14, 2006 4:19 pm
Posts: 3131
Location: Lethbridge, AB
More like fire up the shop vac or leaf blower and see if I can make a cheapo flow bench. Valves, by the way, are now coming from Sweden with guides and seats (and a couple of HG options - 'cause they were cheap).

Now if anyone want's to help me put together a shopping list for MS3. I don't need it yet, but as usual, as I've never done EFI (or even had a car with EFI) most of this stuff remains academic to me.

_________________
Coburn Performance - OCD comes naturally.


Top
 Profile  
 
 Post subject: Re: Project Canuck - 1966 Canadian Build Thread ... Finally
PostPosted: Mon May 21, 2012 7:23 pm 
Haha, I just built a W24 Octo-Turbo, now what?!
User avatar

Joined: Wed Jun 14, 2006 4:19 pm
Posts: 3131
Location: Lethbridge, AB
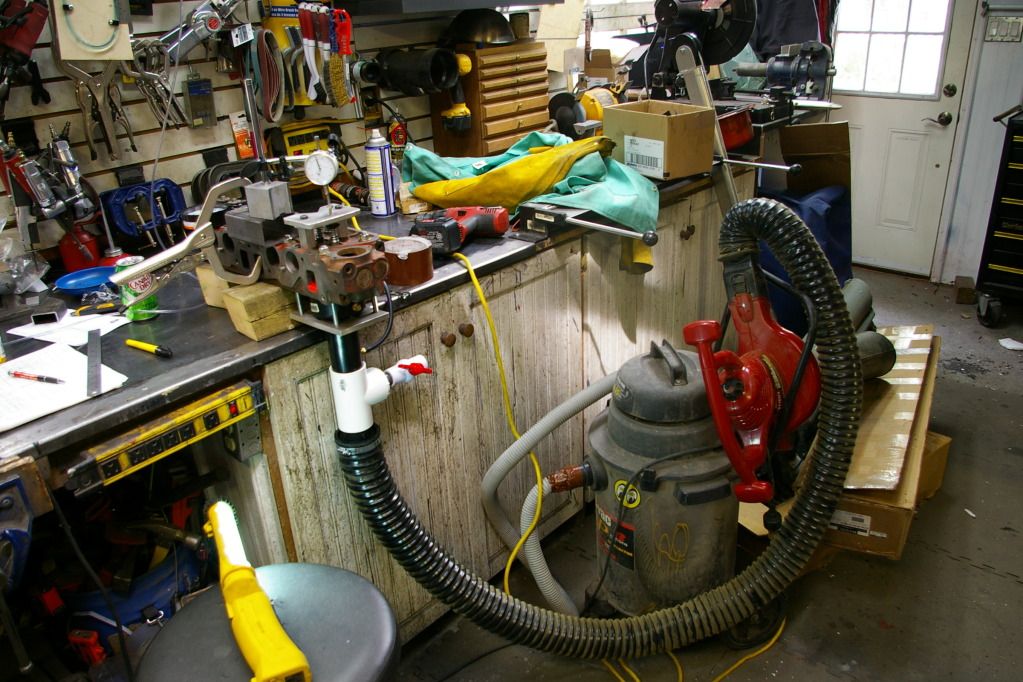
Flow bench time. First up - I can't generate 28" Hg with my shop vac...so we have to take things with a little caution. I tested both with vacuum and with air pressure at 100 psi. Here's what my rig looks like.

Image

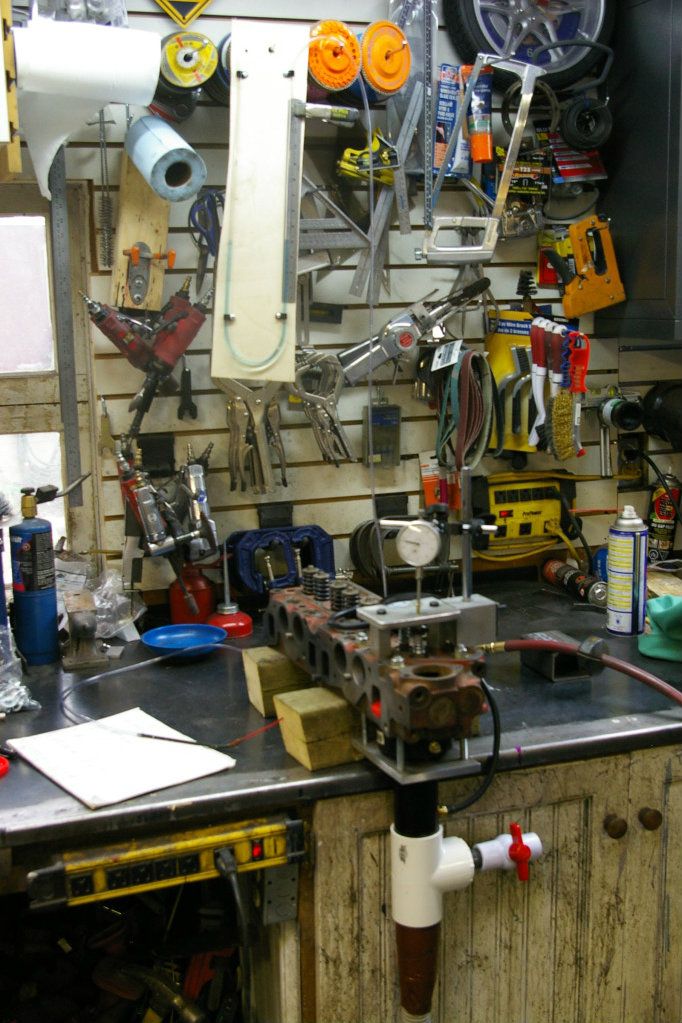
You can see the important parts, the heart of the beast is my shop vac, this runs through a hose to the base 2" ABS pipe, then up to a tee where I've installed a ball valve as a bleed. Next it flows into a 2 - 3 ABS fitting that is the same size as the cylinder bore. I've tapped a hole after the bleed to measure pressure. Hanging on the wall is my manometer - made with clear tube with a wee probe (WD40 wand thingy) to probe the port for flow.

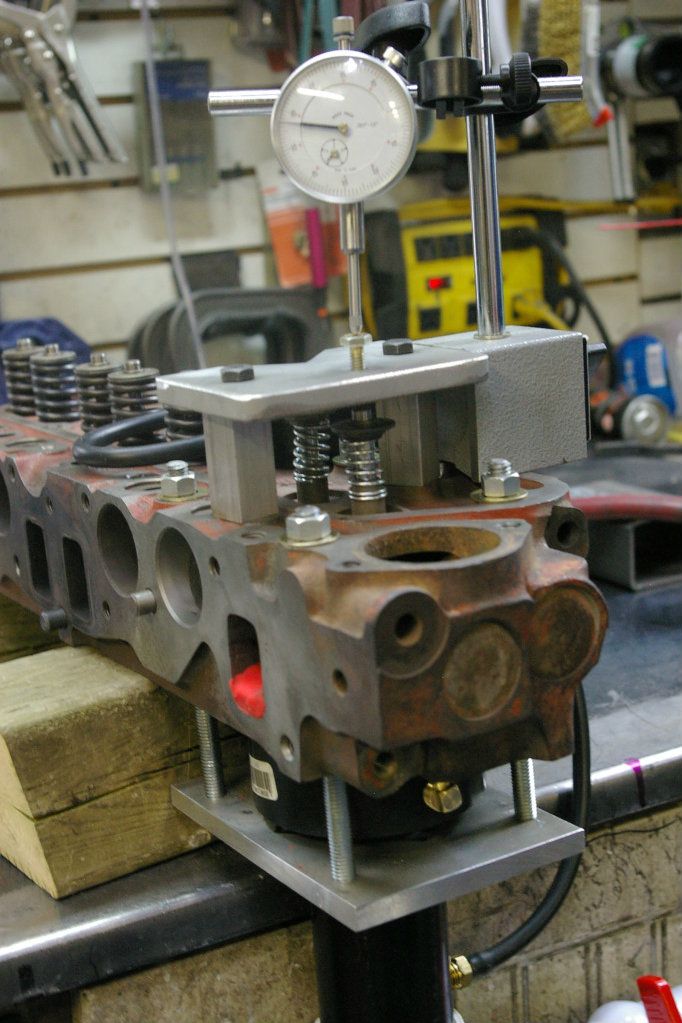
Valves are installed with light springs to make activating them easier - I fabricated a stand and accurately measure the amount that the valve is off the seat. I did my testing at 20/40/47 thou worth of valve lift.

Image

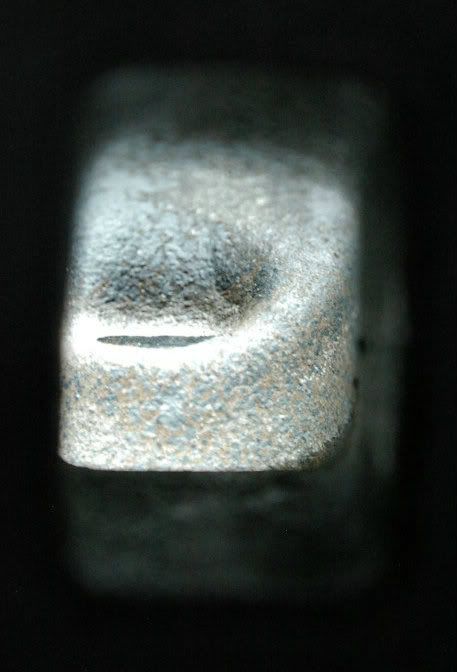
Now for the test - this testing was done with the spare B20F head (1968-1972 - so not the later, better casting) and using the stock valves which look like this (I think they are one piece forgings).

Image

Probing both ports with the manometer varifies that funky things happen around the seat area as reading go from relatively stable to whacky (showing flow disturbances by the seat).

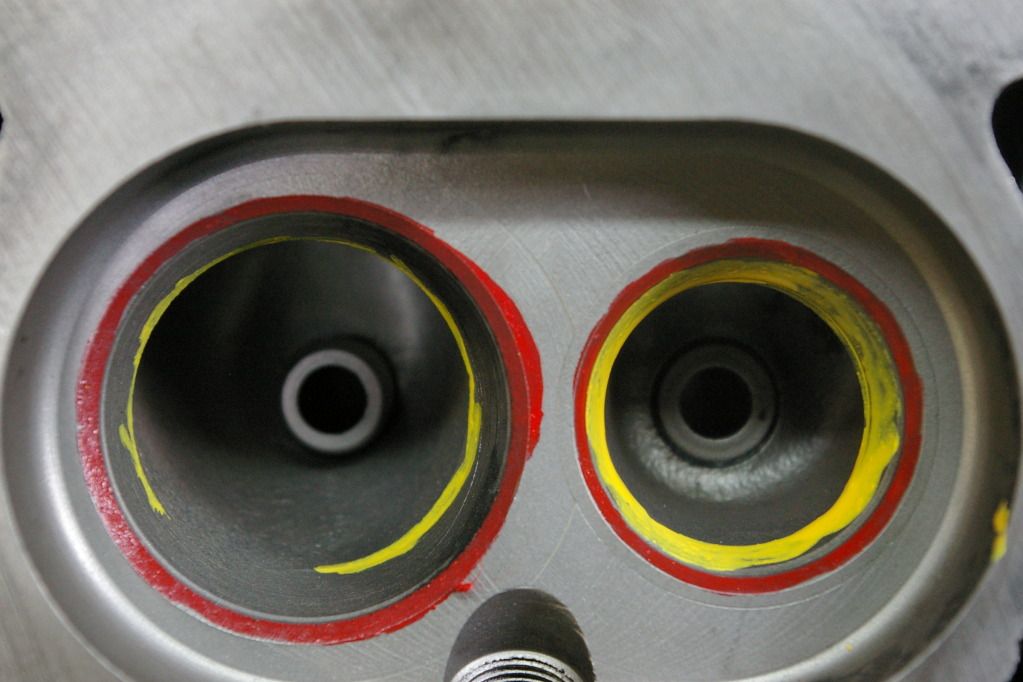
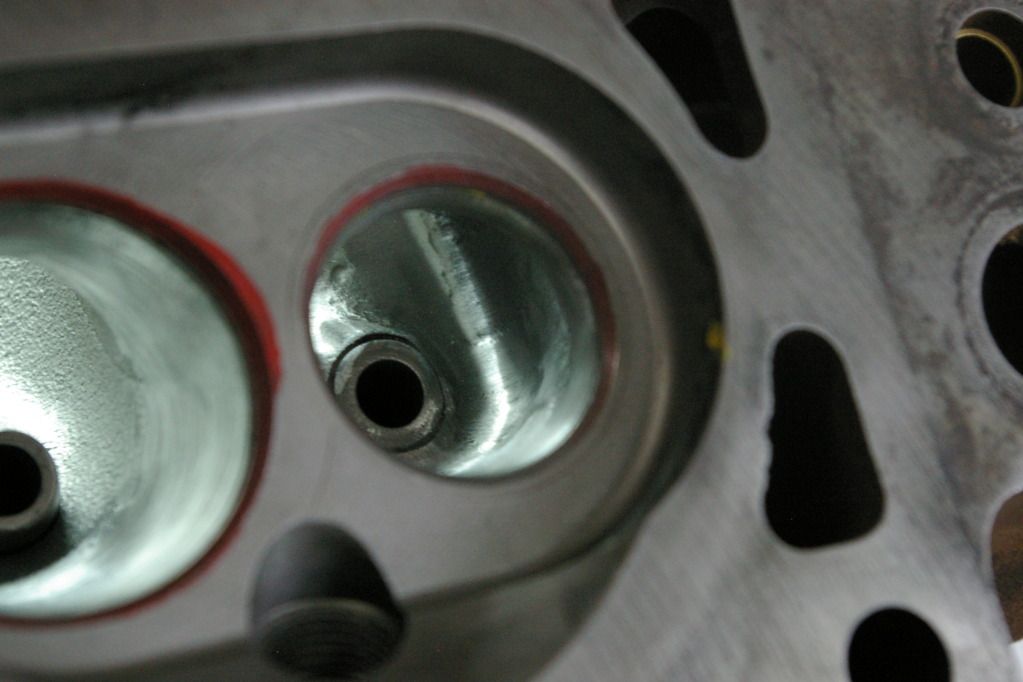
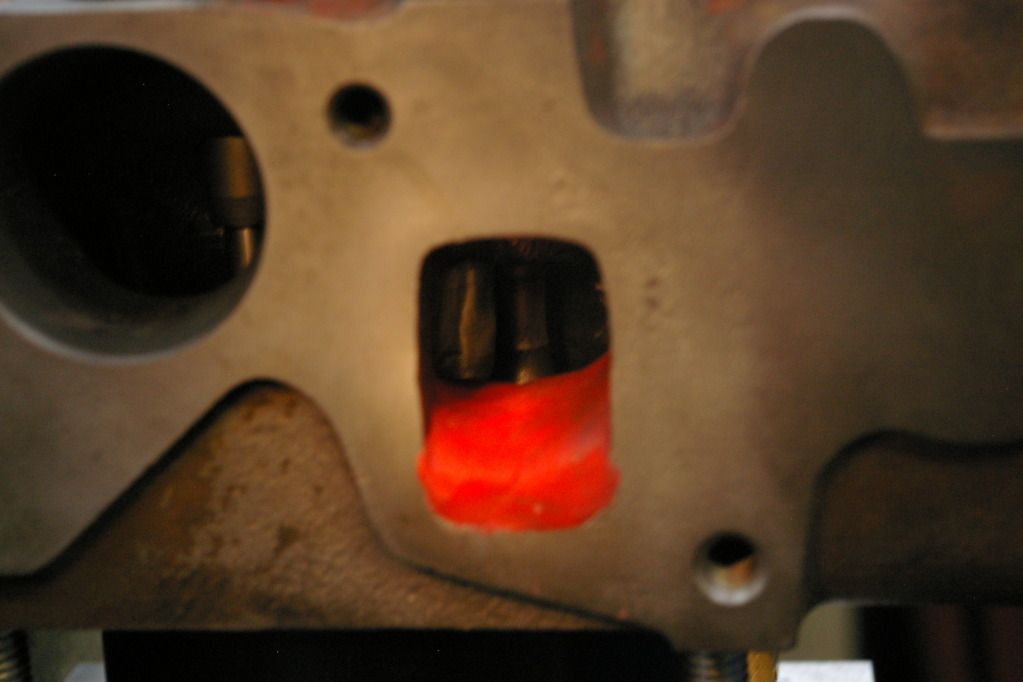
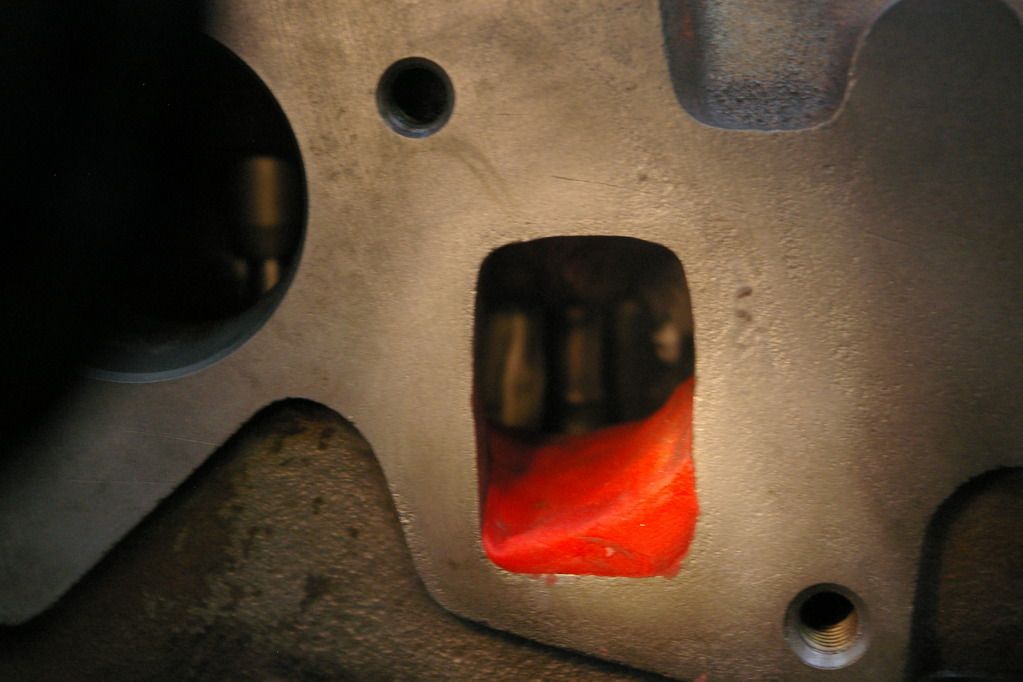
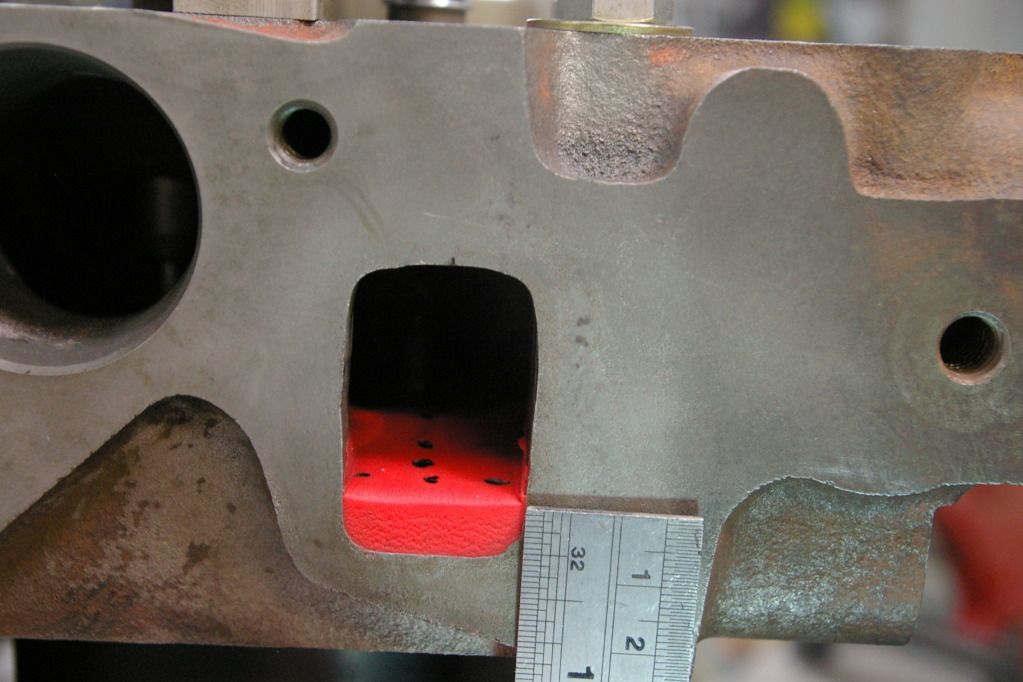
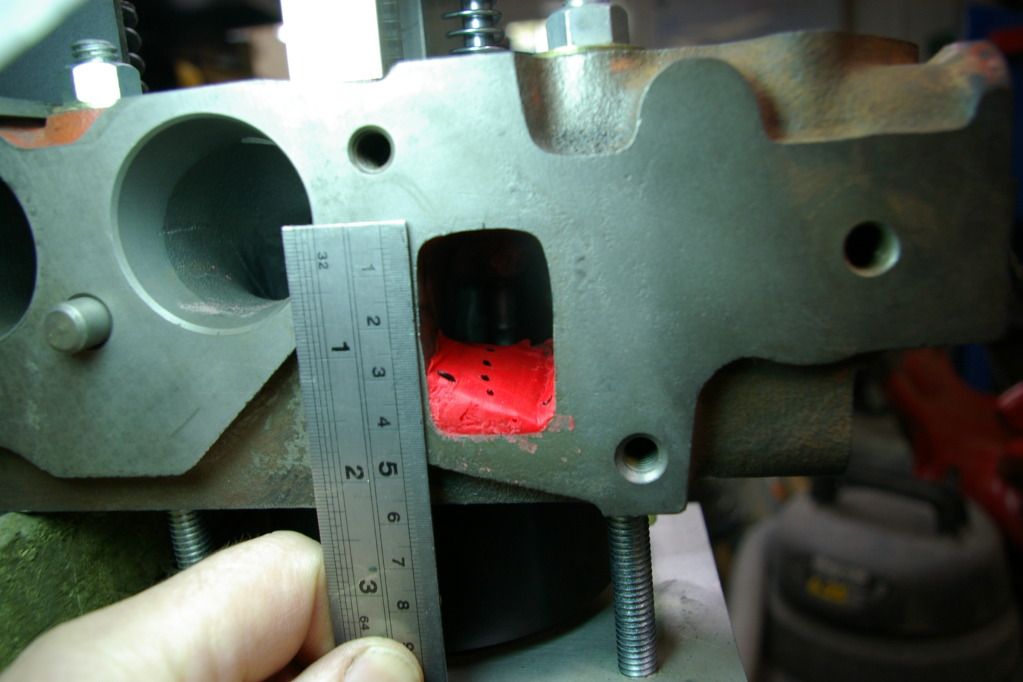
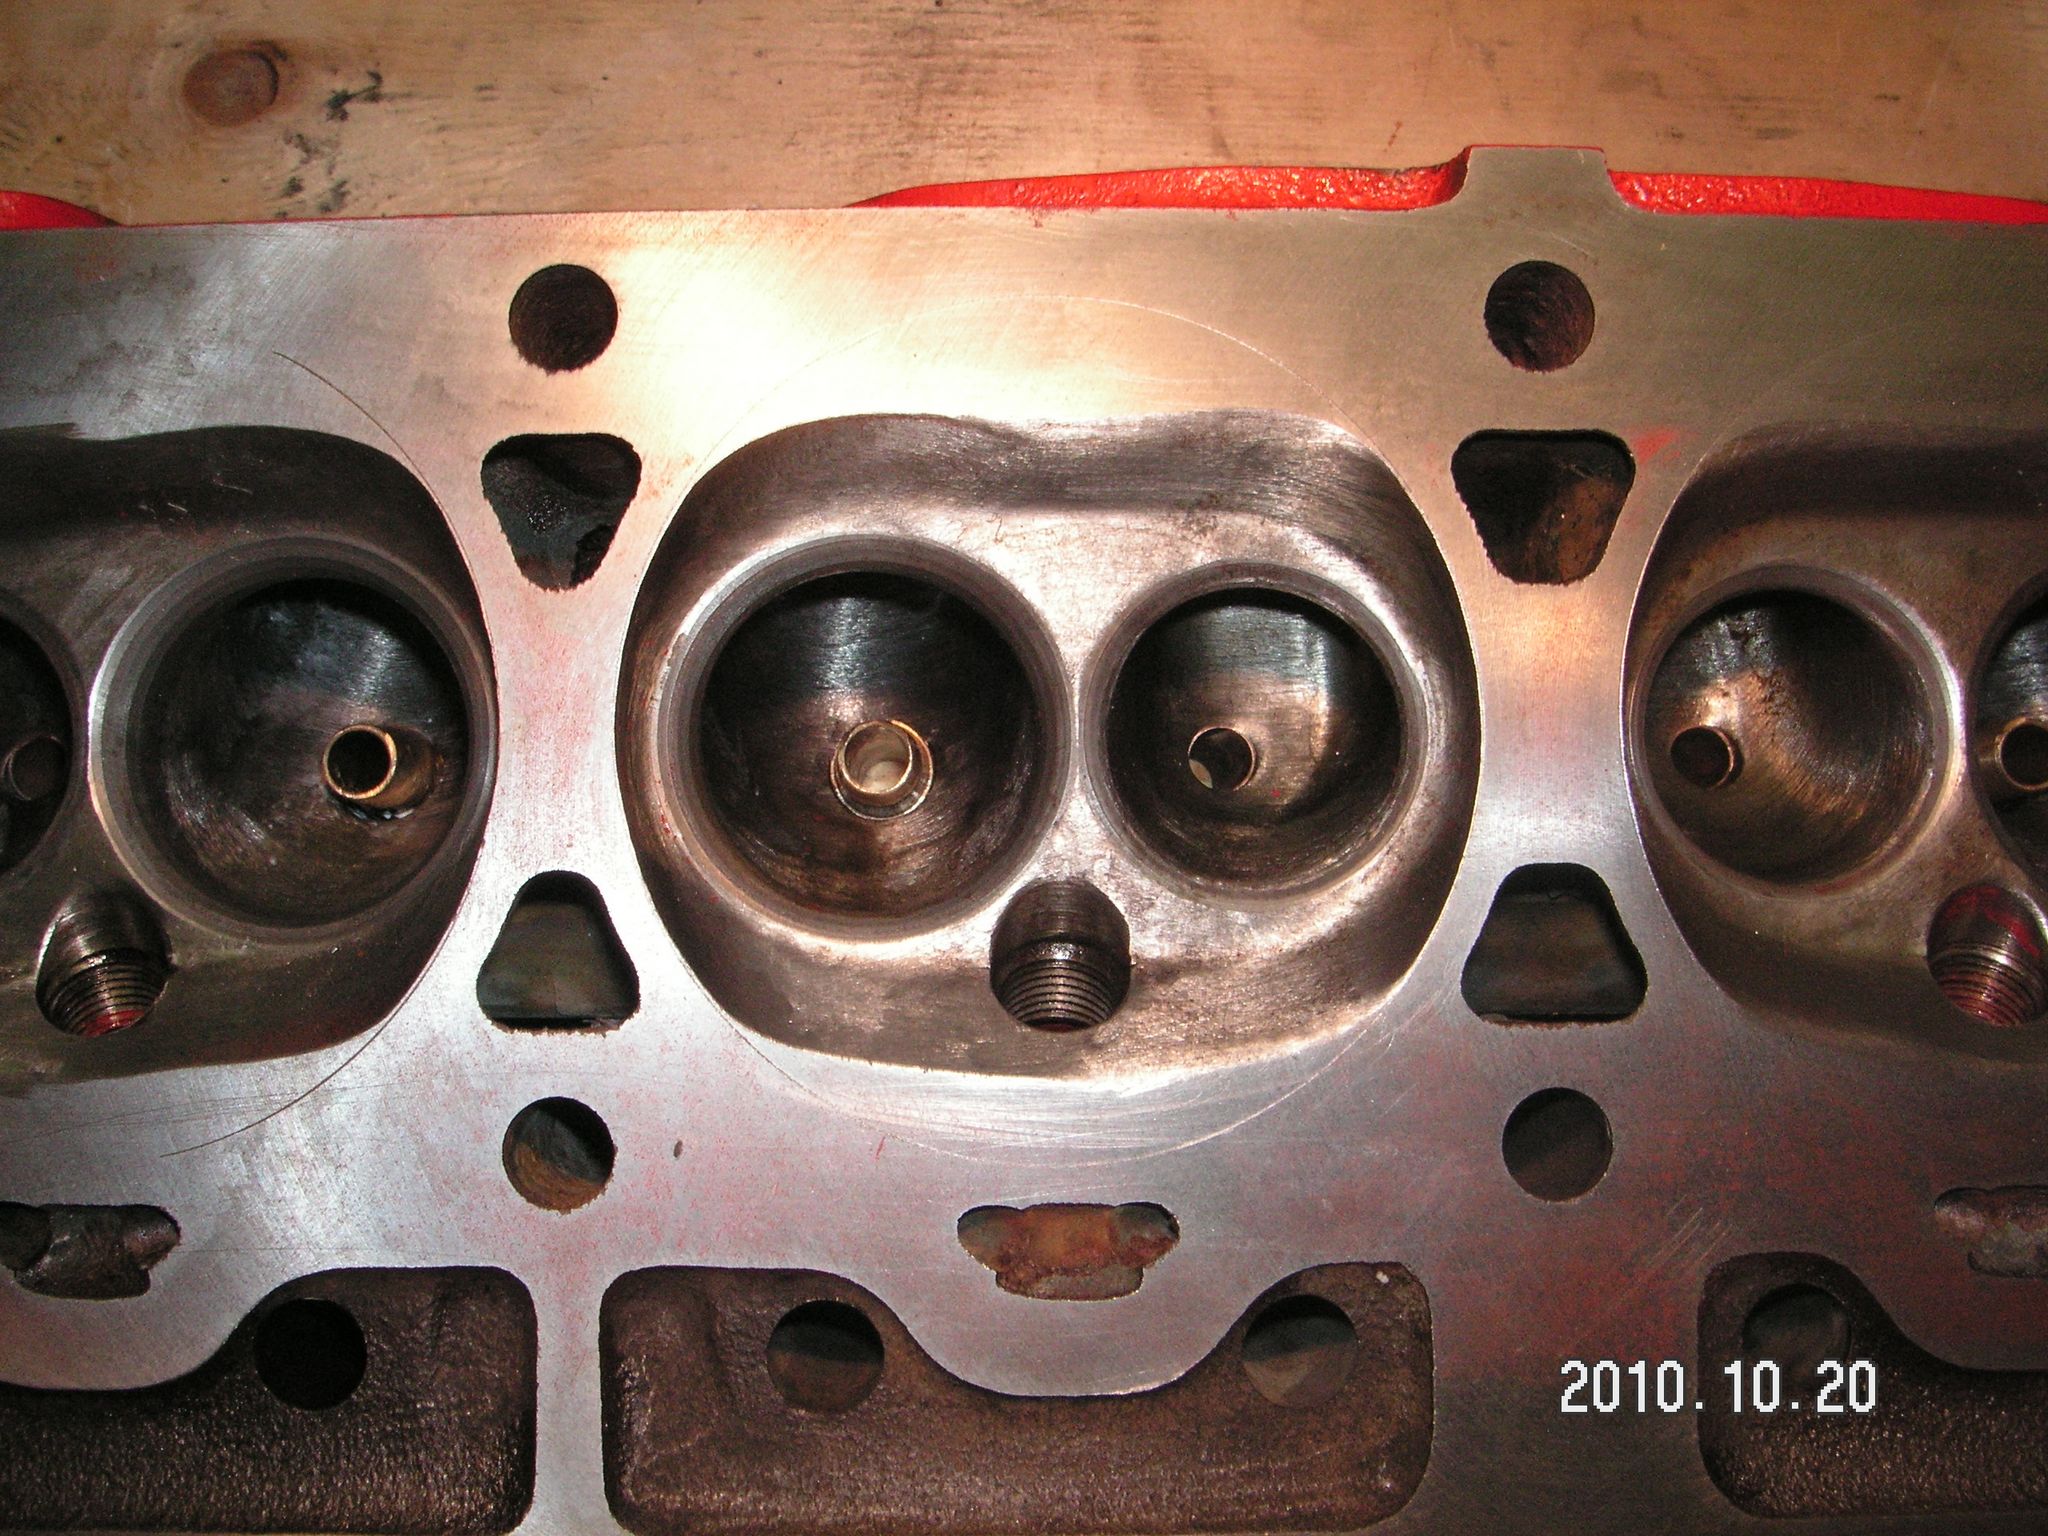
I've posted photo's of these heads before - but this time I've highlighted the area I actually work on. I usually colour the valve seat red to stop me hitting it and the area in yellow is the restriction in the throat. It`s gotta go - so here we are at the start.

Image

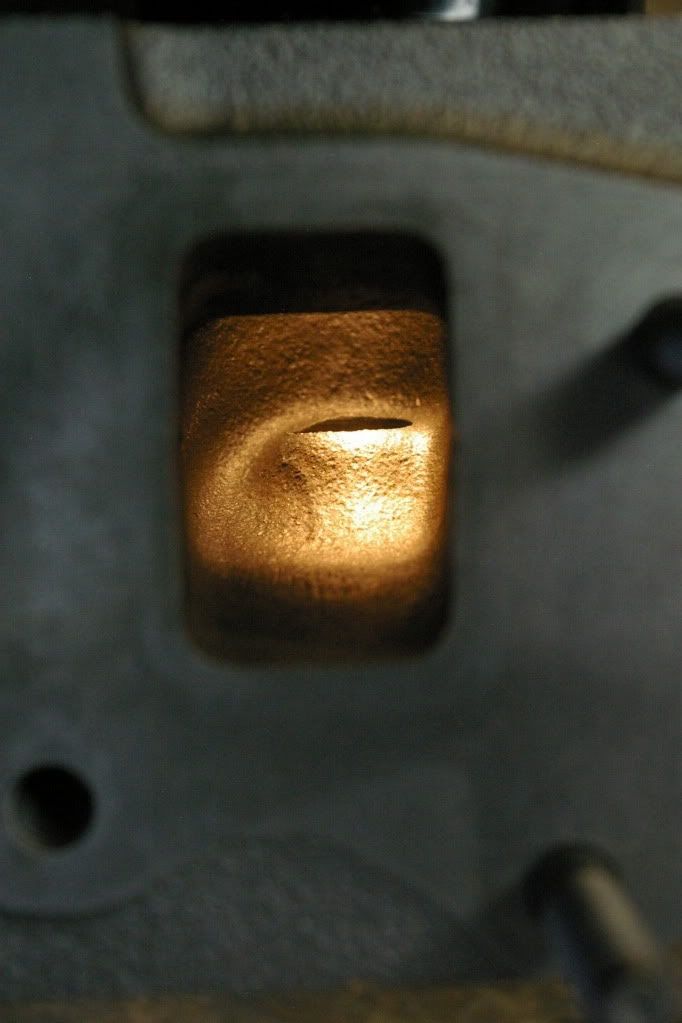
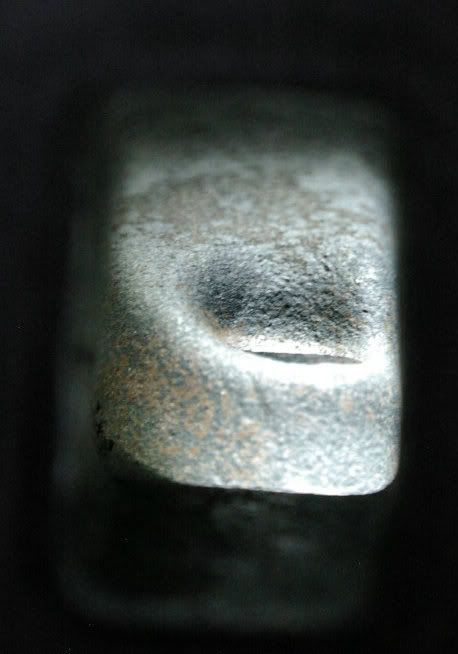
And this is a roughed in port bowl, nothing fancy here at all.

Image

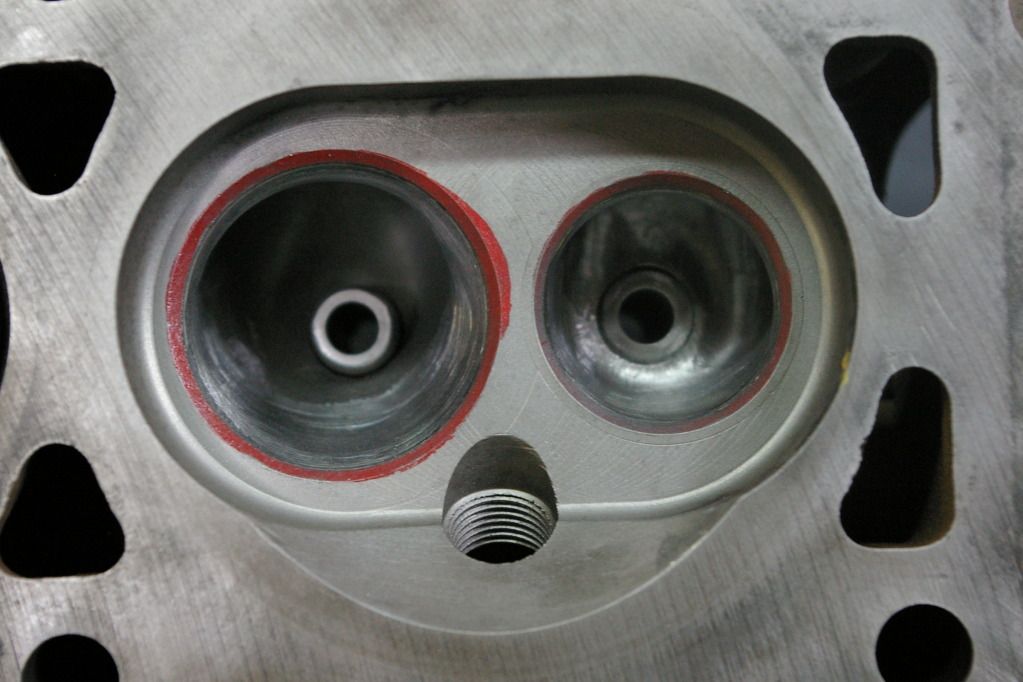
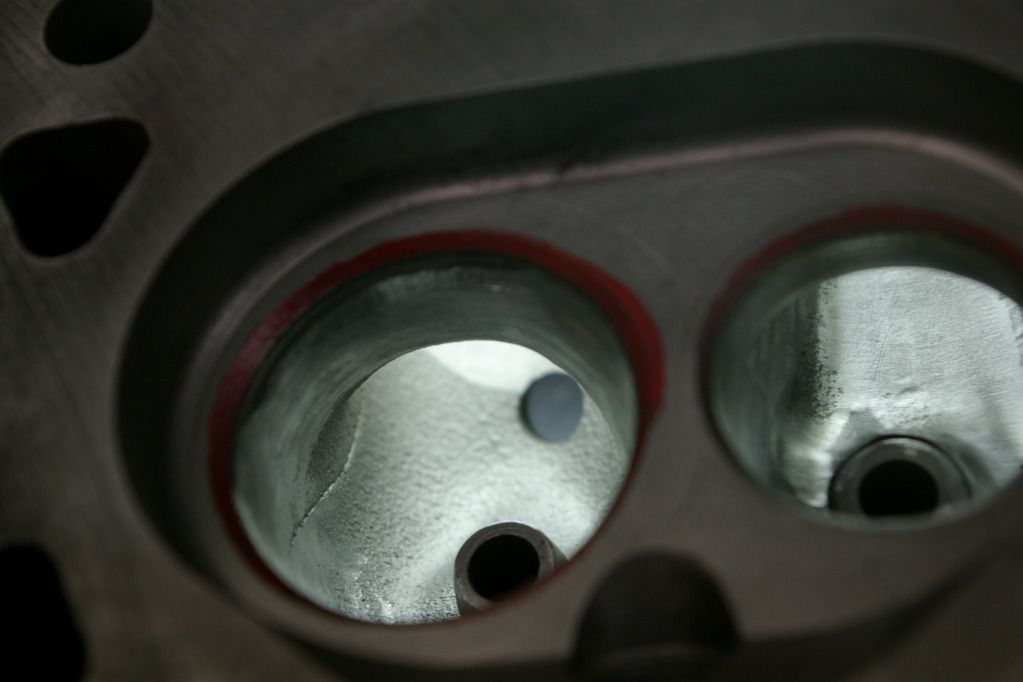
I've taken the back (side away from the port entry/exit) out to the seat as the majority of the intake flow is heading in that direction and the exhaust starts there.

Image

I usually carve around the outside of the valve guide on the exhaust side and accentuate the port roof to complement the bias in the port.

Image

Image

Short-side radius on the intake is cleaned up and profiled, but I try not to make it larger.

Image

Not much to say about the short-side radius on the exhaust side, I just smooth it out and try to keep it from getting sharp.

Now for the results (all probe values in inches - start point was a hair over 4" of windex in the tube :lol: ) - higher values are worse flow.

Image

The removal of the exhaust restriction is easy to see as is the improvement in the disribution of flow in the intake. Wish I could give CFM measurements, but it's how not how much I think in this case.

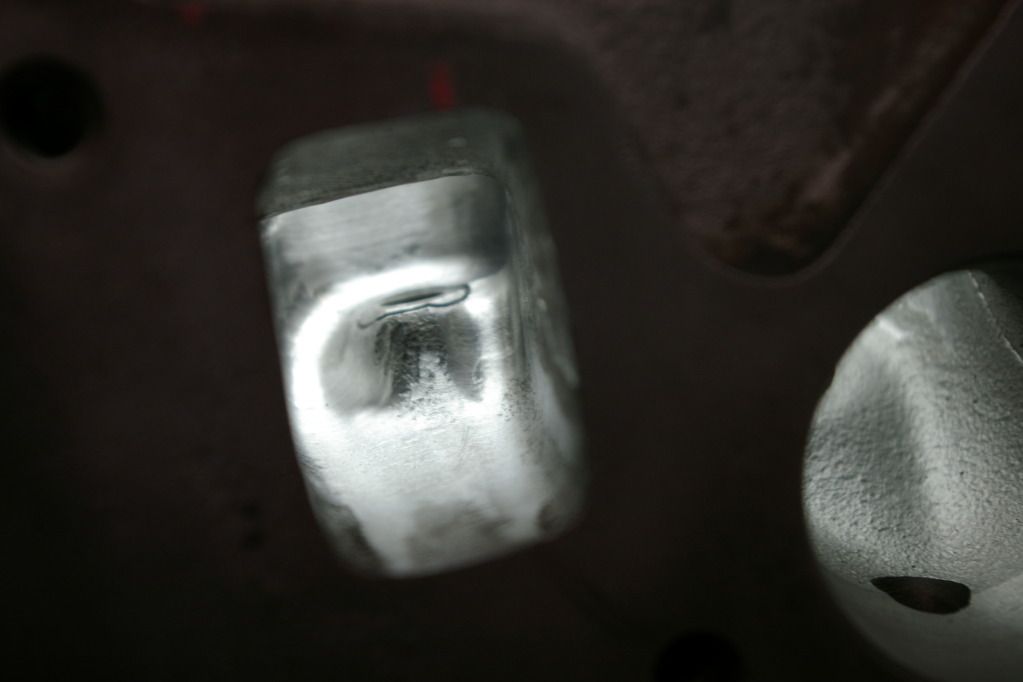
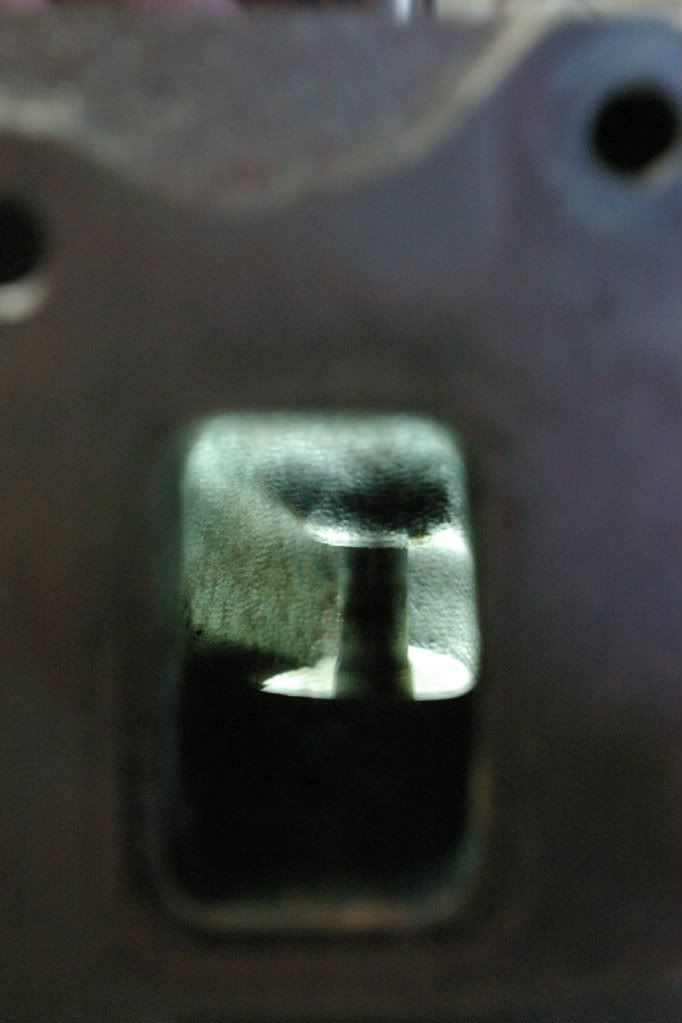
I then played with adding material to the exhaust port floor. I started with building up the port flat.

Image

I also tried a slanted floor.

Image

Here are the results.

Image

So it appears that the slanted floor works - I can also verify that the distrubution of flow in the port is more even with this port than with a simple raised floor.

_________________
Coburn Performance - OCD comes naturally.


Top
 Profile  
 
 Post subject: Re: Project Canuck - 1966 Canadian Build Thread ... Finally
PostPosted: Mon May 21, 2012 7:51 pm 
Haha, I just built a W24 Octo-Turbo, now what?!
User avatar

Joined: Thu Dec 29, 2005 12:29 am
Posts: 1790
Location: Eating tofu and legumes in my hippie shack
Cool! The Playdoh works!

_________________
Image


Top
 Profile  
 
 Post subject: Re: Project Canuck - 1966 Canadian Build Thread ... Finally
PostPosted: Tue May 22, 2012 8:03 am 
Haha, I just built a W24 Octo-Turbo, now what?!
User avatar

Joined: Wed Dec 21, 2005 8:40 pm
Posts: 3492
Location: Calgary, Ab
You've slanted it opposite to what the MPPE head is like. Have you tried it that way?

And why did you stop at .047" lift? Are you only concentrating on low-lift flow for right now?

Wicked work is happening here! It'll be way easier (and probably more effective) to write a cheque to some nutbar Swede who's built dozens of verified 100 hp/l B20s, but this is more entertaining and more educational, right?

Have you looked into building a REAL flowbench? One that can produce actual flow numbers? I've got an old Car Craft article scanned here somewhere, I should try and get it to you.


Top
 Profile  
 
 Post subject: Re: Project Canuck - 1966 Canadian Build Thread ... Finally
PostPosted: Tue May 22, 2012 8:49 am 
Haha, I just built a W24 Octo-Turbo, now what?!
User avatar

Joined: Wed Jun 14, 2006 4:19 pm
Posts: 3131
Location: Lethbridge, AB
Ugly Duck wrote:
You've slanted it opposite to what the MPPE head is like. Have you tried it that way?

And why did you stop at .047" lift? Are you only concentrating on low-lift flow for right now?

Wicked work is happening here! It'll be way easier (and probably more effective) to write a cheque to some nutbar Swede who's built dozens of verified 100 hp/l B20s, but this is more entertaining and more educational, right?

Have you looked into building a REAL flowbench? One that can produce actual flow numbers? I've got an old Car Craft article scanned here somewhere, I should try and get it to you.


Scan the article...could be fun. These were just my first tests and I thought that I'd angle it towards where I saw dead air in the port first and see what happens. I've got more tweaking to go before I'm done.

I'm sure Erland Cox would just laugh at my attempts.

_________________
Coburn Performance - OCD comes naturally.


Top
 Profile  
 
 Post subject: Re: Project Canuck - 1966 Canadian Build Thread ... Finally
PostPosted: Tue May 22, 2012 11:21 am 
Whost Pore

Joined: Sun Feb 11, 2007 7:26 pm
Posts: 558
Location: E-Town
too bad you weren't close enough to lend out the airflow measuring equipment for a few days :P


Top
 Profile  
 
 Post subject: Re: Project Canuck - 1966 Canadian Build Thread ... Finally
PostPosted: Sat May 26, 2012 9:09 pm 
Haha, I just built a W24 Octo-Turbo, now what?!
User avatar

Joined: Wed Jun 14, 2006 4:19 pm
Posts: 3131
Location: Lethbridge, AB
Here we go again...another trip to Can Tire to pick up plumbing fittings and I got rid of the vacuum cleaner and replaced it with a leaf blower. That did the trick. Here's the set-up.

Image

I'm still learning, but the leaf blower puts out a lot more air, so flows are possible to generate, in fact I needed to bleed air to keep water in the manometer. I calibrated the max air flow by setting the ported exhaust valve to 500 thou open then probing the port with the manometer and varying the speed of the blower and the bleed on the intake so that at the maximum flow (lowest number) was still on my scale. I also switched my ruler to metric - SI units are easier to work with. The flows are quite variable, so I'll explain what I did.

I established a consistent measuring location within the port. I measured 8 points, top/bottom, right/left/ exit/valve of the port. Mid points are hard to keep consistent. I marked the points with a sharpie so I could place the manometer probe in the same location for each measurement. Next, the valve lifts were changed from 50 - 500 thou in 50 thou steps. The starting water level in the manometer was 20 cm - so any measurement around 20 means that there is no difference between the port pressure and the atmosphere (the port is not flowing or has stalled). I also added a row of points from the valve seat to the port exit on the bottom (4 points - equally spaced) and the same points along the roof of the port.

Port alterations:

Raised port floor (1/4")

Image

Sloped port floor

Image
Here are the charts.

Right side of the port.

Image

Left side

Image

Centreline

Image

The port is biased to the right - which is easy to see by the graphs. The flow follows the top of the port with some areas of the port (see centreline results) actually creating a vacuum. When I stuck my finger in the flowing port, it was sucked to the bottom of the floor...intersting. At higher flows on the right side top of the port starts to experience turbulent flow - which is hard to measure with any accuracy. The results are a little inconclusive with respect to filling the port. It appears that the level fill will work as well as a slanted port. More work around the exhaust valve stem floor seems like a good idea as the flow stalls there consistently.

Both raised ports flow better along the centreline top - where most of the flow is concentrated. It looks like adding more material around the SSR is the wrong idea, it has to be laid back and smoothed out more. I could rig up another manometer to generally measure the pressure in the inlet and see the effect. Probably worth the effort.

Of interest is the variability of the measurements. Both raised ports vary less than either the stock or basic port.

Looking for contributions/interpretations.

_________________
Coburn Performance - OCD comes naturally.


Top
 Profile  
 
 Post subject: Re: Project Canuck - 1966 Canadian Build Thread ... Finally
PostPosted: Sat May 26, 2012 9:48 pm 
Haha, I just built a W24 Octo-Turbo, now what?!
User avatar

Joined: Wed Jun 14, 2006 4:19 pm
Posts: 3131
Location: Lethbridge, AB
This set of graphs clears up what I was trying to say about consistency in flow.

Image

Image

_________________
Coburn Performance - OCD comes naturally.


Top
 Profile  
 
Display posts from previous:  Sort by  
Post a new topicPost a reply Page 20 of 54   [ 801 posts ]
Go to page Previous  1 ... 17, 18, 19, 20, 21, 22, 23 ... 54  Next


Who is online

Users browsing this forum: No registered users and 6 guests


You cannot post new topics in this forum
You cannot reply to topics in this forum
You cannot edit your posts in this forum
You cannot delete your posts in this forum
You cannot post attachments in this forum

Jump to:  
cron


Powered by phpBB © 2000, 2002, 2005, 2007 phpBB Group
610nm Style by Daniel St. Jules of Gamexe.net