Change font size
It is currently Thu Oct 31, 2024 6:03 pm


Post a new topicPost a reply Page 39 of 54   [ 801 posts ]
Go to page Previous  1 ... 36, 37, 38, 39, 40, 41, 42 ... 54  Next
Author Message
 Post subject: Re: Project Canuck - 1966 Canadian Build Thread ... Finally
PostPosted: Sun Dec 25, 2016 5:46 am 
Haha, I just built a W24 Octo-Turbo, now what?!
User avatar

Joined: Thu Dec 29, 2005 12:29 am
Posts: 1790
Location: Eating tofu and legumes in my hippie shack
Yup. Looks mind-blowing Craig. Well done!

_________________
Image


Top
 Profile  
 
 Post subject: Re: Project Canuck - 1966 Canadian Build Thread ... Finally
PostPosted: Mon Dec 26, 2016 4:19 pm 
Haha, I just built a W24 Octo-Turbo, now what?!
User avatar

Joined: Wed Jun 14, 2006 4:19 pm
Posts: 3131
Location: Lethbridge, AB
I have to keep pushing on - so this is the 25/26th effort. I just need to finalize the sway bar links and this thing can go back up under the car. So first, a little wooden template.

Image

A little bit of plastic tube that fit the hub perfectly.

Image

Tried out some more wooden templates.

Image

Ready to commit some designs to steel. 10 ga should do for the web of my little I-beam.

Image

Yup, those look like they'll work. Used the scary giant belt grinder to finish these off - always worried about that thing finishing me off!

Image

Grabbed my two steel arms.

Image

Did a little cutting.

Image

Image

And a little bending.

Image

Then welded it all back up. I did the cap with stringers - it just feels better than the weave and is better as it puts less head into the part.

Image

Some grinding and we're done this part.

Image

So that takes care of the out turn for the arms. They hit the mark right where I wanted them.

Image

Image

You can see here how the inside will place the link on the new tube and not on the weld or the old tube.

Image

Now I just have to cut the arms and make the I-Beam section. That should keep me out of trouble tomorrow.

_________________
Coburn Performance - OCD comes naturally.


Top
 Profile  
 
 Post subject: Re: Project Canuck - 1966 Canadian Build Thread ... Finally
PostPosted: Tue Dec 27, 2016 6:54 pm 
Haha, I just built a W24 Octo-Turbo, now what?!
User avatar

Joined: Wed Jun 14, 2006 4:19 pm
Posts: 3131
Location: Lethbridge, AB
Time to finish these arms. First I cut off the majority of the arm and just kept the bent section. The rest won't be needed. So we start with welding the web blanks to these parts. They are keyed - so you have to be very careful how all this mounts together.

Image

Carefully shimmed to get the web perfectly centred.

Image

Then with one done, then I matched them up perfectly and welded the second arm to match the first.

Image

Image

I then cut the web blanks to the final shape and added the bar attachment ends, welded them on and ground it all flush.

Then I added the flanges.

Image

Image

This angle makes them look bent - they're just sitting on the welds and are splayed out. They're fine.
Just have to do the final welding tomorrow and then the final grinding and finishing. Then they're done. I still have to work out end links.

_________________
Coburn Performance - OCD comes naturally.


Top
 Profile  
 
 Post subject: Re: Project Canuck - 1966 Canadian Build Thread ... Finally
PostPosted: Sat Dec 31, 2016 10:34 pm 
Haha, I just built a W24 Octo-Turbo, now what?!
User avatar

Joined: Wed Jun 14, 2006 4:19 pm
Posts: 3131
Location: Lethbridge, AB
So with the sway bar arms done (well, they're going to need a little tweak to make them perfect - but that's no big deal), it was time to get the subframe installed for good. The unfortunate part was all of the brackets had to be removed. They all referenced the slightly off frame not the new and improved frame. So all four had to be cut off the car. No problem for the front brackets as they were tacked. The rear brackets were fully welded and not much fun to remove.

The front went back in with a great deal of precision.

Image

The frame was dead square and perfect side to side.

Image

Matt was in town, so we decided to toss the differential in place (not something you do on your own just for fun).

Clearance all looks fantastic.

Image

Just a random shot of the rear cross member back out of the car once again.

Image

Given that the frame was now straight, there were issues with the side clearance, so I had to make some room and add 5/8" to that cross member. Good thing I kept the off-cut.

So I broke out the plasma and cut the frame. It's been fixed up and looks fine.

Image

The start of the new year will see this thing actually welded in place. I stopped short of tacking it in place tonight as I was just too gassed and didn't want to make any more mistakes due to being tired.

Image

Happy New Year people.

_________________
Coburn Performance - OCD comes naturally.


Top
 Profile  
 
 Post subject: Re: Project Canuck - 1966 Canadian Build Thread ... Finally
PostPosted: Thu Jan 05, 2017 4:25 pm 
Somehow completely sideways in 4th

Joined: Thu Nov 10, 2011 11:43 am
Posts: 248
Location: Regina, SK
Happy New Year to you as well!

Still no notifications from this site - but I see your updates on FB and I come here for details. :) Looks great - can't wait to see what it looks like with suspension attached and coilovers in place. :)

Rabin


Top
 Profile  
 
 Post subject: Re: Project Canuck - 1966 Canadian Build Thread ... Finally
PostPosted: Fri Jan 06, 2017 6:00 pm 
First volvo in outer space
User avatar

Joined: Fri Dec 14, 2007 1:46 pm
Posts: 1648
Location: East L.A.
I know it's only sitting in there temporarily, but it sure is nice to see it in place.

_________________
Jim

66 122S (Garage Queen)
89 244 (Hers)
90 745Ti (Mine)
89 744 (SOLD/Bought back for other daughter)
78 242GT (Project... LOL)
91 244 (Don't Ask!!)


Top
 Profile  
 
 Post subject: Re: Project Canuck - 1966 Canadian Build Thread ... Finally
PostPosted: Sun Jan 22, 2017 7:10 pm 
Haha, I just built a W24 Octo-Turbo, now what?!
User avatar

Joined: Wed Jun 14, 2006 4:19 pm
Posts: 3131
Location: Lethbridge, AB
Time for another update. I have to try to remember where this all left off (takes a moment to scroll down - right)...it's been too long.

So the front brackets for the subframe are all welded in and I made sheet metal returns up to the floor pan. Start with some 20 ga bent to 90 degrees and stretch to make the curve.

Image

That gets these done faster than you think.

Image

Then weld them on and tidy up the welds.

Image

Then I thought that even with the gussets, it might be worth boxing the top of the seat pan and joining it to the cross member for extra unneeded strength. So I made some cardboard templates (I'm getting good at these now).

Image

Scribed them onto some 18 ga steel (love the smell of blueing).

Image

And got to work bending this all up.

Image

Good patterns produce good parts.

Image

Welded up the joins.

Image

Welded them in place - the tricky part was accounting for the slope of the cross member.

Image

Seat fits in and you can't see a thing - perfect.

Image

Then I gave the subframe a quick shot of black paint to hold it until I'm done fabricating and get it powder coated.

Image

Stuffed it all back in the hole and started to work out the sheet metal for the trunk.

Turns out I didn't need to make the strut bar removable, but it was probably easier to fabricate this way - or at least that's what I'm telling myself.

Image

Time for some serious pattern making.

Image

I thought I'd do the centre trunk panel correlations in the same style as Volvo used - so i tried to hammer form them.

Image

Image

That didn't work out very well and wasted about a day of effort. 18 ga is just too thick for that trick with my tooling. So, we went from this mess.

Image

To this...much better.

Image

Tight fit-up is critical for welding. No gaps allowed.

Image

Underside - not yet ground or planished straight. Note the lack of warping.

Image

Top side.

Image

I also made this panel - didn't take pictures of how.

Image

_________________
Coburn Performance - OCD comes naturally.


Top
 Profile  
 
 Post subject: Re: Project Canuck - 1966 Canadian Build Thread ... Finally
PostPosted: Sun Jan 22, 2017 7:11 pm 
Canadian Tire Bolt ons
User avatar

Joined: Tue Aug 06, 2013 6:14 pm
Posts: 26
Location: NW Calgary
Even those little pans look super cool. I would be psyched to make even one of those after many hours of effort.


Top
 Profile  
 
 Post subject: Re: Project Canuck - 1966 Canadian Build Thread ... Finally
PostPosted: Sun Jan 22, 2017 7:33 pm 
Haha, I just built a W24 Octo-Turbo, now what?!
User avatar

Joined: Wed Jun 14, 2006 4:19 pm
Posts: 3131
Location: Lethbridge, AB
SeatSafetySwitch wrote:
Even those little pans look super cool. I would be psyched to make even one of those after many hours of effort.


They were not that bad to do in the end. This is the best way to make these. For each corrugation, the material was gathered lengthwise by 2mm. So you'd have to stretch the centre to account for this to get it all flat in the end if built in one piece. Not easy when I don't have an English wheel - you can do it with a hammer form but the material was just too thick for a simple masonite form. If it was a steel form, I could have gotten it to move. In the end that would have been more work than it's worth. This was done with my bead roller with my wife turning the crank. I just knocked back the return on the end of the channels. Worked great.

The rest of the sheet metal is coming out very nice so far. I have to remember that this will be carpet covered! No reason not to practice and keep developing skill.

_________________
Coburn Performance - OCD comes naturally.


Top
 Profile  
 
 Post subject: Re: Project Canuck - 1966 Canadian Build Thread ... Finally
PostPosted: Thu Mar 30, 2017 9:54 am 
Haha, I just built a W24 Octo-Turbo, now what?!
User avatar

Joined: Wed Jun 14, 2006 4:19 pm
Posts: 3131
Location: Lethbridge, AB
It's been a while since I posted an update. I've been trying to get a few things done and with a few other projects to tidy up, the sheet metal sat for a few weeks. Anyway, here we are again. Progress has been made.

A few tape guidelines to get the general shape of things.

Image

Then some cardboard templates.

Image

Not really loving this design - the idea was that I'd like to have access to the shock towers to change springs, adjust shocks or whatever else you do back there.

A little more tape...it's starting to take shape.

Image

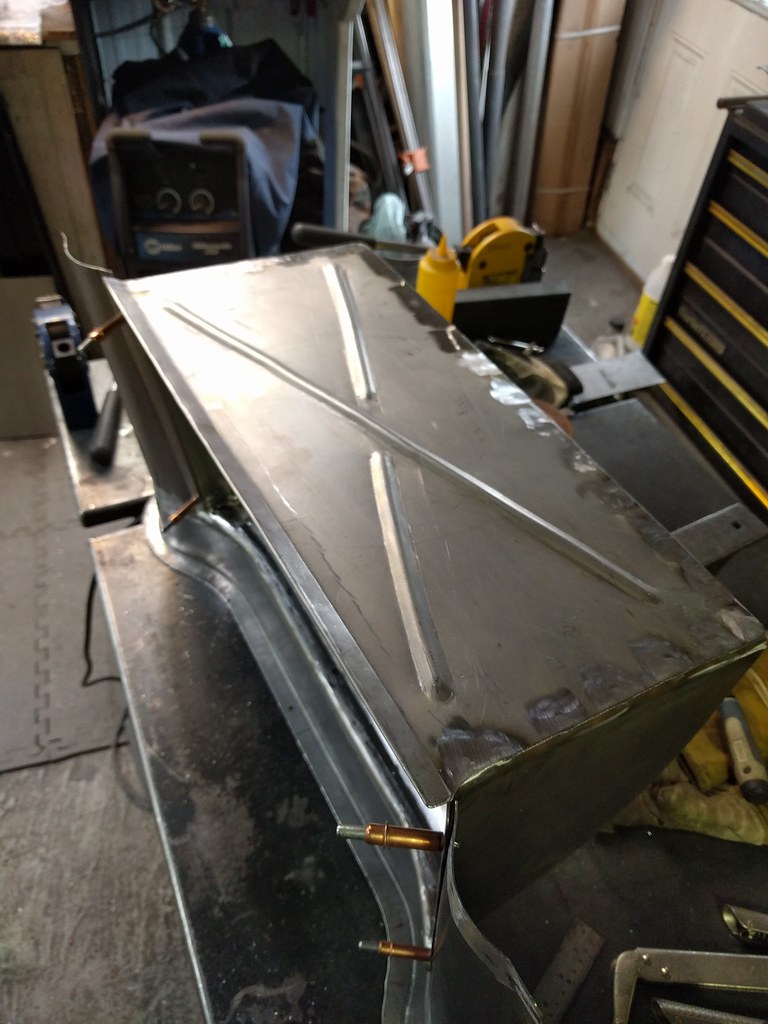
Then I built the centre section...it ended up looking a bit like a BBQ lid, but it gave the maximum area.

Put together the end plates first. Not bad for fit up.

Image

Image

Then I rolled out the middle bit. Formed on my MIG trimix tank.

Image

Then tacked it all together.

Image

Done.

Image

Then I'm going to need a closing panel at the top of the trunk (bottom of the parcel shelf.

It starts like this...a little shrink and stretch.

Image

And you have this.

Image

Image

Side parts to extend from the wheel housing to the new metal.

Image

Stuff all that back into the trunk with a few cleco's and we're testing with tape again.

Image

I didn't like the stealth fighter look of my previous design. So the angles evolved into these things.

Image

Turn a few flanges with the tipping wheel and they start to look a bit like shin pads. It's starting to come together but I'm not liking the joins...and the right hand shin pad looks a bit wonky.

Image

So I added a return flange to the top parcel shelf panel.

Image

Which ended up like so.

Image

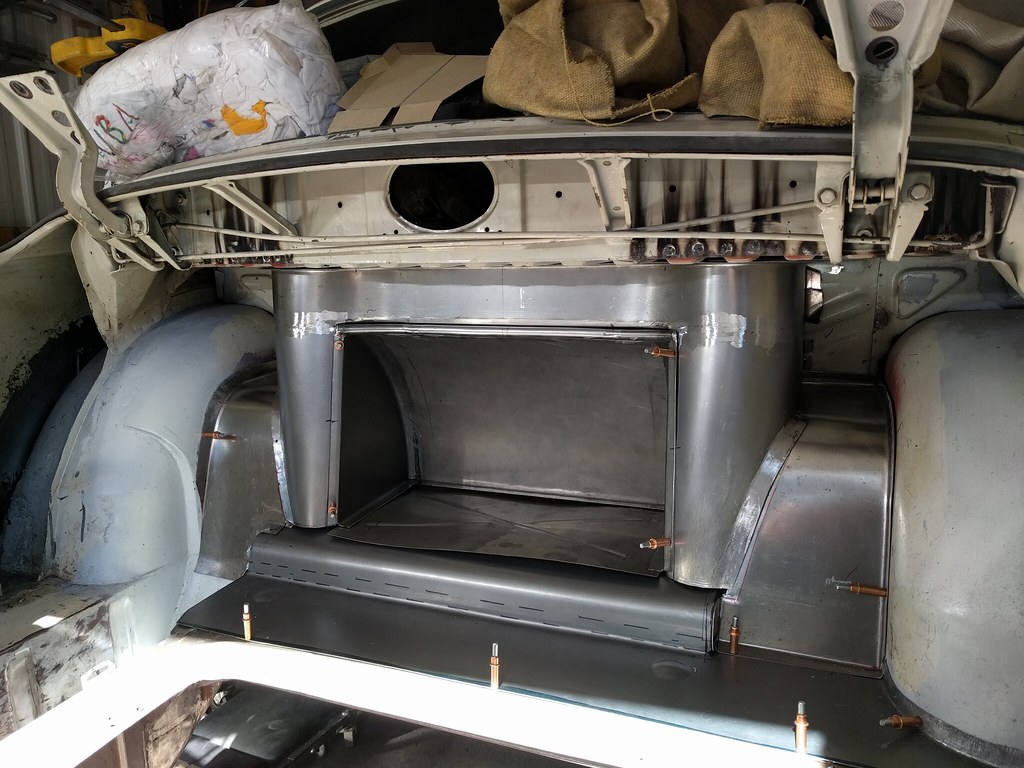
Then make a matching return on the BBQ lid, roll some steps in the shin pads (remake the right hand one to match the left) and remake the pan as it wasn't perfectly symmetrical.

Ta Da.
Image

Image

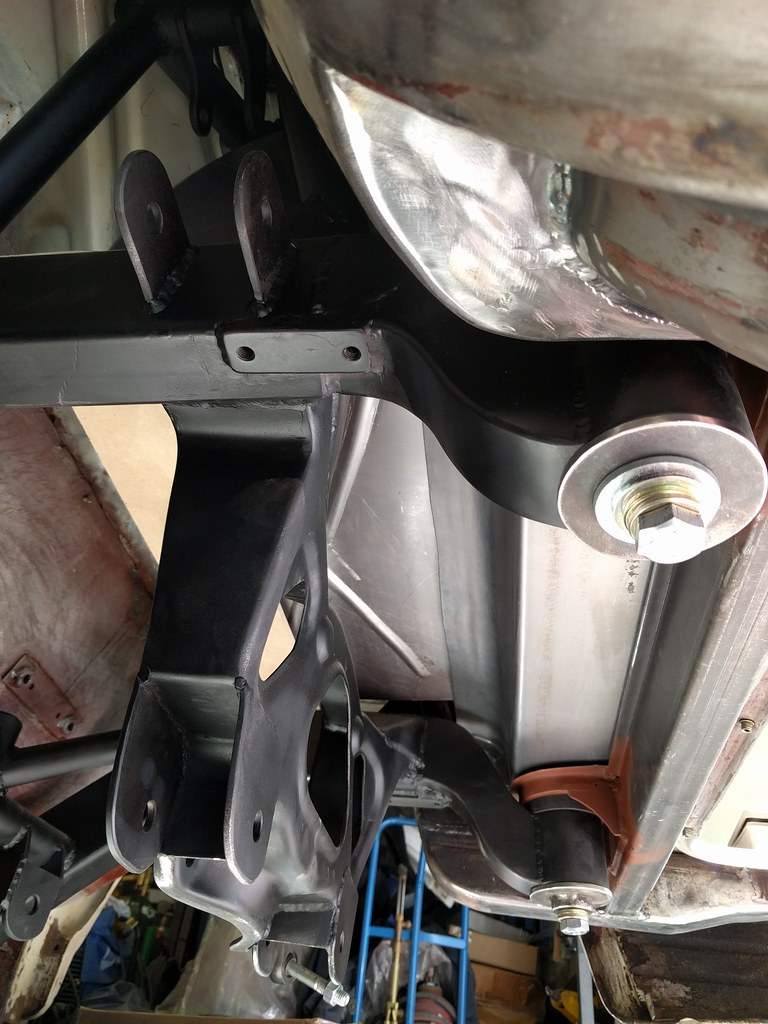
Just a few little flanges and finish work and the trunk is all done.

Clearance is good all around.
Image

_________________
Coburn Performance - OCD comes naturally.


Top
 Profile  
 
 Post subject: Re: Project Canuck - 1966 Canadian Build Thread ... Finally
PostPosted: Thu Mar 30, 2017 12:46 pm 
Haha, I just built a W24 Octo-Turbo, now what?!
User avatar

Joined: Wed Dec 21, 2005 8:40 pm
Posts: 3492
Location: Calgary, Ab
I like that BBQ lid. You could have a nice little fireplace back there, or a nativity scene at xmas, or it could even be a good place for the TV.

Just kidding. That work is amazing! The BBQ lid is a very simple, rigid solution that'll be easy to remove and install and should give you maximum access to the shocks & such. And it's anything but a flat pro-tour plate.


Top
 Profile  
 
 Post subject: Re: Project Canuck - 1966 Canadian Build Thread ... Finally
PostPosted: Sat Apr 01, 2017 8:52 am 
First volvo in outer space
User avatar

Joined: Fri Dec 14, 2007 1:46 pm
Posts: 1648
Location: East L.A.
Wow, so much work and detail to finish off that area. Like Matt said most would have sheeted (is that a word?) it over and called it a day. Amazing work. =D>

_________________
Jim

66 122S (Garage Queen)
89 244 (Hers)
90 745Ti (Mine)
89 744 (SOLD/Bought back for other daughter)
78 242GT (Project... LOL)
91 244 (Don't Ask!!)


Top
 Profile  
 
 Post subject: Re: Project Canuck - 1966 Canadian Build Thread ... Finally
PostPosted: Wed Apr 05, 2017 5:36 pm 
Somehow completely sideways in 4th

Joined: Thu Nov 10, 2011 11:43 am
Posts: 248
Location: Regina, SK
God is in the details as they say - and that level of work in the trunk is just plain cool to see!

Rabin


Top
 Profile  
 
 Post subject: Re: Project Canuck - 1966 Canadian Build Thread ... Finally
PostPosted: Mon Apr 10, 2017 9:20 am 
Haha, I just built a W24 Octo-Turbo, now what?!
User avatar

Joined: Wed Jun 14, 2006 4:19 pm
Posts: 3131
Location: Lethbridge, AB
I really didn't take a lot of pictures this weekend. Mostly doing a thousand details to finalize the sheet metal. Turning flanges, getting the fits perfect...it's all rather tedious and eats up a lot of time and doesn't look like anything has happened. Here are the highlights.

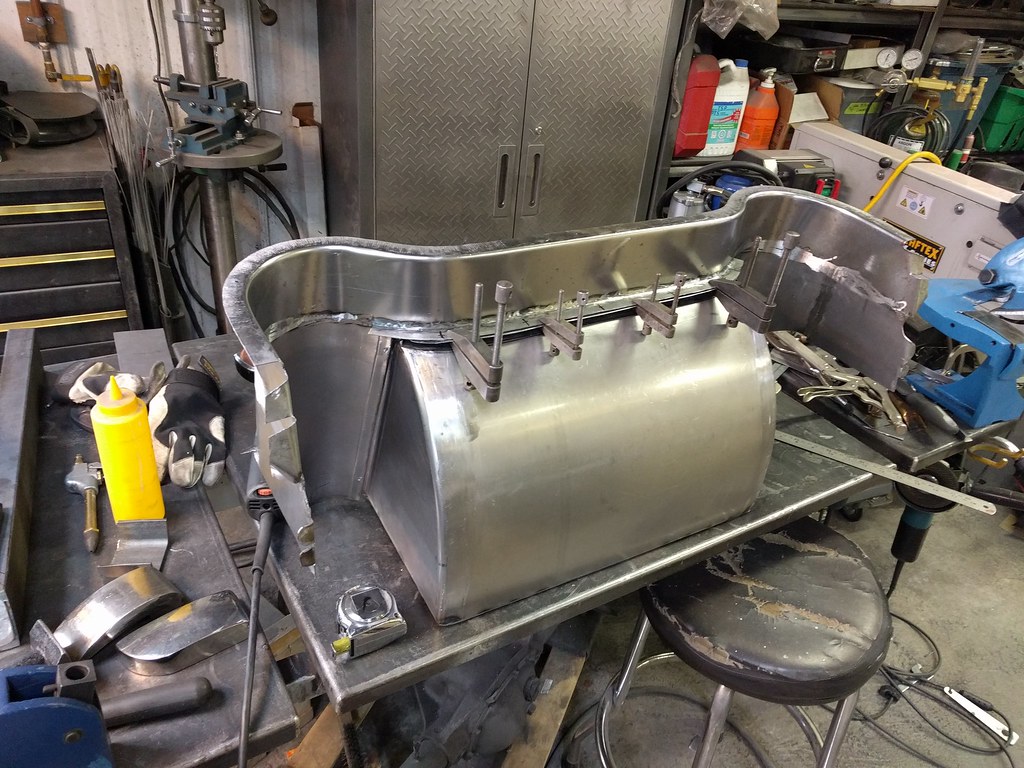
The bottom panel of the BBQ lid need to be welded in place to stop things floating around and causing havoc with the fit-up. So I turned a sheet metal return for the edge and hammered it over and then plug welded it to the lid. Then I added a little finishing angle so when it's screwed down it all comes up seamless. I really have to build a wheel instead of a crank for the bead roller...not the straightest effort on the beads. The ends were finished with a tool I made out of cheap leather punches from Princess Auto.

Image

Then I fixed the attaching points for the sides where they contact the trunk panel. It needed flanges and some material added as I cut twice and it was still too short. No pictures of that. It worked.

Next, we have to attache the BBQ lid to the upper sheet metal closing panel. So clamp it up and get some holes drilled.

Image

These were a PITA as my drill couldn't reach the flange straight so I had to use a long reach die grinder with a 1/8" bit. I needed the holes really straight to do the trick I wanted to do.

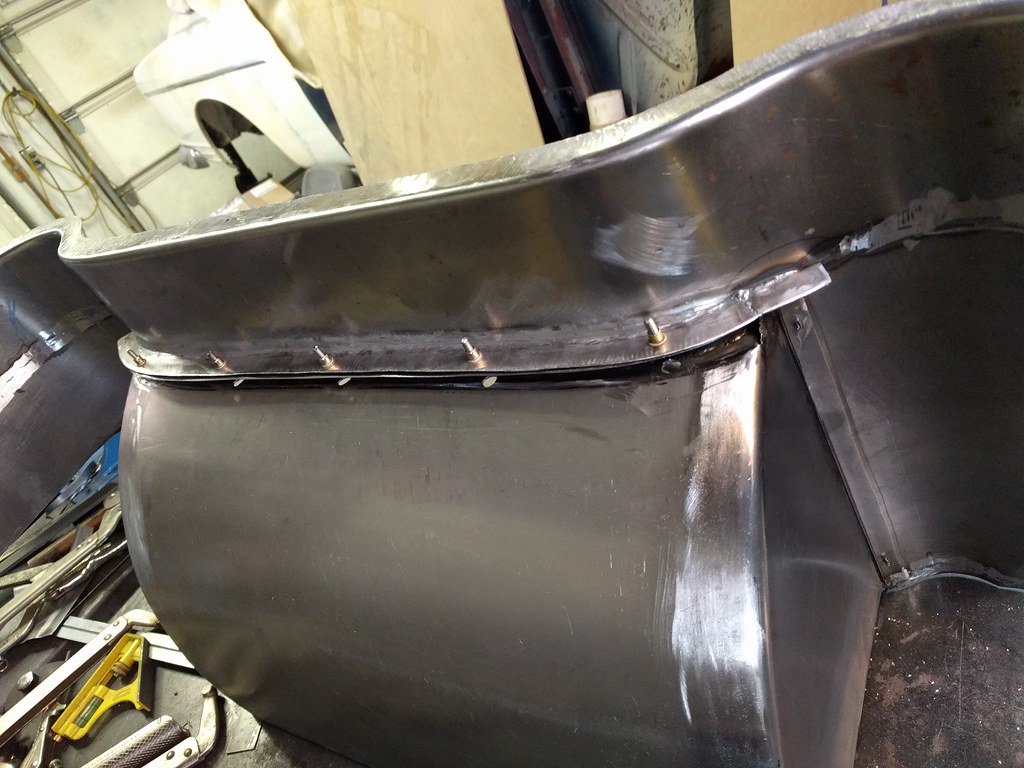
I'm using metric screws everywhere to be consistent. So I added metric M4 rivnuts (I used steel in this position as they are unlikely to see water) to pull the panel up perfectly.

Image

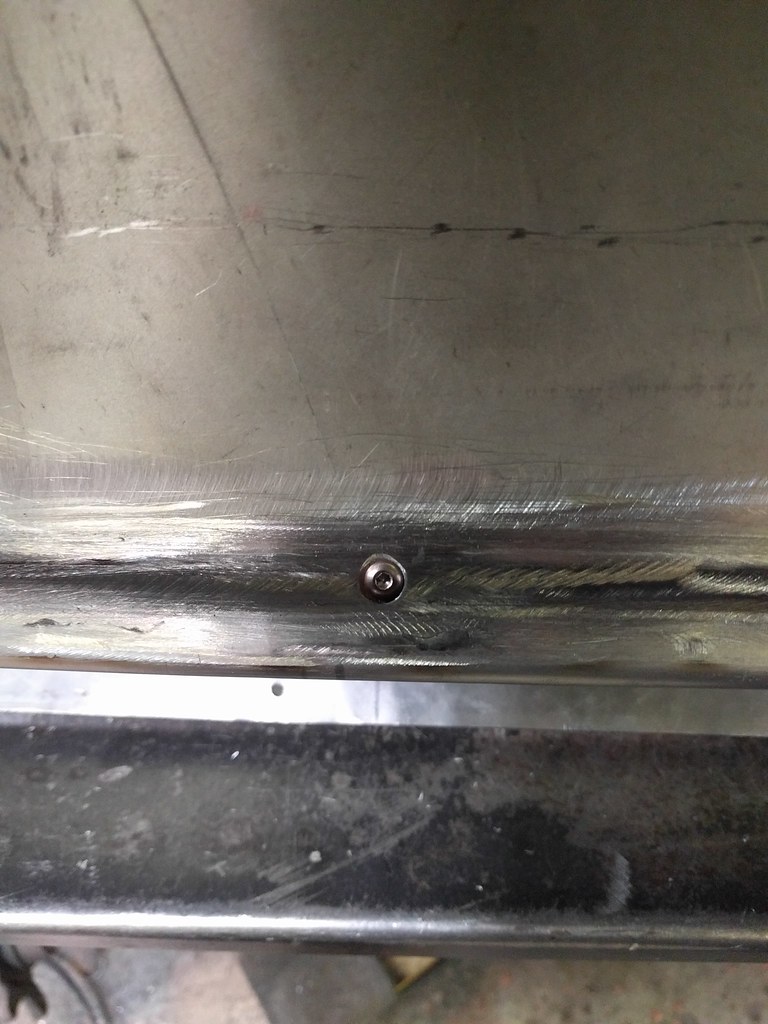
The view from inside the BBQ lid - Stainless button heads are nice.

Image

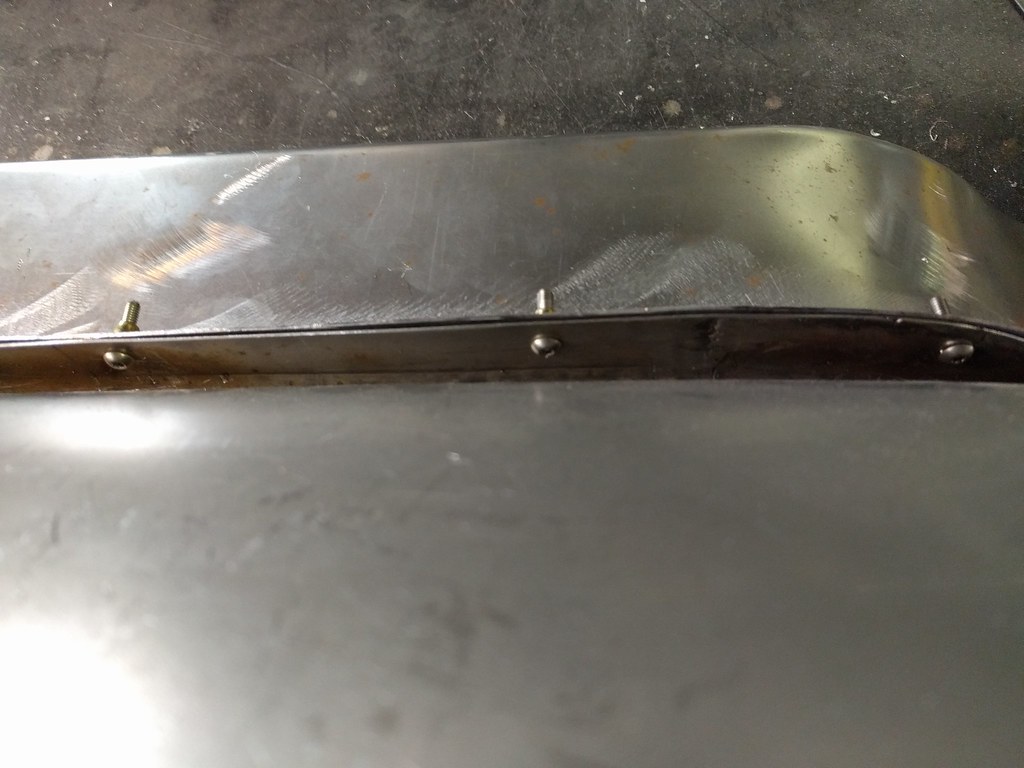
Here you can see the fasteners through the flange. I won't be closing this area in - if the screws don't come straight out, they'll just fall to the ground instead of rattling around inside a panel. So the only holes are clearance 8 mm access holes that will get finishing plugs on final assembly. These same screws will adorn the sides and bottom to attach this assembly.

Image

_________________
Coburn Performance - OCD comes naturally.


Top
 Profile  
 
 Post subject: Re: Project Canuck - 1966 Canadian Build Thread ... Finally
PostPosted: Sun Apr 23, 2017 1:43 pm 
Haha, I just built a W24 Octo-Turbo, now what?!
User avatar

Joined: Wed Jun 14, 2006 4:19 pm
Posts: 3131
Location: Lethbridge, AB
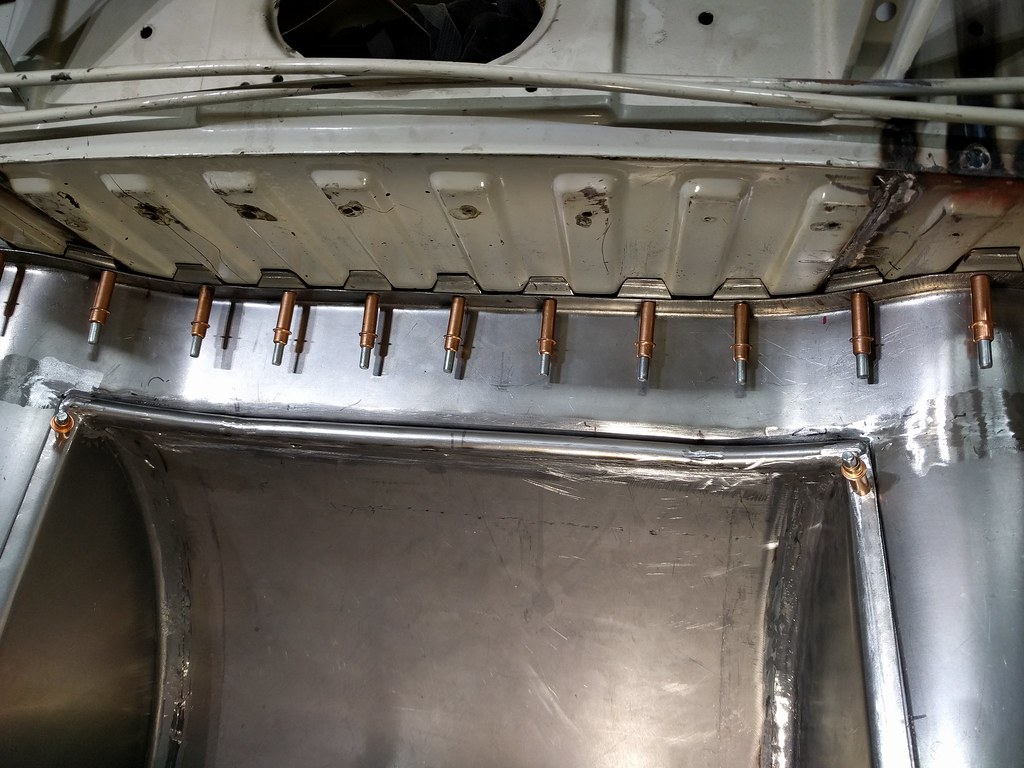
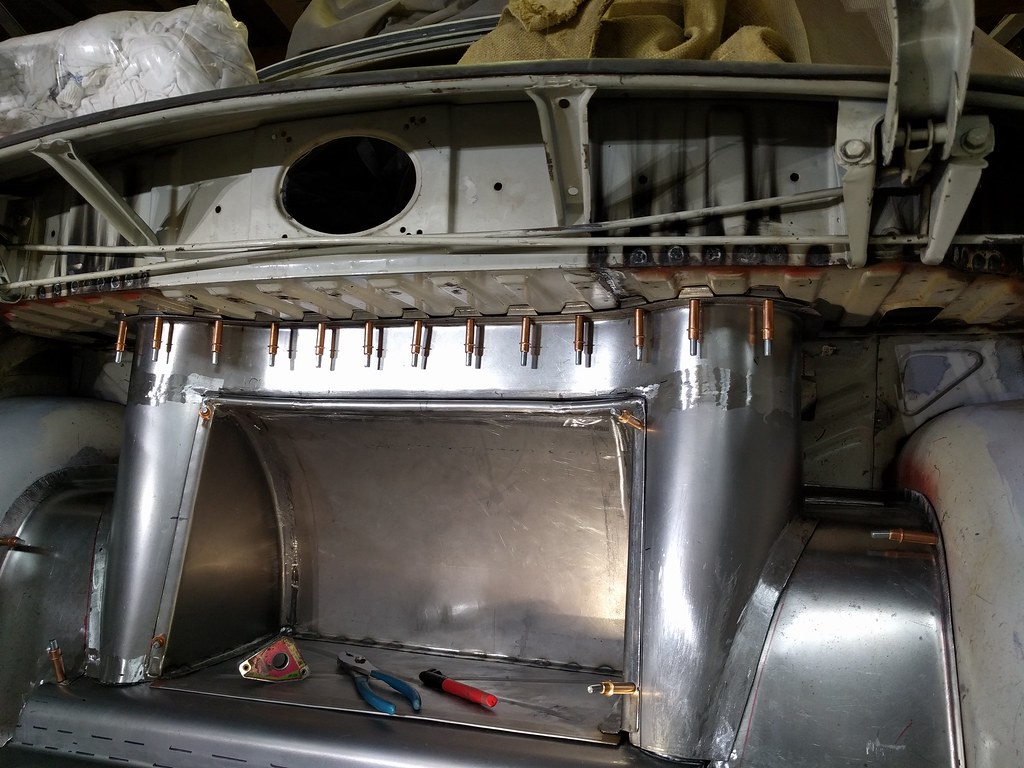
Just a little update. I needed to close the area between the upper trunk panel and the parcel shelf. The parcel shelf is corrugated. You know where this is going to go.

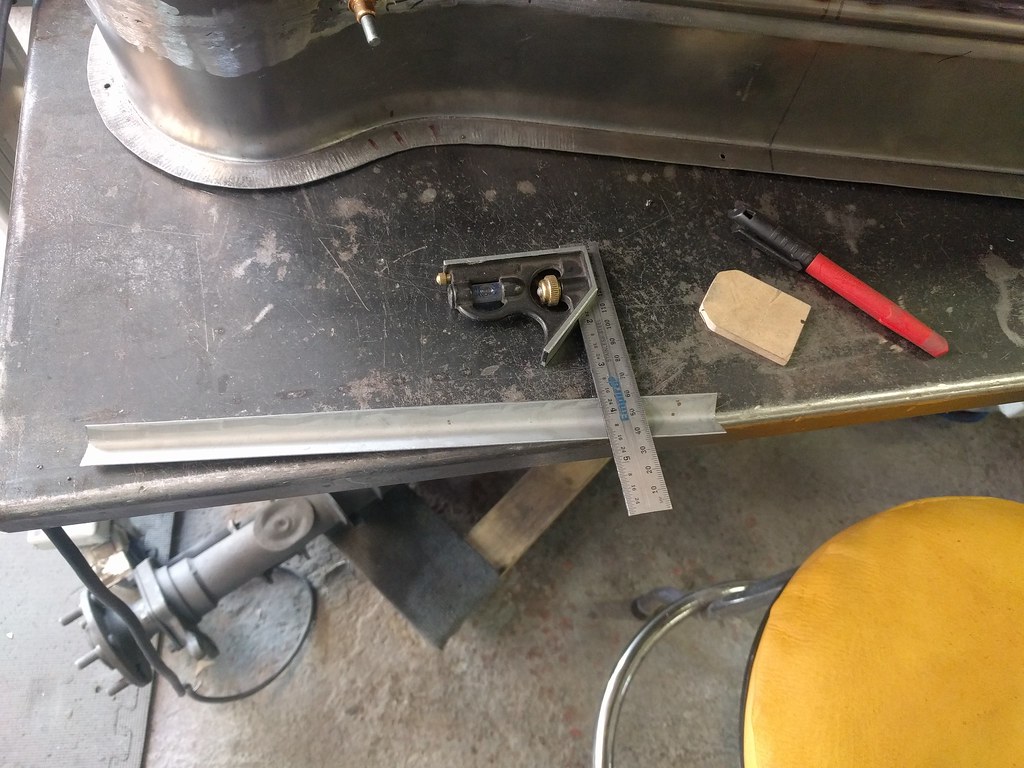
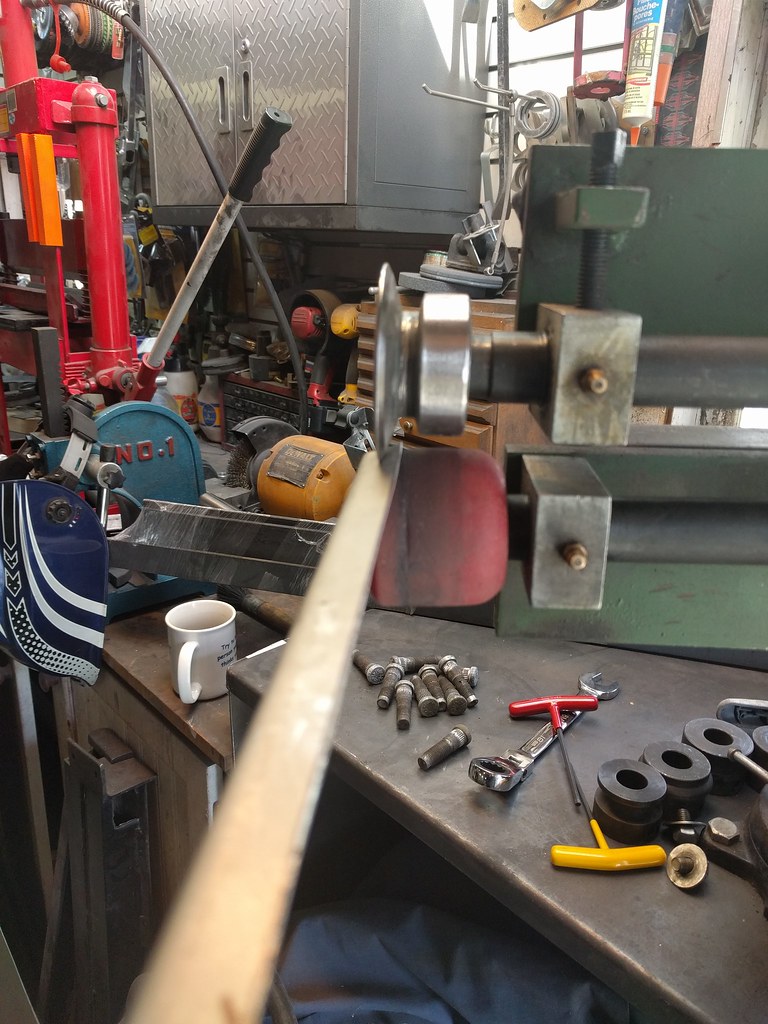
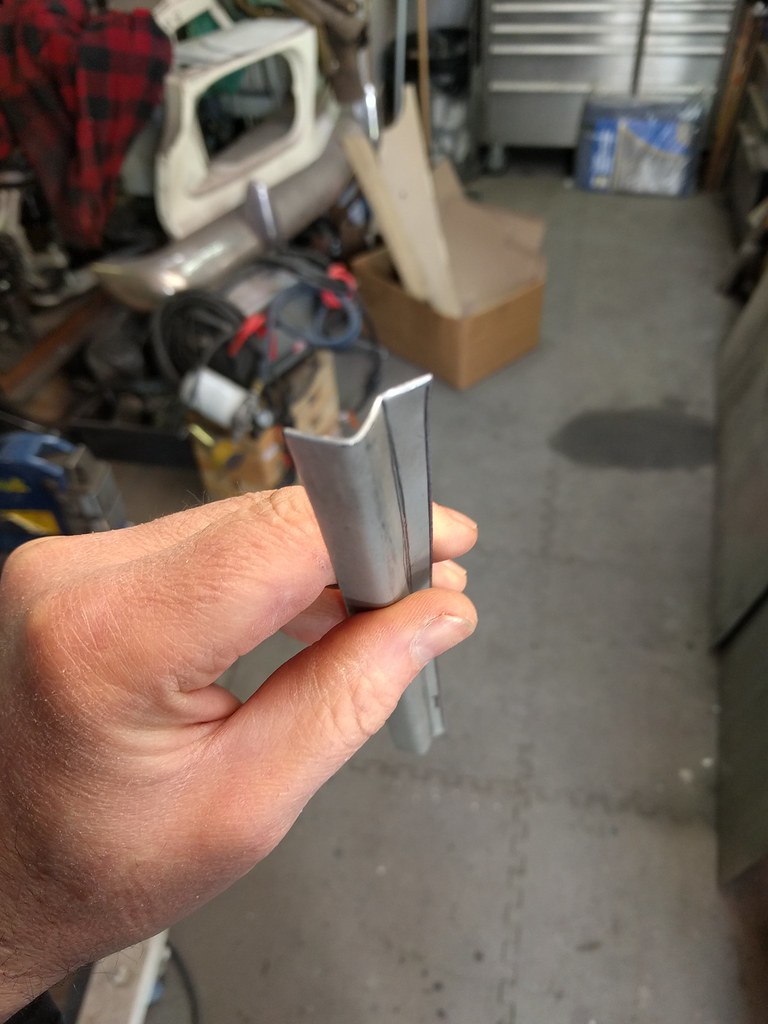
First up - put a little 90 degree bend in some sheet metal and make a little wooden template that is the shape of the corrugation.

Image

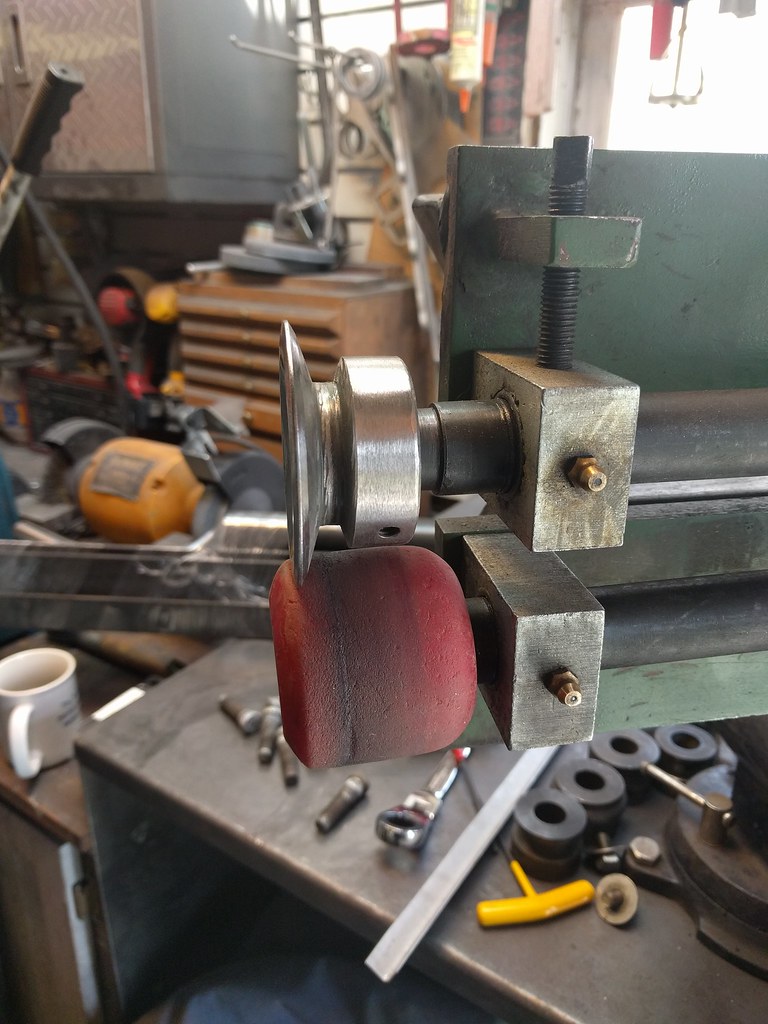
Off to the tipping wheel to bend the return. That old skateboard wheel is getting a workout.

Image

Image

That's a good start.

Image

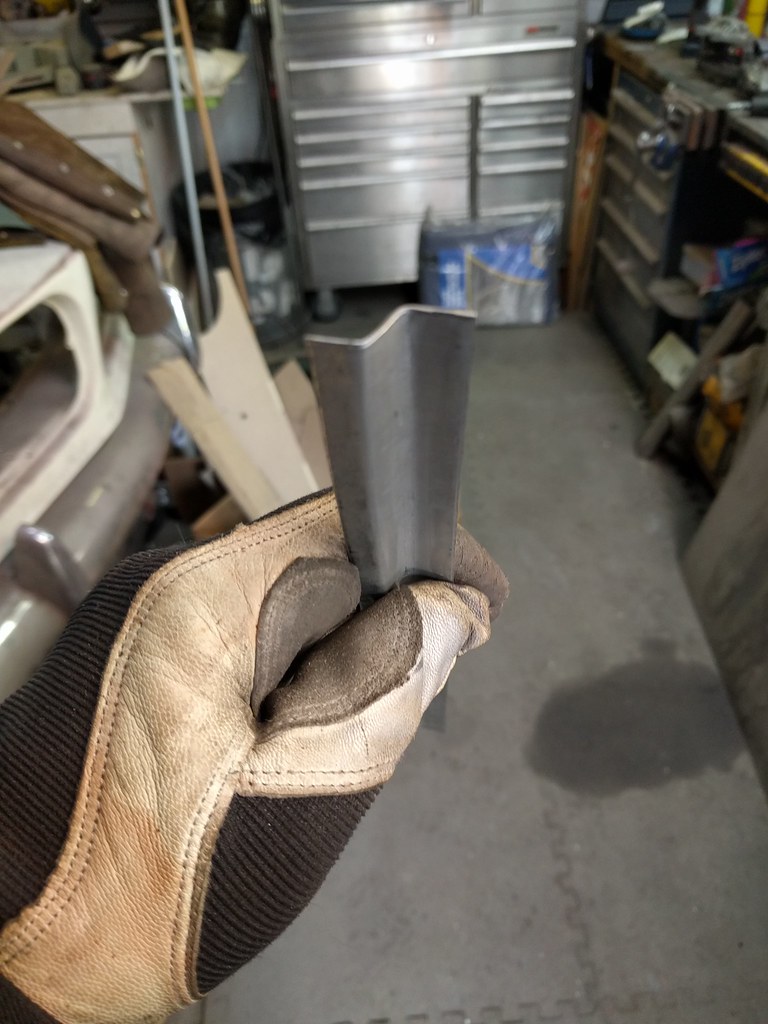
Just a bit more.

Image

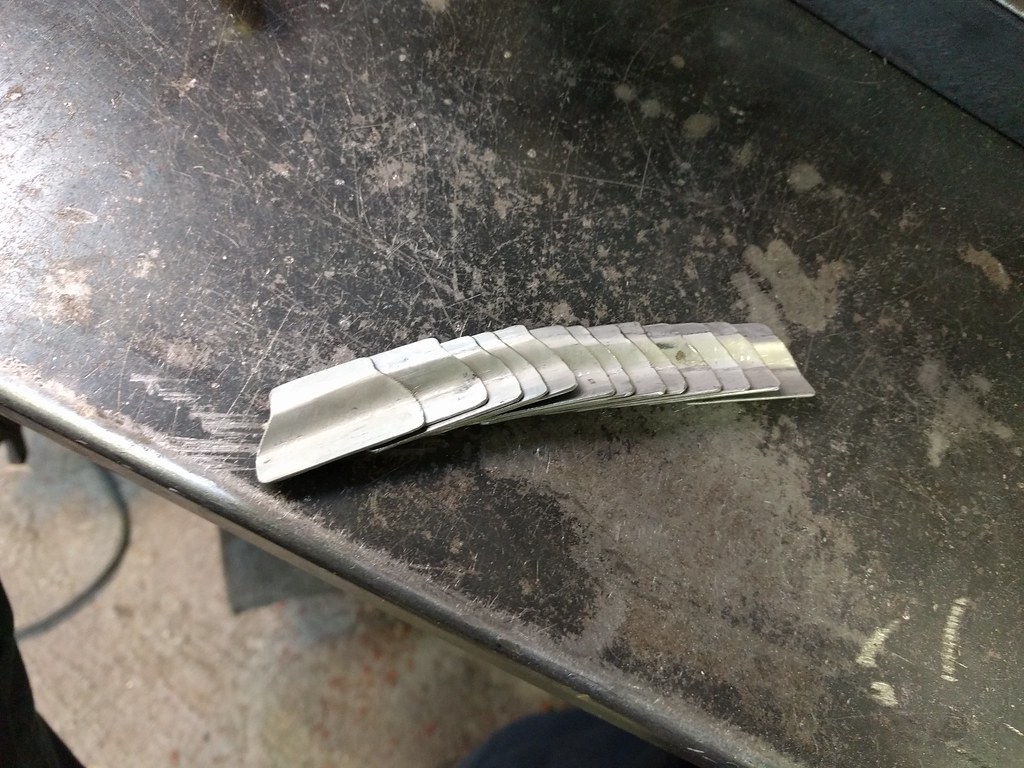
Lots of cutting and fitting. Tabs for the easy parts done.

Image

Then a few holes and almost every cleco that I have. That'll hold it while I tack them in place.

Image

Image

Another detail no one will ever notice.

_________________
Coburn Performance - OCD comes naturally.


Top
 Profile  
 
Display posts from previous:  Sort by  
Post a new topicPost a reply Page 39 of 54   [ 801 posts ]
Go to page Previous  1 ... 36, 37, 38, 39, 40, 41, 42 ... 54  Next


Who is online

Users browsing this forum: No registered users and 0 guests


You cannot post new topics in this forum
You cannot reply to topics in this forum
You cannot edit your posts in this forum
You cannot delete your posts in this forum
You cannot post attachments in this forum

Jump to:  
cron


Powered by phpBB © 2000, 2002, 2005, 2007 phpBB Group
610nm Style by Daniel St. Jules of Gamexe.net