Change font size
It is currently Thu Aug 21, 2025 12:17 pm


Post a new topicPost a reply Page 1 of 5   [ 65 posts ]
Go to page 1, 2, 3, 4, 5  Next
Author Message
 Post subject: Mjöllnir Build Thread (1959 PV)
PostPosted: Mon Mar 02, 2009 9:32 pm 
Whost Pore

Joined: Sun Feb 11, 2007 7:26 pm
Posts: 558
Location: E-Town
*Mostly just putting this together here until it's up to part and can be reposted elsewhere*

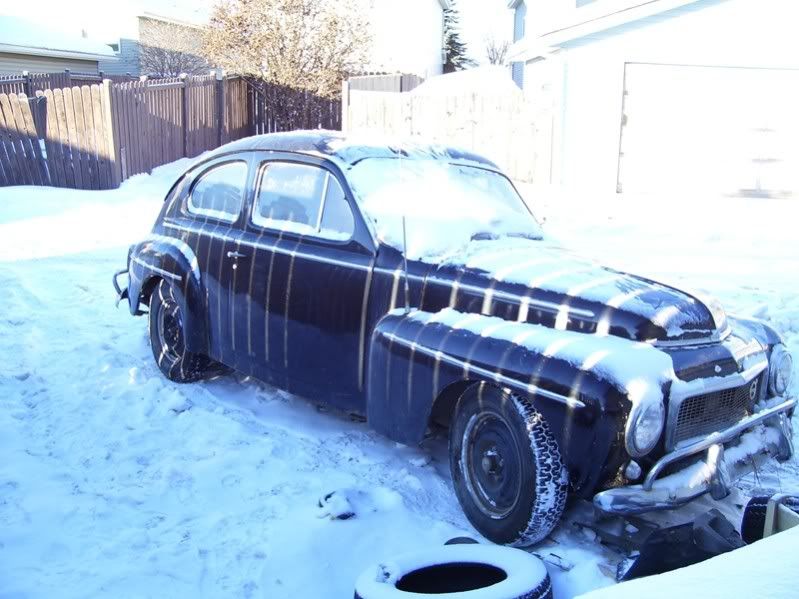
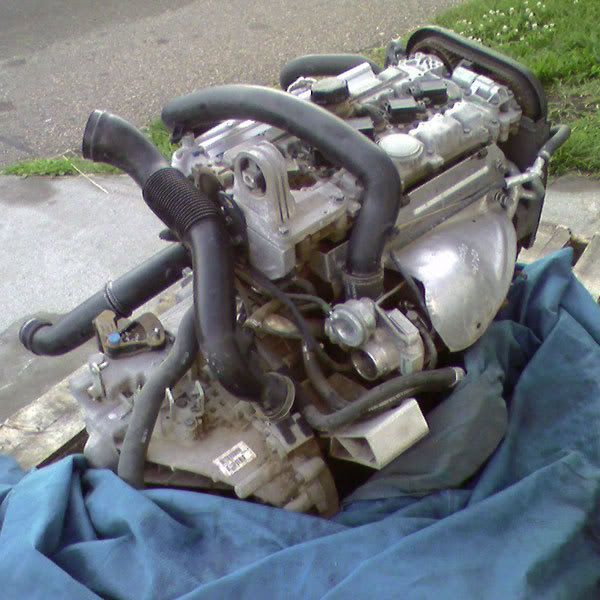
Fall 2007, A local import wrecking yard is closing down, so i'm offered a 1959 volvo PV and a s60 HPT engine for the dastardly sum of 1600$

Image

and

Image

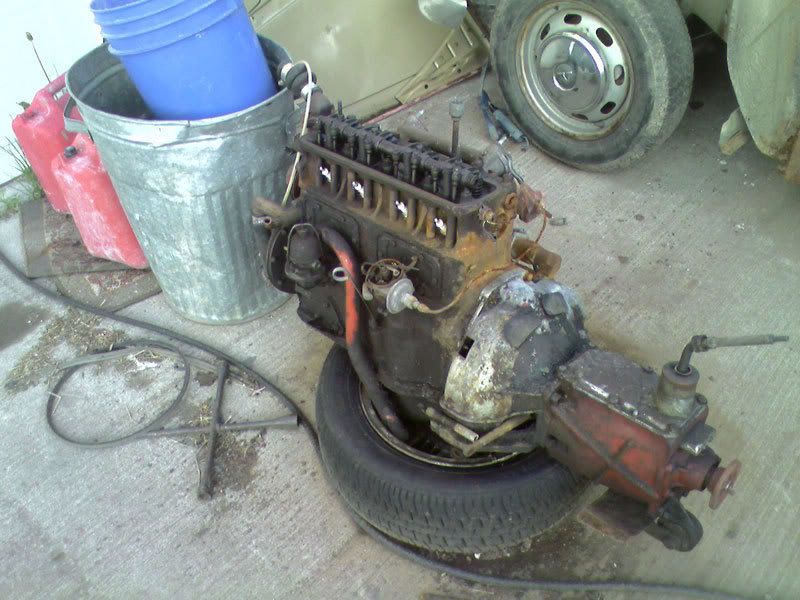
So, in my fullhearted and hapazard fashion, I yank out the seemingly nice b16 and send it to the scrapyard...

Image

Somehow i find a 10v whiteblock lurking in the corner of the garage, hell, let's throw that one in there just to see how it fits roughly....

ImageImageImage


Hmm... not bad!

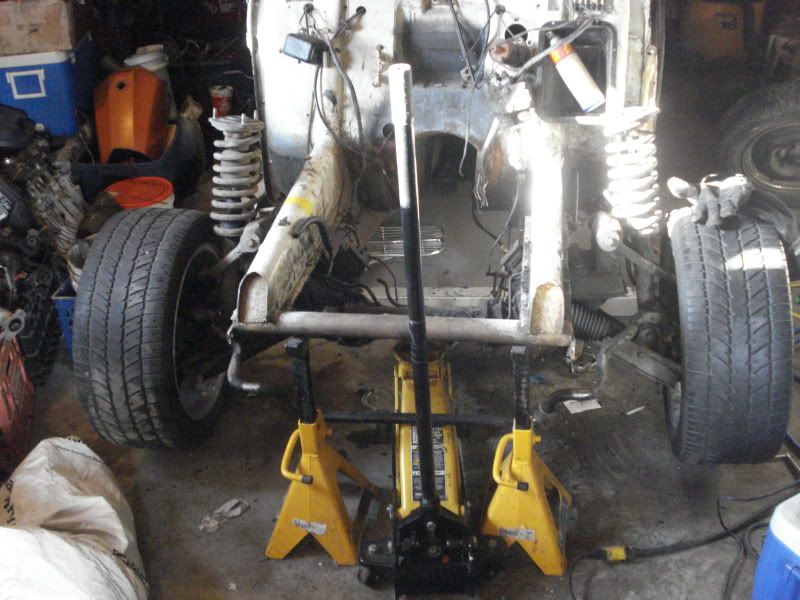
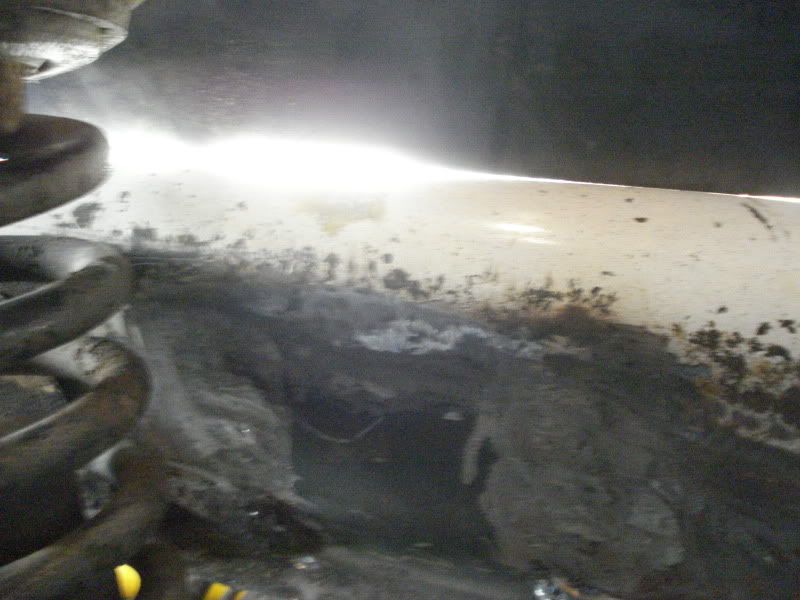
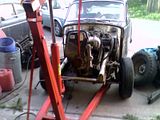
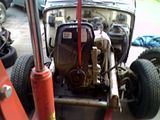
about half a year passes, and i tear off the front clip, very rusty, and hide it in the yard to hopefully be fiberglassed later and help fab a new one with... put the car up on stands in the garage and see just how rusty she is...

Image
Image
Image

So, looks like i need most of the fender mounting points, rocker panels, the frame rail extension under the floor boards, floor boards, and parts of the trunk. Okay, that could not be much worse, but this will get worked out somehow....

Let it sit for close to another year, and in the summer/fall of 2008 I see a post on a PV for parts/fixup on CVC, and also get a good deal on a v70 wagon parts car... i've still got to yank the engine of the parts PV and return it to calgary though!!!!

Image
Image
Image

In the winter, a friend of mine picks up a 960 parts car, so huzzah makes it come more into reality, pick up the motor mounts, tranny, some wiring bits, oil pan, and motor mounts.

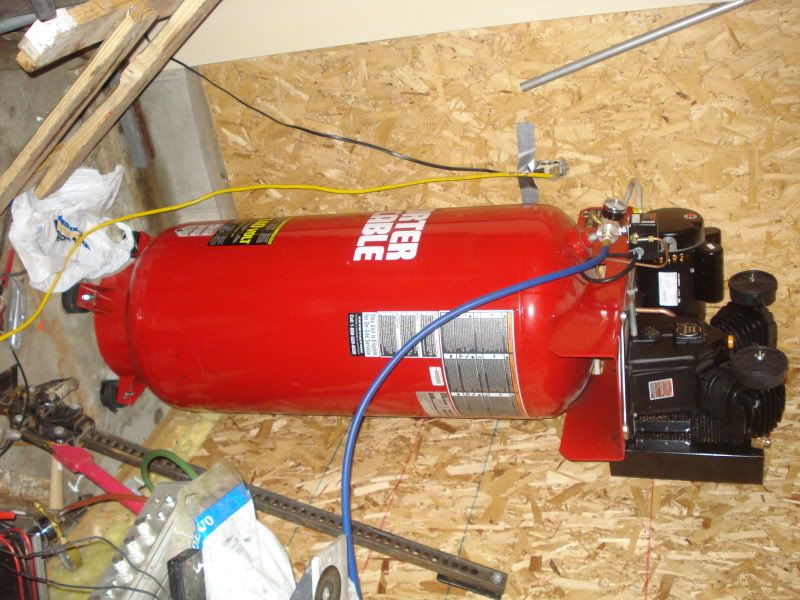
Throw this together in the cold and end up with in January/February

Image
Image
Image
Image

So, a motor, set up for RWD... now, this needs to be mounted!

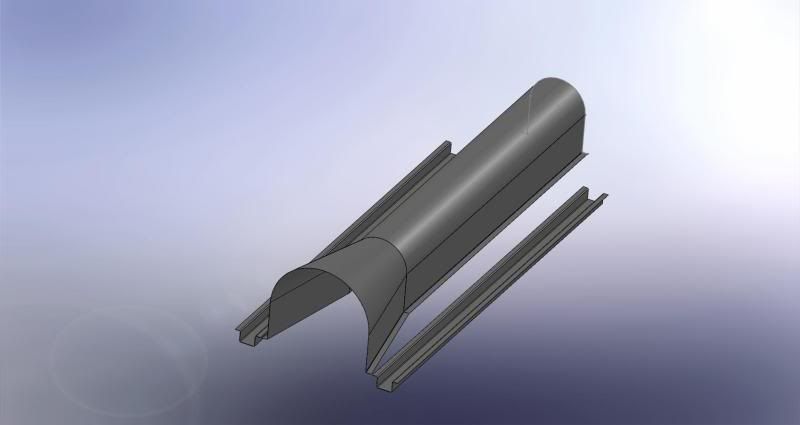
Fast forward to monday march 2, 2008, I spend a costly sum of 130$ on some sched 80 black steel pipe 1/4" wall, 1.25" I.D, and 20 pounds of 3/16" plate, and some energy suspension p/n 9.9107 poly bushings (10$/pair)...

The plan here is to make some super beefy motor mounts out of this pipe, although silly me forgot that it's inside welded, and that means i'll have to file out the weld on the inside of the ~~ 2" bearing surface. Nonetheless, it'll be bulletproof, and probably get replaced with something lighter later in life... but it will do.

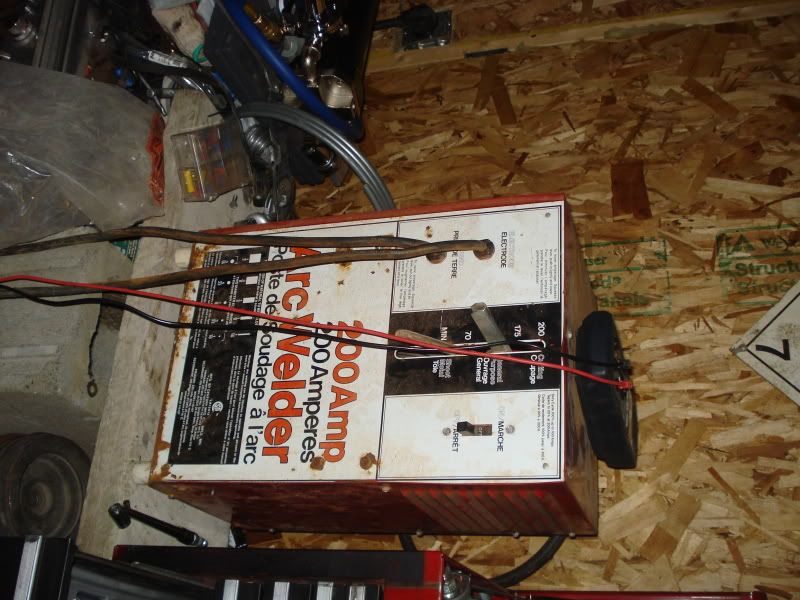
Now, i just need more acetelyne, and to rent a c02 bottle for the welder and build a cart. Not a huge deal.

The ultimate plan for the PV:

run the HPT t5, probably with MS.

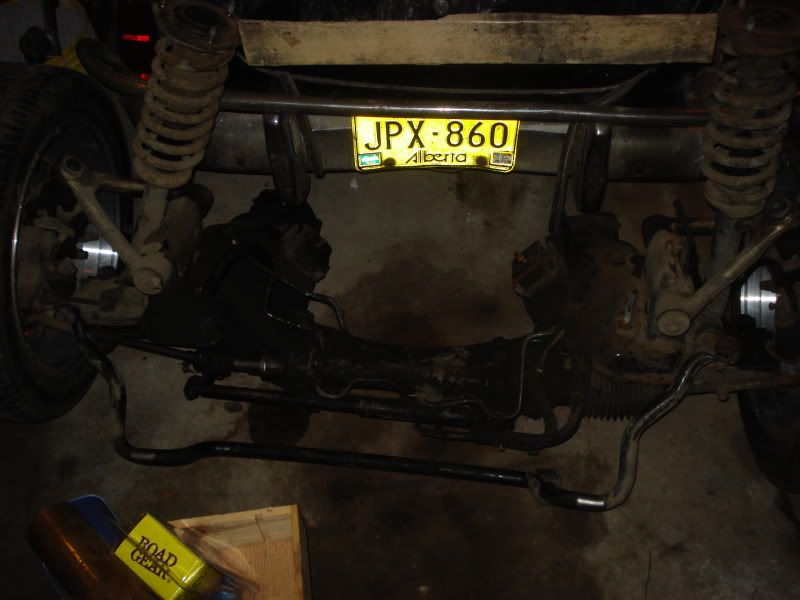
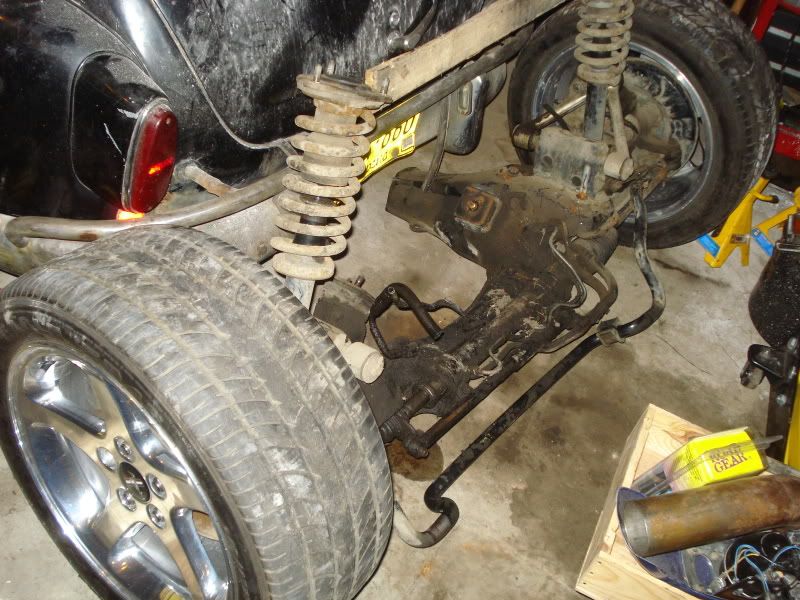
Run on toyota supra suspension in the front and 5 series bmw (the 88-90something series with the 3-point subframe and LSD) in the back. re-fab the front clip to widen the fenders the 6" that will be needed to cover up the widened track. and in the rear, make some fenders similar to those of brazuca racing, in that they are simple and wide. Since it'll be getting a bit of a custom floorpan/tranny tunnel, the seats will be mounted almost 6" back from stock, and it will definitely be a 2-seater. No plans for the interior yet.

Tenative schedule:

-have the motor mounted before i leave for fort mac again on may 1
-have the sheet metal patches ordered/in by the end of august
-have the body work roughed back together by december when my next work term starts.
-- depending on the next work term, which i'm hoping is 2 weeks on 2 weeks off to the diamond mines, I will be able to make some serious amount of progress in this time.

-try to have the driveline/suspension acquired and mocked up by the time i graduate in 2011, and with any luck, be able to take it for a drive.


Top
 Profile  
 
 Post subject: Re: Mjöllnir Build Thread (1959 PV)
PostPosted: Tue Oct 27, 2009 9:29 pm 
Whost Pore

Joined: Sun Feb 11, 2007 7:26 pm
Posts: 558
Location: E-Town
Plans took a little side-step.

Frame rails are being bent up sometime within the next few weeks (14ga channels that run from the front spars through to the back suspension mounting points.


Picked up a few goodies lately,

Image
Image
Image
Image
Image

EDIT:

found some nasty rust in the drivers side frame spar behind where the suspension mounts, tore open the rail/spar there and have now fixed the bottom piece. still working on the support bracket and then the side. So the PA mig works quite darn well on this stuff, on the 3'rd/4 heat setting and wire speed of about 2/10 on the scale, it lays a decently flat bead (when i remember to turn the gas on) and little distortion with decent penetration. The stock 1.3 or so mm(17-18ga sheet?) seems a tad thin for this application, but we'll see how it all comes together. have to do a drawing for the sheet metal guys again to get my rails bent up. but 14ga channel with 3/4" ears had ought to do it.

EDIT 2:

Got the rail patched today, getting a little bit more comfortable with this whole welding thing, getting great penetration and HAZ but on the vertical welds my bead is a bit high, just makes for more grinding.


Top
 Profile  
 
 Post subject: Re: Mjöllnir Build Thread (1959 PV)
PostPosted: Sat Oct 31, 2009 8:32 pm 
Whost Pore

Joined: Sun Feb 11, 2007 7:26 pm
Posts: 558
Location: E-Town
cleaned up my patch, knocked off the bracket for the master cylinder, and jacked the supra suspension underneath, looks like it will work SMASHINGLY well stance wise, fitment wise and strength wise! May need to make a little bit shorter (2" or so) strut assembly to clear the wings with good margin, but otherwise not much is needed. . The steering rack though is pointing straight through the frame rail, so i'm thinking of cutting a hole on each side and running a piece of thinwall tube through it and then welding it in, and then having a u-joint on top. Anyone know where I can find info on maximum allowable deflection in steering u-joints and the like? are there any other solutions?

Off to a halloween Keg party though, Ciao!


Top
 Profile  
 
 Post subject: Re: Mjöllnir Build Thread (1959 PV)
PostPosted: Sun Nov 01, 2009 12:25 pm 
Whost Pore

Joined: Sun Feb 11, 2007 7:26 pm
Posts: 558
Location: E-Town
Image
Image
Image

busted up my knee pretty good, but i'm still able to hobble around and work a little bit.

the distance between the centrelines of the mounting points in the supra is 180mm wheras the PV is 177, not bad at all. gotta get my crane back and trim out the the flanges to fit in the pipe, hoist the suspension up, line it all up, tack, check my fitment again, and then box it all in.

For the mounting I will be using 1.25" x 0.25" wall DOM welded to the 18ga sheet, it'll have a nylon bushing inside to centre the bolt, and then be boxed around with 18ga sheet again. the steering rack kind of points through the middle of the frame rail, so i'm trying to figure out if i'm best off notching the rail, or if it might be better to trim a hole in each end, insert a piece of tubing and make a through- for it with a u-joint on the top pointing to where I want it to go.

EDIT:

Picked up a cheap PA air shear, set up the el cheapo "tool shop" brake too, gonna have to brace up the brake a bit, but otherwise, it's good. no clue how I lived without an air-shear before though! wow!

gonna hopefully have the rails this week sometime, and am working on the drawing of the new tranny tunnel.


Top
 Profile  
 
 Post subject: Re: Mjöllnir Build Thread (1959 PV)
PostPosted: Mon Nov 02, 2009 8:54 pm 
Whost Pore

Joined: Sun Feb 11, 2007 7:26 pm
Posts: 558
Location: E-Town
Image

turns out it's 200$ for the setup/labour and only about 40$ for the 2 4x8 sheets i need, so basically my run of parts is held off until i design the rest of the stuff needed and run it all off at once. so, here I go designing all the pieces I can think i'll need. Also gonna run off a new part of the rear rails for the 220 where it's rusted near the bumper mounts since i can sneak it in.


Top
 Profile  
 
 Post subject: Re: Mjöllnir Build Thread (1959 PV)
PostPosted: Thu Nov 05, 2009 3:48 pm 
Whost Pore

Joined: Sun Feb 11, 2007 7:26 pm
Posts: 558
Location: E-Town
ordered up some bits from olof too today, into the car for about 3k now... it's sure adding up quick!


Top
 Profile  
 
 Post subject: Re: Mjöllnir Build Thread (1959 PV)
PostPosted: Thu Nov 05, 2009 5:48 pm 
Haha, I just built a W24 Octo-Turbo, now what?!
User avatar

Joined: Wed Jun 14, 2006 4:19 pm
Posts: 3131
Location: Lethbridge, AB
Looking good Eric. Sorry to hear about your knee. The PA air shear is great (I've got an electric and a air one - I use the air one more). Go get an air hammer if you really want to have fun. I still have to make a planishing head for mine.

So it will be $240 for the tunnel pieces? That's not bad considering the work. Glad to hear the Supra front is going to work. That's going to be so cool.

_________________
Coburn Performance - OCD comes naturally.


Top
 Profile  
 
 Post subject: Re: Mjöllnir Build Thread (1959 PV)
PostPosted: Thu Nov 05, 2009 6:58 pm 
Whost Pore

Joined: Sun Feb 11, 2007 7:26 pm
Posts: 558
Location: E-Town
just got back from the garage chopping up the old xmember (don't hurt me) to use as a jig to line everything up,

yeah, 240$ + 16$ in sheet for the two 14ga frame rails, tranny tunnel and driveshaft tunnel, really quite a decent price, that and the ~~500 i've dropped on bits from VIP today.

just gotta figure out if i can use this nylon bushing, or will have to get something custom made up... i'm starting to re-think using the 1/4" wall on the suspension mounts and leaning more towards a boxed-in- tube now, we'll see what i decide on tomorrow. I'm hoping to have this mounted by the time fall break is over, which is next thursday morning.

put together that cheapo-brake and man is life ever easy now, had to brace it up a bit to get it to clamp better, but no problems so far. The welding is slowly getting better, i'm gonna be attacking a lot of scrap tonight/tomorrow to really dial in the welder with this 18ga stuff. I've been having a little bit of trouble getting a consistent wire feed speed out of the thing, so i've been playing with the tensioner quite a bit. I'm not sure if it's the temperature fluctuations or what, but it's getting a tad annoying.

EDIT

HUZZAH! Pulled apart the buzzbox, lubed up everything real good (drive motor gears) and it works like a charm! better than ever! almost finished up the brake reinforcements, pulled the windshield.


Top
 Profile  
 
 Post subject: Re: Mjöllnir Build Thread (1959 PV)
PostPosted: Fri Nov 06, 2009 6:37 pm 
Whost Pore

Joined: Sun Feb 11, 2007 7:26 pm
Posts: 558
Location: E-Town
finished the brake, then subsequently broke the aluminum casting on the clamp... grr. then used some c-clamps again, lo and behold it works rather well!

also picked up one of tohse 25$ 8" Digital calipers with the 0.01mm accuracy, measured out the supra suspension and through averaging 4 measurements (inside-inside, outside-outside) of the bolt holes, it turns out the spacing between them is 178mm exactly. compare this to the volvo spec of 177 +/- 0.15 and it's so darn close... so i broke up some C type channel (4 pieces), that gets mounted to the frame rail, then inside this goes the 0.049" wall tube to fit the 5/8" bolts then there are 3 braces between these two C type channels inbetween them and then 3 gussets per U channel facing to the front and rear of the car, after this there is a sheet metal piece that is bent to go over the whole shebang, gonna draw it up in a few mins.


Top
 Profile  
 
 Post subject: Re: Mjöllnir Build Thread (1959 PV)
PostPosted: Fri Nov 06, 2009 7:47 pm 
Site Admin
User avatar

Joined: Wed Dec 21, 2005 4:01 pm
Posts: 2005
Location: Always in front of a computer or behind a wheel
moar pix. =P~


Top
 Profile  
 
 Post subject: Re: Mjöllnir Build Thread (1959 PV)
PostPosted: Fri Nov 06, 2009 8:55 pm 
Haha, I just built a W24 Octo-Turbo, now what?!
User avatar

Joined: Wed Jun 14, 2006 4:19 pm
Posts: 3131
Location: Lethbridge, AB
rockmonton wrote:
Got the rail patched today, getting a little bit more comfortable with this whole welding thing, getting great penetration and HAZ but on the vertical welds my bead is a bit high, just makes for more grinding.


The technique for going up-hill is different than welding in other positions. You have weave and go up and over in a reverse zig-zag. You can get the beads to lay flat with some practice. Looking great by the way.

_________________
Coburn Performance - OCD comes naturally.


Top
 Profile  
 
 Post subject: Re: Mjöllnir Build Thread (1959 PV)
PostPosted: Fri Nov 06, 2009 9:10 pm 
Whost Pore

Joined: Sun Feb 11, 2007 7:26 pm
Posts: 558
Location: E-Town
Image

design for the suspension mounts, excluding the flanges on all the gusset/brace pieces should work out quite well actually

more pics to come tomorrow

EDIT: 10:20

finished welding up the bushing surface of the motor mounts :D

now if i get my hoist back i can also put the motor in asap.


Top
 Profile  
 
 Post subject: Re: Mjöllnir Build Thread (1959 PV)
PostPosted: Sat Nov 07, 2009 9:42 pm 
Whost Pore

Joined: Sun Feb 11, 2007 7:26 pm
Posts: 558
Location: E-Town
finished cleaning up the welds on the motor mounts, a fair bit thick, but good penetration and solid, still not exactly where I want them to be, but they'll do for now. Also cut out part of the front rails and jacked the suspension into position, positioned the first two U-channels with the tubes in them, tacked the tubes to the U, and marked the U to the rail, pulled suspension back down, gonna clean up behind the U channels a bit and get it all welded together tomorrow morning then position the other two together as well. I'm just hoping I can keep everything aligned :S this whole front suspension thing is pretty tricky and the alignment is crucial! i really would like to know what sorta tolerances are needed, the way it's looking i should be within 1mm passenger-drivers side and have it aligned rotation-about-the-motor wise very well (within ~~0.3mm from the centreline of each frame rail)

bro stole the camera, so pics to come tomorrow i guess.

realistically, i could have the suspension mounted tomorrow solid enough to rest the car down on-slammed to the ground. Then there is sorting out the steering-column-through-the-frame-rail issue. still open to suggestions or else i'm gonna have 3 U joints on it with about 15 degrees each and two shaft supports until i find something better


EDIT: 11:53

Got the first two bolting mounts tacked on and partially welded. only 2 more big ones and 4 little ones to do now :D I should be able to put it on the ground slammed riding on bushing deflection tomorrow afternoon sometime!


Top
 Profile  
 
 Post subject: Re: Mjöllnir Build Thread (1959 PV)
PostPosted: Sun Nov 08, 2009 2:33 pm 
Whost Pore

Joined: Sun Feb 11, 2007 7:26 pm
Posts: 558
Location: E-Town
finished welding first mounts, then took 20 measurements on each side to the indent on the frame rail that marks the centreline of each wheel,

the total of that is a difference of 0.05mm in 1710mm, max was 0.7mm and min was 0.02mm so they're not perfect, but considering the bolt has around 0.1mm of play on each side i'm going to say it'll be fine,

for reference the 0.05mm works out to a misalignment of about 0.003º

EDIT:

all 4 main supports are tacked/welded in, the vertical bead is a bit droopy/ugly but it's stuck pretty good, got up and jumped on it hard enogh to nearly knock it off the jackstands with just two bolts in there (i'm 330lbs). but alas, i ran out of wire :@

Tomorrow is school, but tuesday i should be able to finish it and get it rolling on the ground. Started bending up the bracing/cover plate. i'm wondering how i should treat the inside of it.... any ideas tempted to dry it out really good and PU foam it or something.


Top
 Profile  
 
 Post subject: Re: Mjöllnir Build Thread (1959 PV)
PostPosted: Sun Nov 08, 2009 11:04 pm 
Whost Pore

Joined: Sun Feb 11, 2007 7:26 pm
Posts: 558
Location: E-Town
hmm... it would seem as though some high density PU closed cell foam may be one of the big tickets after i get things buttoned up a little bit :D

8 LB Density Urethane Foam

Common Applications: This 8LB density foam is extremely hard and rigid, like that of a soft wood. Your fingernail can penetrate its skin, however it cannot be dented by hand. Uses include casting, carving, sculpting, sign making as well as areas where an extremely durable and rigid foam is needed for support. More questions? [Try our Foam FAQ.]

Cat No. Kit Size(net weight) Approx. Coverage Price
FOAM-0804 4 LB Kit 1/2 Cubic Foot $20.50
FOAM-0816 16 LB Kit 2 Cubic Feet $62.00
FOAM-0880 80 LB Kit 10 Cubic Feet $244.00
5 or more kits of the FOAM-0880 $232.00 / Kit
Product Information:
Free Rise Density: 8.0 lbs cubic ft.
Expansion Rate: Approx. 8x Liquid Volume
Buoyancy (flotation): 54 LBs per Cubic Ft.
*Physical Properties:
Parallel Compressive Strength: 250 psi
Tensile Strength: 225 psi
Shear Strength: 130 psi
Flexural Strength: 350 psi


and there's also a 16lb/ft^3 available, conna have to check with viking plastics in town here see if they can, like they usually do, it cheaper. But even then, this may be worth a gander. maybe i'll bump my rails down from 14ga to 18ga again and use a PU foam as a chassis stiffener... similar to what some OEMs are doing as well as a lot of guys who race....

*Physical Properties:
Parallel Compressive Strength: 580 psi
Tensile Strength: 450 psi
Shear Strength: 230 psi
Flexural Strength: 750 psi

16lb/ft^3 info... that's pretty strong stuff.


Top
 Profile  
 
Display posts from previous:  Sort by  
Post a new topicPost a reply Page 1 of 5   [ 65 posts ]
Go to page 1, 2, 3, 4, 5  Next


Who is online

Users browsing this forum: No registered users and 1 guest


You cannot post new topics in this forum
You cannot reply to topics in this forum
You cannot edit your posts in this forum
You cannot delete your posts in this forum
You cannot post attachments in this forum

Jump to:  
cron


Powered by phpBB © 2000, 2002, 2005, 2007 phpBB Group
610nm Style by Daniel St. Jules of Gamexe.net