Change font size
It is currently Sun Apr 27, 2025 5:42 pm


Post a new topicPost a reply Page 27 of 54   [ 801 posts ]
Go to page Previous  1 ... 24, 25, 26, 27, 28, 29, 30 ... 54  Next
Author Message
 Post subject: Re: Project Canuck - 1966 Canadian Build Thread ... Finally
PostPosted: Mon Jun 17, 2013 8:59 am 
Haha, I just built a W24 Octo-Turbo, now what?!
User avatar

Joined: Wed Jun 14, 2006 4:19 pm
Posts: 3131
Location: Lethbridge, AB
Yup - but do you like it? Greg, stop over when you can - I have parts for you. I'll be drilling and tapping the holes for the T5 tonight.

It's not this colour.

Image

This is the original colour.

Image

It's this colour.

Image

_________________
Coburn Performance - OCD comes naturally.


Top
 Profile  
 
 Post subject: Re: Project Canuck - 1966 Canadian Build Thread ... Finally
PostPosted: Mon Jun 17, 2013 9:30 am 
First volvo in outer space
User avatar

Joined: Fri Dec 14, 2007 1:46 pm
Posts: 1648
Location: East L.A.
The butter colored car is a cool color. Your new cream color is much nicer than the stock white, looking forward to seeing the whole car done!!

_________________
Jim

66 122S (Garage Queen)
89 244 (Hers)
90 745Ti (Mine)
89 744 (SOLD/Bought back for other daughter)
78 242GT (Project... LOL)
91 244 (Don't Ask!!)


Top
 Profile  
 
 Post subject: Re: Project Canuck - 1966 Canadian Build Thread ... Finally
PostPosted: Mon Jun 17, 2013 10:55 pm 
Haha, I just built a W24 Octo-Turbo, now what?!
User avatar

Joined: Thu Dec 29, 2005 12:29 am
Posts: 1790
Location: Eating tofu and legumes in my hippie shack
Sorry...just got this now. I'll swing by soon....just dealing with real estate stuff recently. No no no....I like the colour just fine, but I'm not sure if I like it more than the white or not. I'll have to have a look see to compare.

_________________
Image


Top
 Profile  
 
 Post subject: Re: Project Canuck - 1966 Canadian Build Thread ... Finally
PostPosted: Tue Jun 18, 2013 6:05 am 
Haha, I just built a W24 Octo-Turbo, now what?!
User avatar

Joined: Wed Dec 21, 2005 8:40 pm
Posts: 3492
Location: Calgary, Ab
@ Craig - yes I do!

@ Greg - real estate?


Top
 Profile  
 
 Post subject: Re: Project Canuck - 1966 Canadian Build Thread ... Finally
PostPosted: Tue Jun 18, 2013 3:10 pm 
Haha, I just built a W24 Octo-Turbo, now what?!
User avatar

Joined: Thu Dec 29, 2005 12:29 am
Posts: 1790
Location: Eating tofu and legumes in my hippie shack
Don't want to theadjack, but yes, a new holiday property in B.C. is in the process of being purchased. Its been taking up all my time....really all my energy. Thus the lack of progress on my cars as of late. Should hopefully be done this week.

_________________
Image


Top
 Profile  
 
 Post subject: Re: Project Canuck - 1966 Canadian Build Thread ... Finally
PostPosted: Wed Jun 19, 2013 5:56 pm 
Haha, I just built a W24 Octo-Turbo, now what?!
User avatar

Joined: Wed Jun 14, 2006 4:19 pm
Posts: 3131
Location: Lethbridge, AB
UPS guy showed up with a big bill and a present from the USA...Dutchman Motorsports came through with a set of custom axles for me...should be able to get a mock up done pretty soon.

Image

_________________
Coburn Performance - OCD comes naturally.


Top
 Profile  
 
 Post subject: Re: Project Canuck - 1966 Canadian Build Thread ... Finally
PostPosted: Wed Jun 19, 2013 8:31 pm 
First volvo in outer space
User avatar

Joined: Fri Dec 14, 2007 1:46 pm
Posts: 1648
Location: East L.A.
122_Canuck wrote:
UPS guy showed up with a big bill and a present from the USA...Dutchman Motorsports came through with a set of custom axles for me...should be able to get a mock up done pretty soon.

Image


Shoulda shipped them to Sweet Grass, I KNOW I am cheaper. :wink:

_________________
Jim

66 122S (Garage Queen)
89 244 (Hers)
90 745Ti (Mine)
89 744 (SOLD/Bought back for other daughter)
78 242GT (Project... LOL)
91 244 (Don't Ask!!)


Top
 Profile  
 
 Post subject: Re: Project Canuck - 1966 Canadian Build Thread ... Finally
PostPosted: Wed Jun 19, 2013 9:38 pm 
Haha, I just built a W24 Octo-Turbo, now what?!
User avatar

Joined: Thu Dec 29, 2005 12:29 am
Posts: 1790
Location: Eating tofu and legumes in my hippie shack
OOOO! Very nice Craig!

_________________
Image


Top
 Profile  
 
 Post subject: Re: Project Canuck - 1966 Canadian Build Thread ... Finally
PostPosted: Thu Jun 20, 2013 9:06 am 
Haha, I just built a W24 Octo-Turbo, now what?!
User avatar

Joined: Wed Jun 14, 2006 4:19 pm
Posts: 3131
Location: Lethbridge, AB
volvoshredder wrote:
OOOO! Very nice Craig!


And approved by the project manager.

Image

_________________
Coburn Performance - OCD comes naturally.


Top
 Profile  
 
 Post subject: Re: Project Canuck - 1966 Canadian Build Thread ... Finally
PostPosted: Thu Jun 20, 2013 9:07 am 
Haha, I just built a W24 Octo-Turbo, now what?!
User avatar

Joined: Thu Dec 29, 2005 12:29 am
Posts: 1790
Location: Eating tofu and legumes in my hippie shack
Always important.

_________________
Image


Top
 Profile  
 
 Post subject: Re: Project Canuck - 1966 Canadian Build Thread ... Finally
PostPosted: Tue Jul 23, 2013 9:00 am 
Haha, I just built a W24 Octo-Turbo, now what?!
User avatar

Joined: Wed Jun 14, 2006 4:19 pm
Posts: 3131
Location: Lethbridge, AB
Update - things everyone restoring a 122 should know.

The front turn signals are a PITA to put in to the car. I thought they would be easy as the old ones just pop in and out without trouble. When I assembled the car in haste in 2009, I bought all new turn signal parts (buckets, lenses, and stainless trim). They never fit properly. So while I was thinking about how to do other things, I decided to get these parts to work properly.

First up - the stainless trim. These cars mostly have cast trim that seems to fit and work wonderfully but is difficult to rechrome (not to mention expensive) and Volvo offers (through the usual suspects) a stainless steel replacement. While not cheap either, they should be for life.

I found that they don't fit the body very well. I spent some considerable time convincing them to behave by rolling them over a 2 X 4 until they tightly fit the lens. I didn't take photo's - sorry, but you just roll the flat over the wood carefully and apply pressure to make the bend properly. It took about 1/2 hour per side but without this step, the rest is hopeless, so fit them first. One side even needed to be massaged to fit the fender (it needed to be opened up to fit the contour) - again, there is no short cut, just roll them out.
If they don't fit without the rubber, they won't fit with the rubber.

Next step was to fit the lens to the body. These are Hella lenses and are two piece and break very easily. I found that both of mine needed to have a little lip sanded off the park light side at the join. They should fit the panel without any stress or strain. I also had to open up one of the screw holes to match the trim (we've all seen the cracks that develop at the screws, now you know why).

Here it is finished.

Image

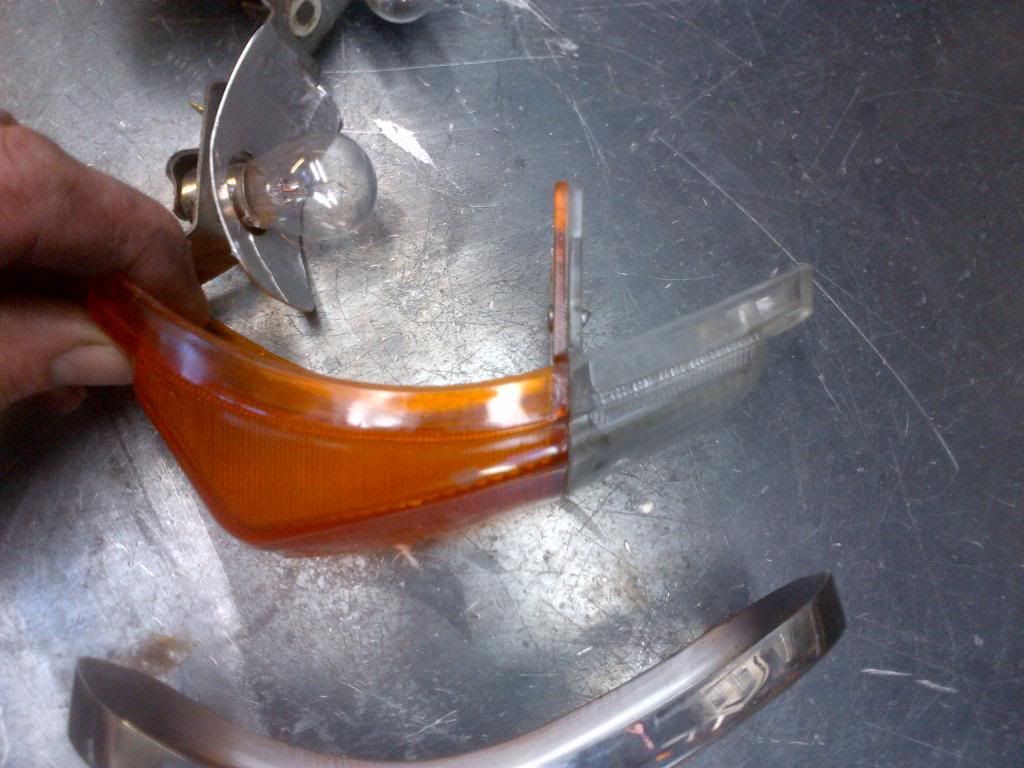
Next was working out how the factory did this install, there is no way to leave the wiring harness in place and just change the rubber part. the easiest method (so the way it must have been done) is to release the turn and park light wires from the main harness (push back the locking tabs, push out the wires) and thread the harness back out the hole.

Image

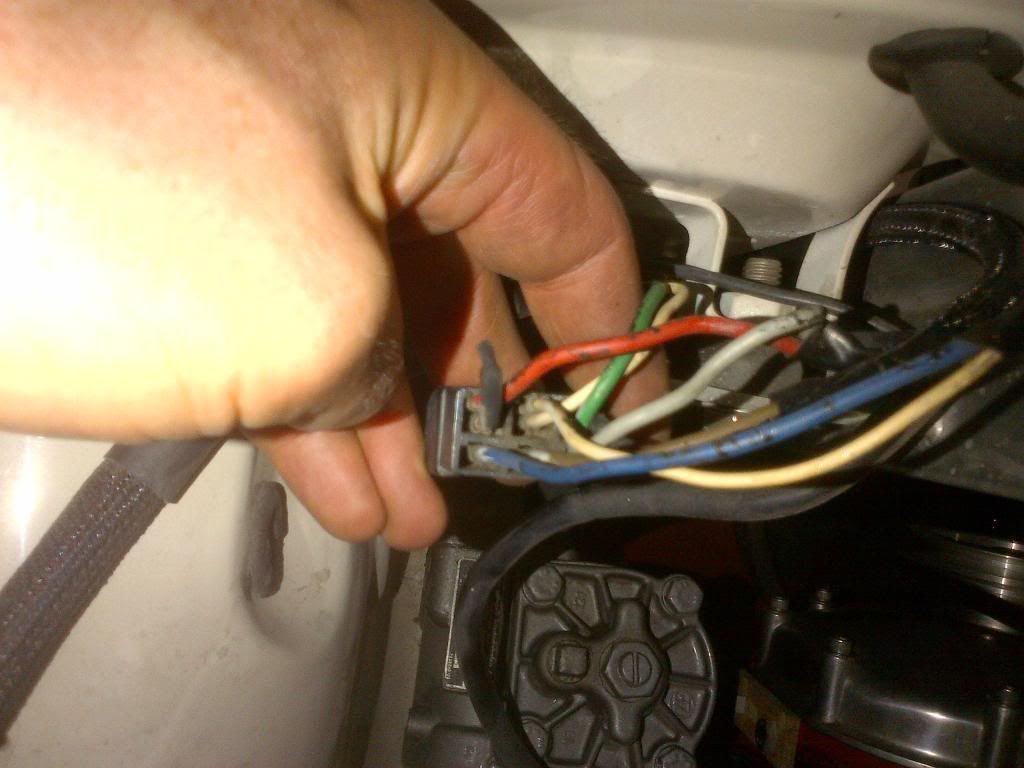
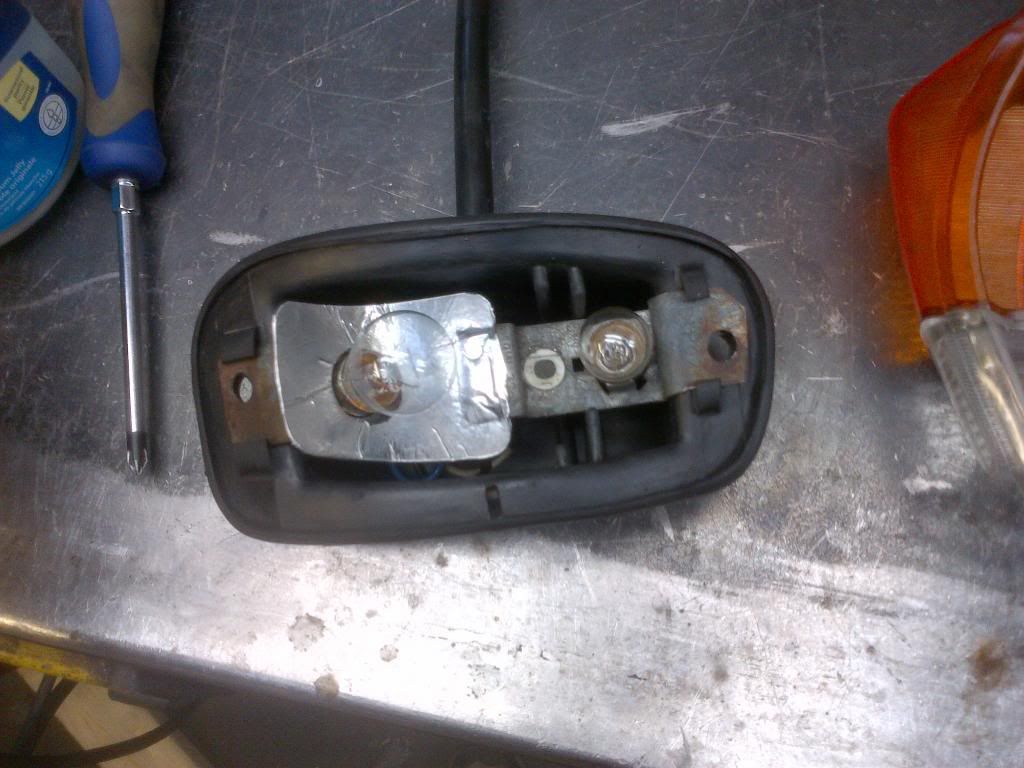
Once on the bench, assemble all the parts (wiring, bucket, lens, trim) and make sure they fit.

Image

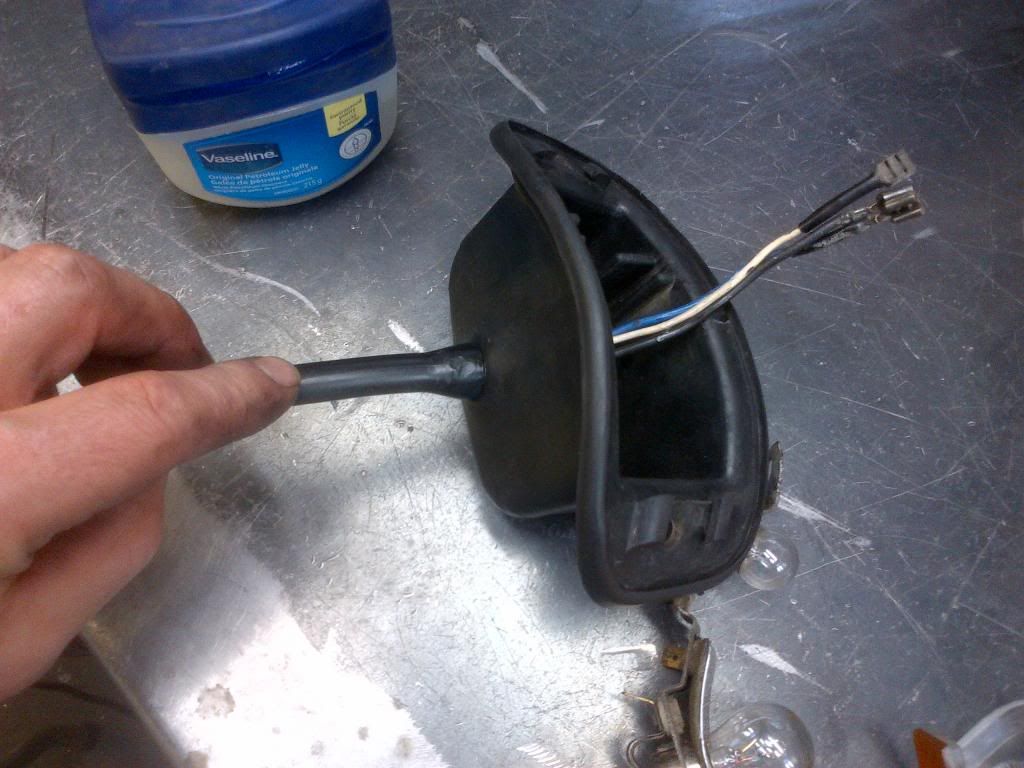
The wiring harness is passed through the boot like so with a little help from Vaseline.

Image

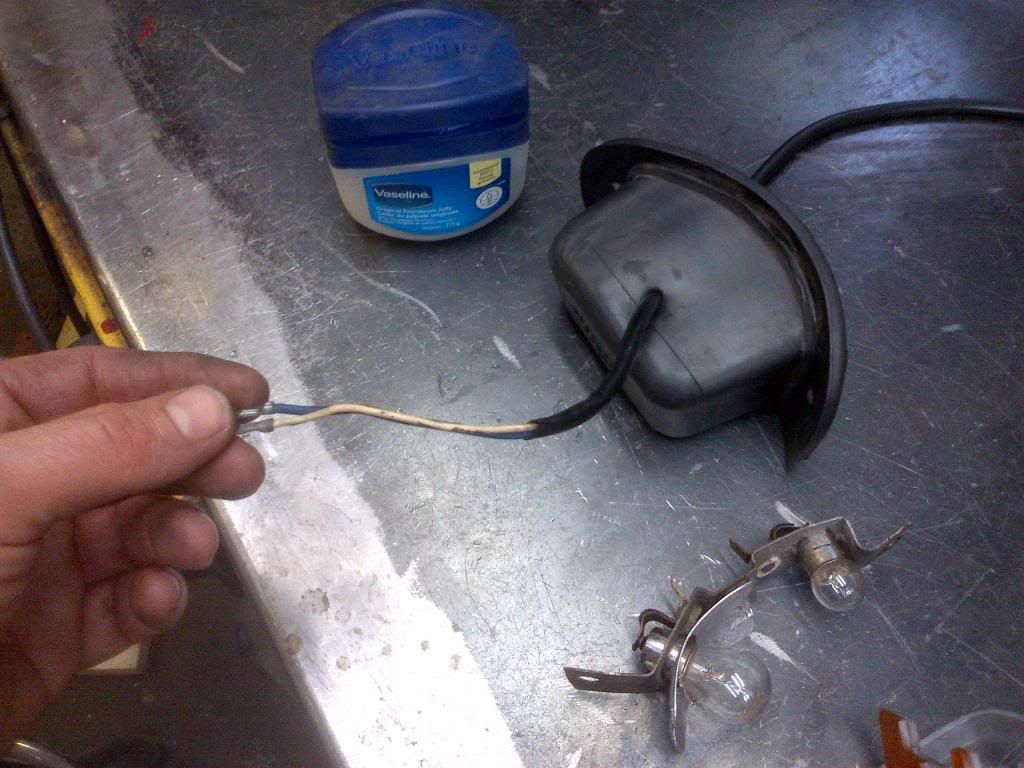
The taper on the harness opens up the hole and then locks the boot to the harness. There is no way to do this the other way - you'll probably rip the rubber boot if you try. I have disconnected the turn signal bulb holder assembly for this shot, but it could be done with it connected.

Image


There, installed - this is how you present the part to the car. Just thread the wiring harness back through the various grommets and along the rad support and insert the connectors (bend the locking tabs back out) and you're almost done.

Image

The connection between the rubber boot and the wiring harness gets a big gob of butyl caulking if you're into that sort of thing. I left mine without as these are all coming off later, so there's no point in making a mess.

Putting the trim on is a bit of a pain, first give the boot a little lube (I used WD-40 because it's what I had handy) and get a bone tool. Then put the trim on the lens and start the screws. As you tighten, work the lip around the trim going from the bottom to the sides then the top. The better the stainless fit, the easier this process is - if you thought the stainless was "good enough", you're probably doing the shaping step again.

When done, it looks like this.

Image

No bad cracking noises or swearing involved. Just a lot of careful fitting.

_________________
Coburn Performance - OCD comes naturally.


Top
 Profile  
 
 Post subject: Re: Project Canuck - 1966 Canadian Build Thread ... Finally
PostPosted: Tue Jul 23, 2013 9:12 am 
Haha, I just built a W24 Octo-Turbo, now what?!
User avatar

Joined: Wed Jun 14, 2006 4:19 pm
Posts: 3131
Location: Lethbridge, AB
Quick update on the IRS install. The frame came out of the jig last week after I finished fabricating the front cross member.

Image

Image

There's still the final welding to be done, but it was time to fit it up under the car to see if things fit. So I tossed it under the car and had a look to see if my "engineering" was up to standard.

Looks like I'll have enough clearance that I won't have to hack the rear seat at all...this was a relief (sorry, that' funny :lol: ).

Image

The photo makes it look like it's on the diff snubber - it's not. I only guessed at the shape of the front cross member - what luck.

Image

I tossed a wheel and arm assembly on just to see how the tire fit and BINGO it's in and just as perfect as I had hoped.

Image

I have to remove the stock brackets and get the mounts tacked on and the sub frame welded, but this chapter is fast approaching done.

It looks like I'll be able to use the stock spindle upright strut mount to put a coil over in up into the trunk area where the stock shock mounts. I'll be building a bracket that attaches to the frame for strength for this part. You can see the mount, the hole in the trunk and how the original spring cup will get in the way. So we'll just take that cup off and should have room.

Image

That's it for now.

_________________
Coburn Performance - OCD comes naturally.


Top
 Profile  
 
 Post subject: Re: Project Canuck - 1966 Canadian Build Thread ... Finally
PostPosted: Tue Jul 23, 2013 9:50 am 
Haha, I just built a W24 Octo-Turbo, now what?!
User avatar

Joined: Thu Dec 29, 2005 12:29 am
Posts: 1790
Location: Eating tofu and legumes in my hippie shack
Beauty!!!

_________________
Image


Top
 Profile  
 
 Post subject: Re: Project Canuck - 1966 Canadian Build Thread ... Finally
PostPosted: Tue Jul 23, 2013 10:26 am 
First volvo in outer space
User avatar

Joined: Fri Dec 14, 2007 1:46 pm
Posts: 1648
Location: East L.A.
WOW, that is all.

_________________
Jim

66 122S (Garage Queen)
89 244 (Hers)
90 745Ti (Mine)
89 744 (SOLD/Bought back for other daughter)
78 242GT (Project... LOL)
91 244 (Don't Ask!!)


Top
 Profile  
 
 Post subject: Re: Project Canuck - 1966 Canadian Build Thread ... Finally
PostPosted: Tue Jul 23, 2013 12:32 pm 
Haha, I just built a W24 Octo-Turbo, now what?!
User avatar

Joined: Wed Dec 21, 2005 8:40 pm
Posts: 3492
Location: Calgary, Ab
Having been privvy to these photos as they developed, it only occurs to me to ask now: Where is the sway bar going? Overtop of the frame rails?

And again: =D> =D> =D>


Top
 Profile  
 
Display posts from previous:  Sort by  
Post a new topicPost a reply Page 27 of 54   [ 801 posts ]
Go to page Previous  1 ... 24, 25, 26, 27, 28, 29, 30 ... 54  Next


Who is online

Users browsing this forum: No registered users and 12 guests


You cannot post new topics in this forum
You cannot reply to topics in this forum
You cannot edit your posts in this forum
You cannot delete your posts in this forum
You cannot post attachments in this forum

Jump to:  
cron


Powered by phpBB © 2000, 2002, 2005, 2007 phpBB Group
610nm Style by Daniel St. Jules of Gamexe.net