Change font size
It is currently Fri Sep 27, 2024 10:52 pm


Post a new topicPost a reply Page 31 of 54   [ 801 posts ]
Go to page Previous  1 ... 28, 29, 30, 31, 32, 33, 34 ... 54  Next
Author Message
 Post subject: Re: Project Canuck - 1966 Canadian Build Thread ... Finally
PostPosted: Wed Jun 17, 2015 5:41 am 
Haha, I just built a W24 Octo-Turbo, now what?!
User avatar

Joined: Wed Dec 21, 2005 8:40 pm
Posts: 3492
Location: Calgary, Ab
So good to see sparks flying again!


Top
 Profile  
 
 Post subject: Re: Project Canuck - 1966 Canadian Build Thread ... Finally
PostPosted: Wed Jun 17, 2015 10:15 am 
Haha, I just built a W24 Octo-Turbo, now what?!
User avatar

Joined: Thu Dec 29, 2005 12:29 am
Posts: 1790
Location: Eating tofu and legumes in my hippie shack
Hooray!

_________________
Image


Top
 Profile  
 
 Post subject: Re: Project Canuck - 1966 Canadian Build Thread ... Finally
PostPosted: Wed Jun 17, 2015 3:46 pm 
First volvo in outer space
User avatar

Joined: Fri Dec 14, 2007 1:46 pm
Posts: 1648
Location: East L.A.
Lookin good!!

_________________
Jim

66 122S (Garage Queen)
89 244 (Hers)
90 745Ti (Mine)
89 744 (SOLD/Bought back for other daughter)
78 242GT (Project... LOL)
91 244 (Don't Ask!!)


Top
 Profile  
 
 Post subject: Re: Project Canuck - 1966 Canadian Build Thread ... Finally
PostPosted: Wed Jun 17, 2015 6:40 pm 
Haha, I just built a W24 Octo-Turbo, now what?!
User avatar

Joined: Wed Jun 14, 2006 4:19 pm
Posts: 3131
Location: Lethbridge, AB
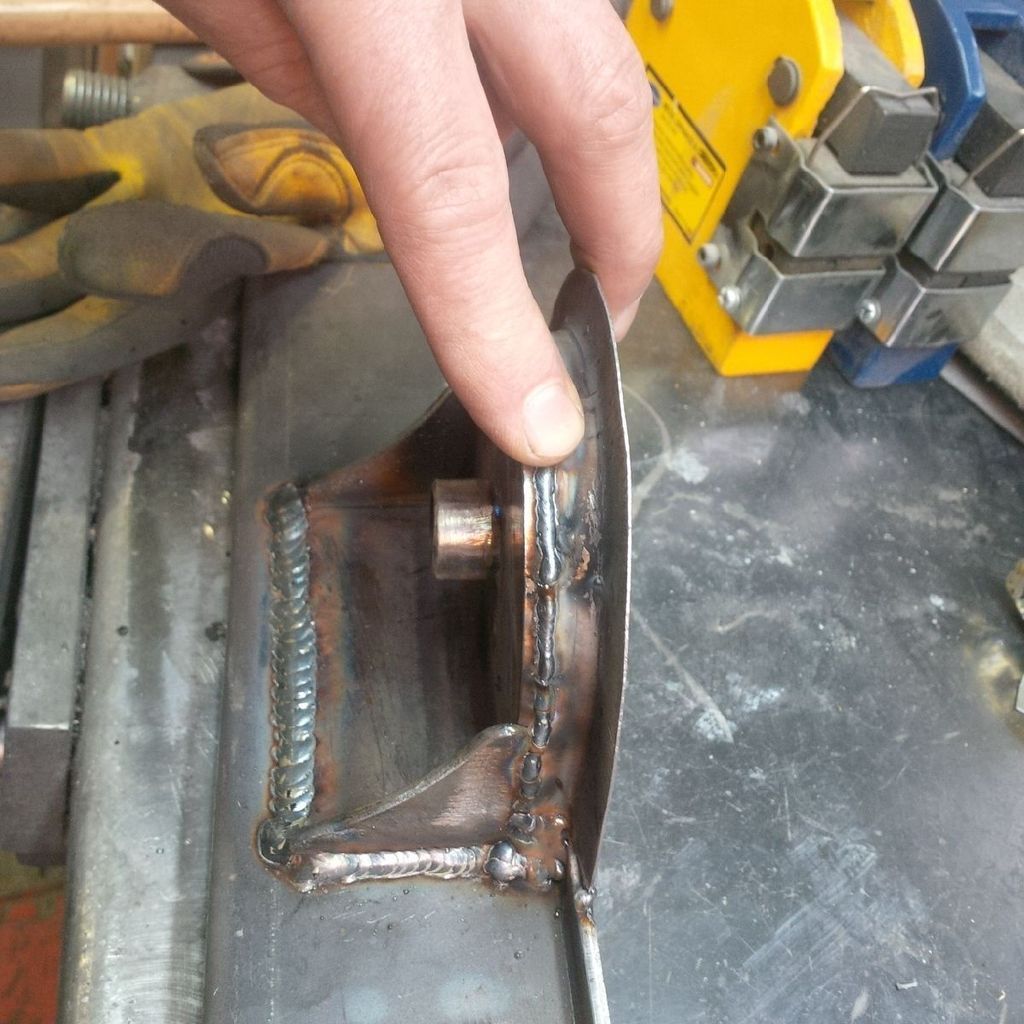
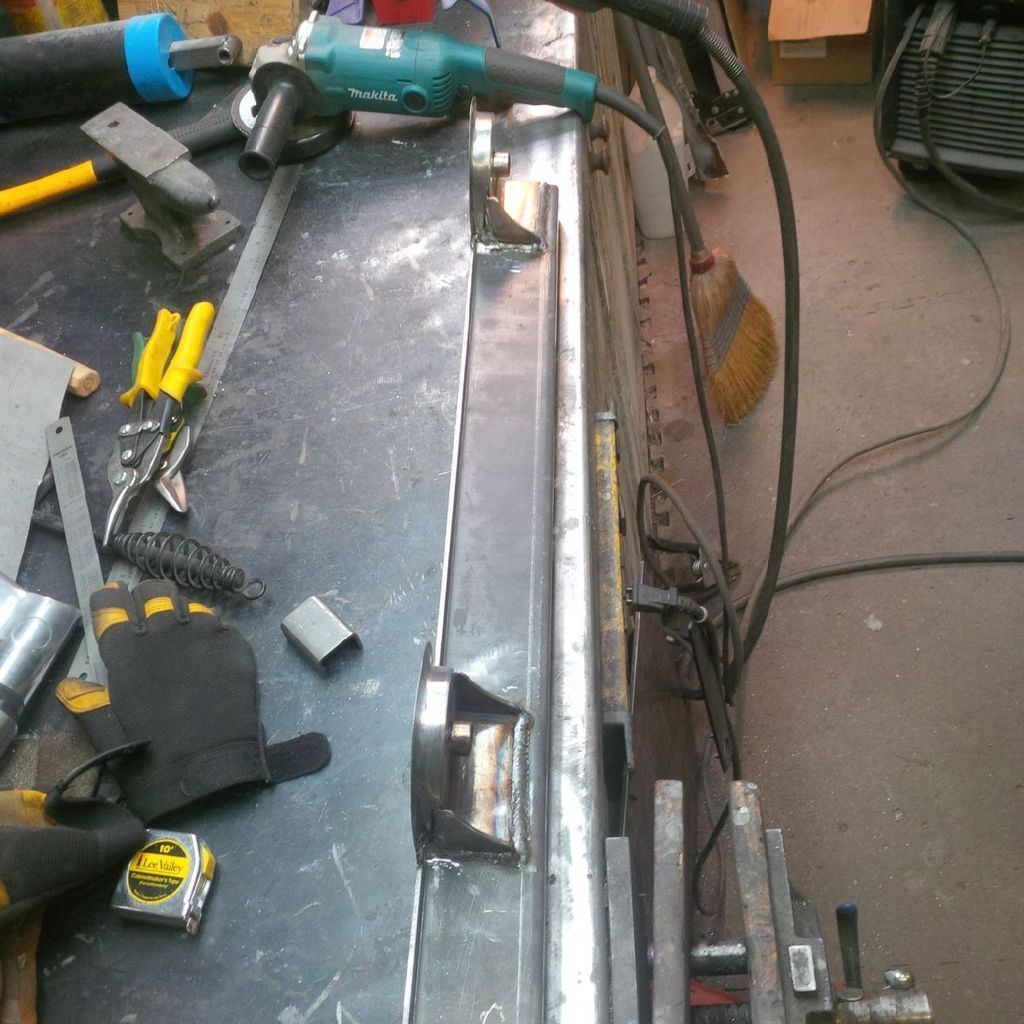
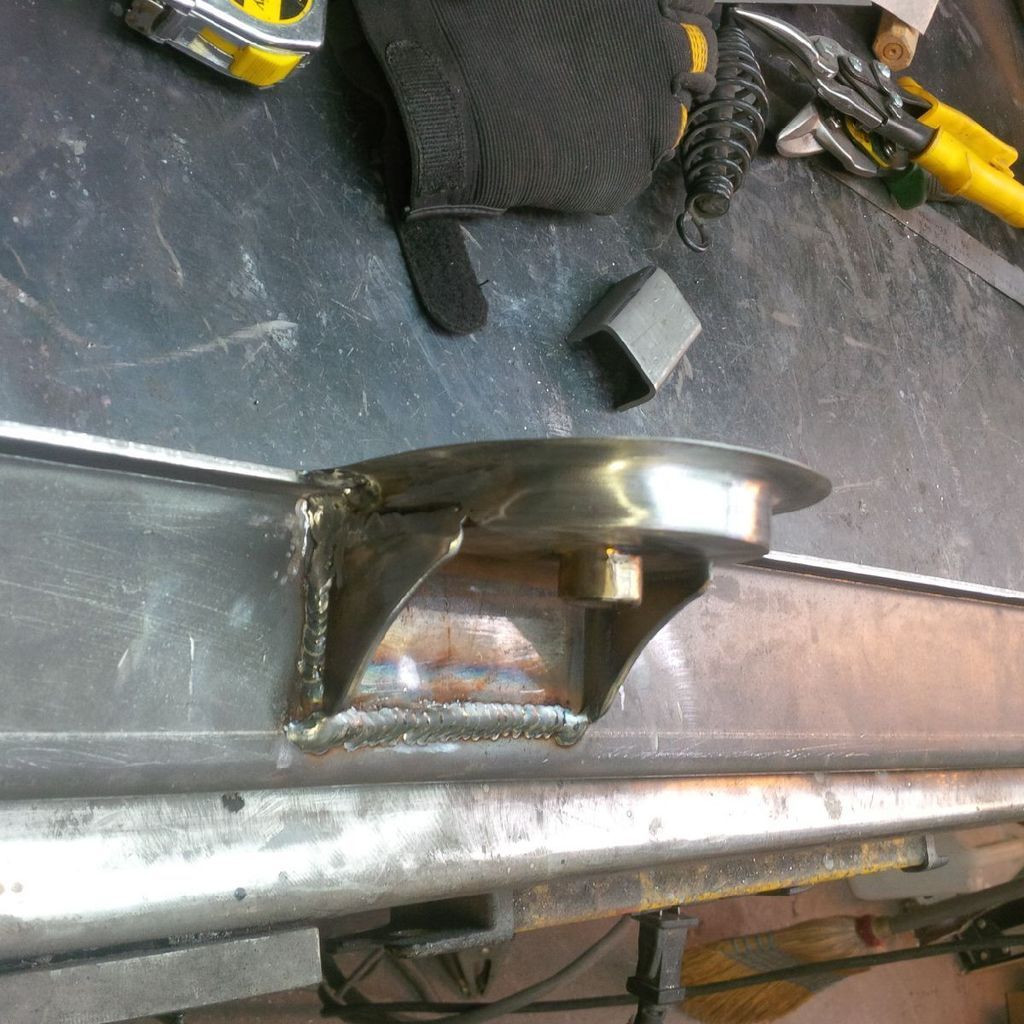
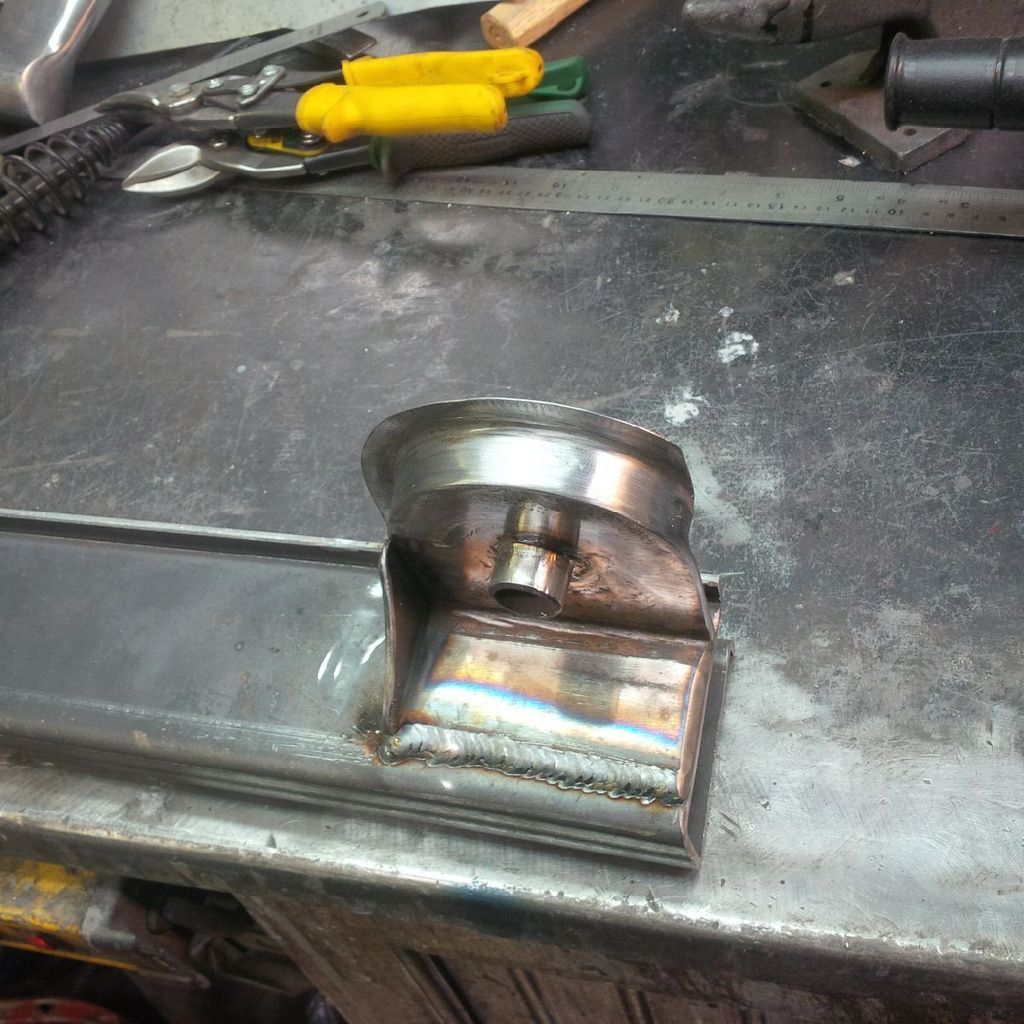
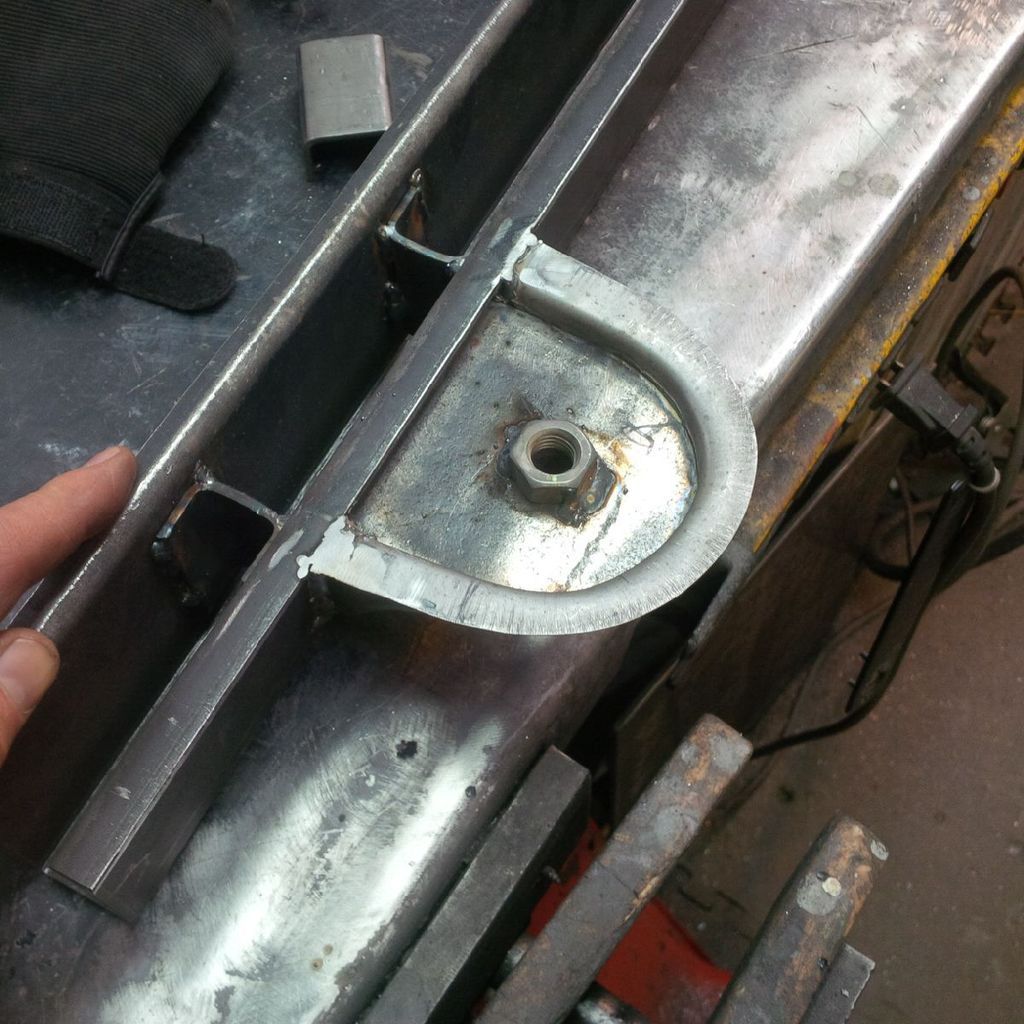
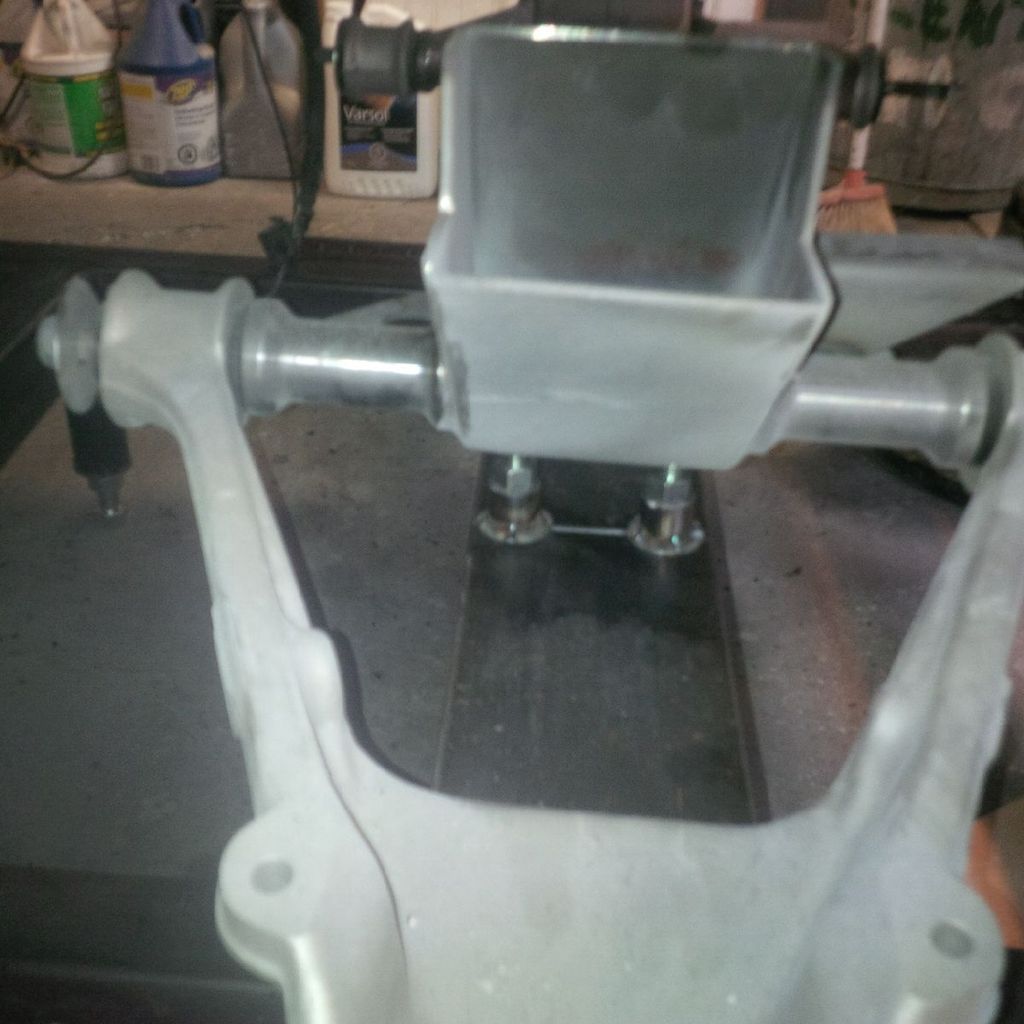
Rocking and rolling on the project as I stole an afternoon (well, three hours) to get the brackets finish welded and make the sheet metal flange that will join the bracket to the new trunk floor. I didn't take pictures of making the curved flanges - it's not as easy as it looks to do and I still consider it somewhat akin to voodoo.

Here we go with the picture show.

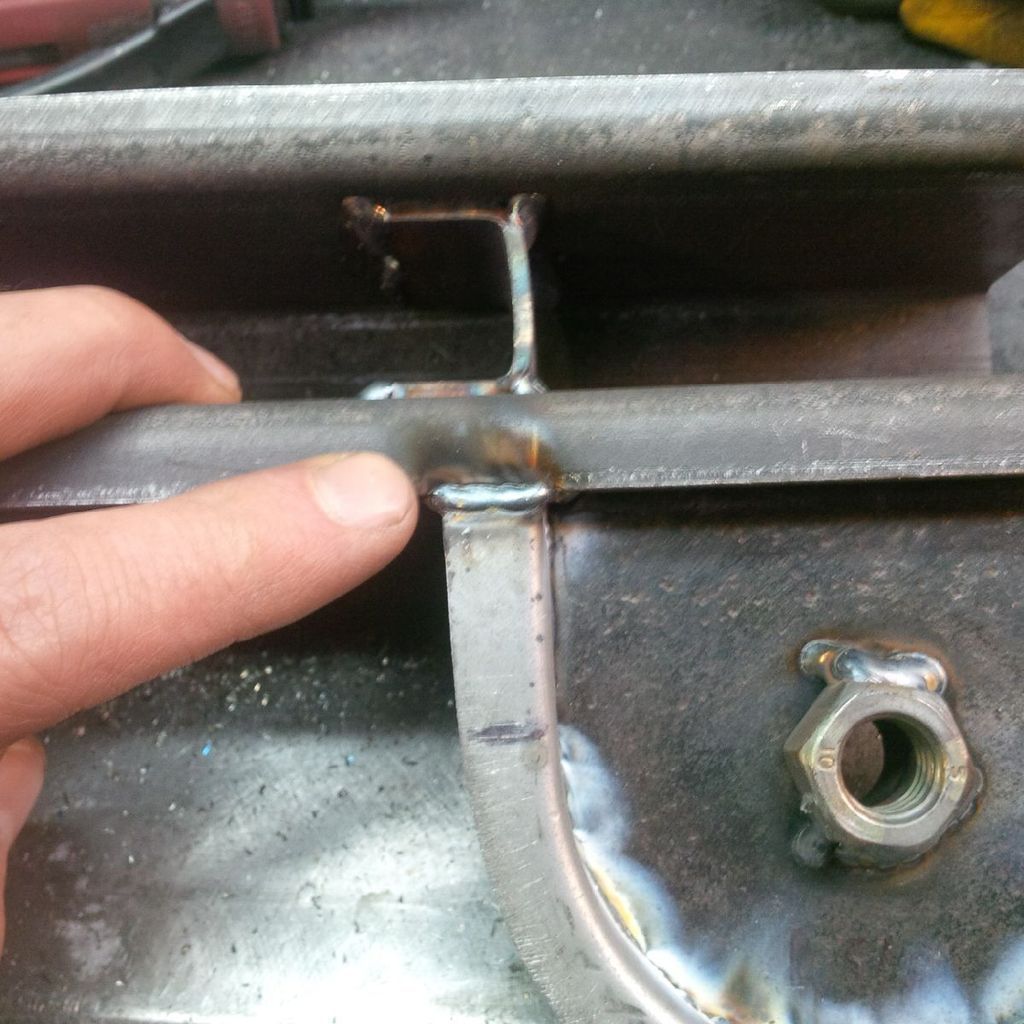
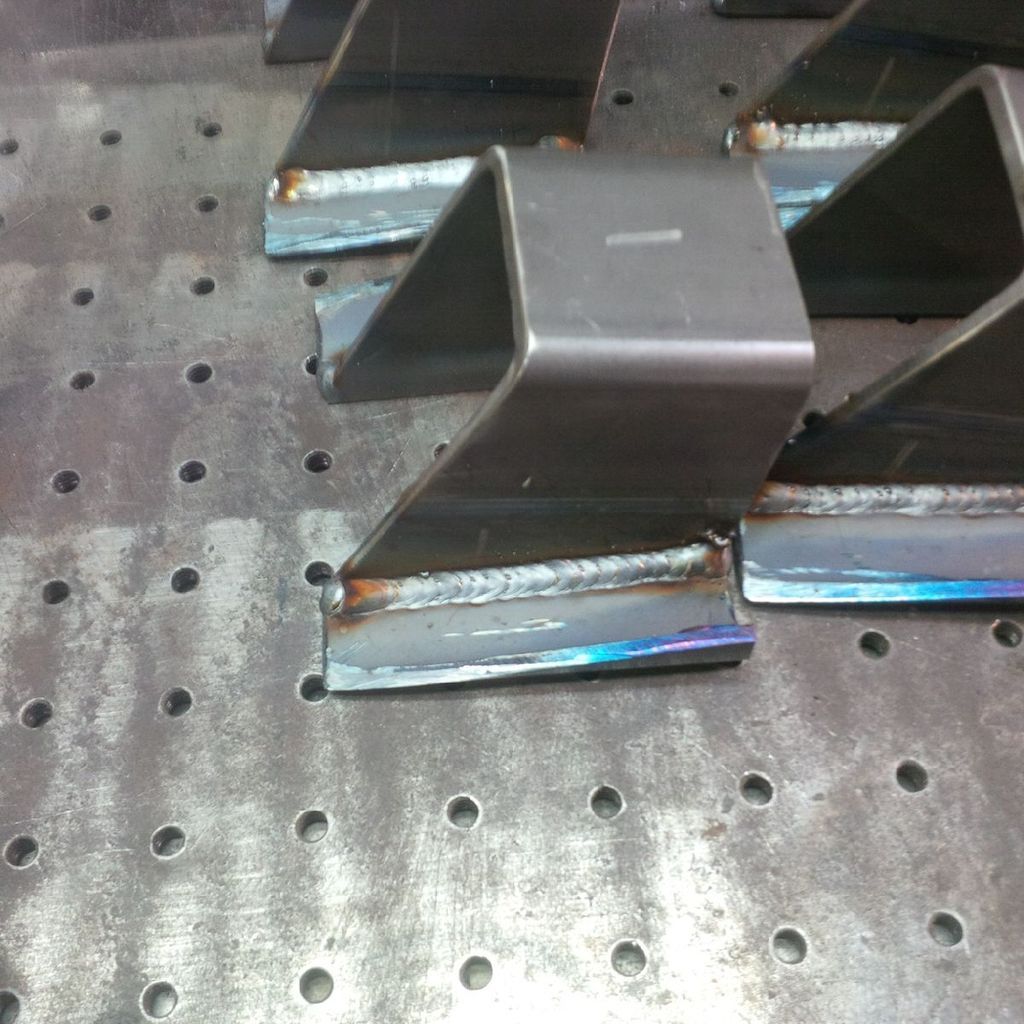
If you can recall from last year, I've become obsessed with welding sheet metal with the same techniques I use for the thick stuff. You need to hold a "TIGHT" arc and move really fast. Finger for scale.

Image

Image

Tiny beads don't warp the metal and are easier to finish without the brutal pucker left by the "tack and move" method. In fact, I did most of the finishing with a quick swipe with my 5" grinder!

Here they are finished and ready to weld on to the car tomorrow.

Image

Image

Image

Oh, and I welded in the nuts for good measure.

Image

Tomorrow I sort out the rigging for the shock hoops. Time to put away the MIG and dust off the TIG!

_________________
Coburn Performance - OCD comes naturally.


Top
 Profile  
 
 Post subject: Re: Project Canuck - 1966 Canadian Build Thread ... Finally
PostPosted: Thu Jun 18, 2015 7:15 am 
Haha, I just built a W24 Octo-Turbo, now what?!
User avatar

Joined: Wed Dec 21, 2005 8:40 pm
Posts: 3492
Location: Calgary, Ab
It must be voodoo: you're so good it's spooky.


Top
 Profile  
 
 Post subject: Re: Project Canuck - 1966 Canadian Build Thread ... Finally
PostPosted: Tue Aug 04, 2015 6:17 pm 
Haha, I just built a W24 Octo-Turbo, now what?!
User avatar

Joined: Wed Jun 14, 2006 4:19 pm
Posts: 3131
Location: Lethbridge, AB
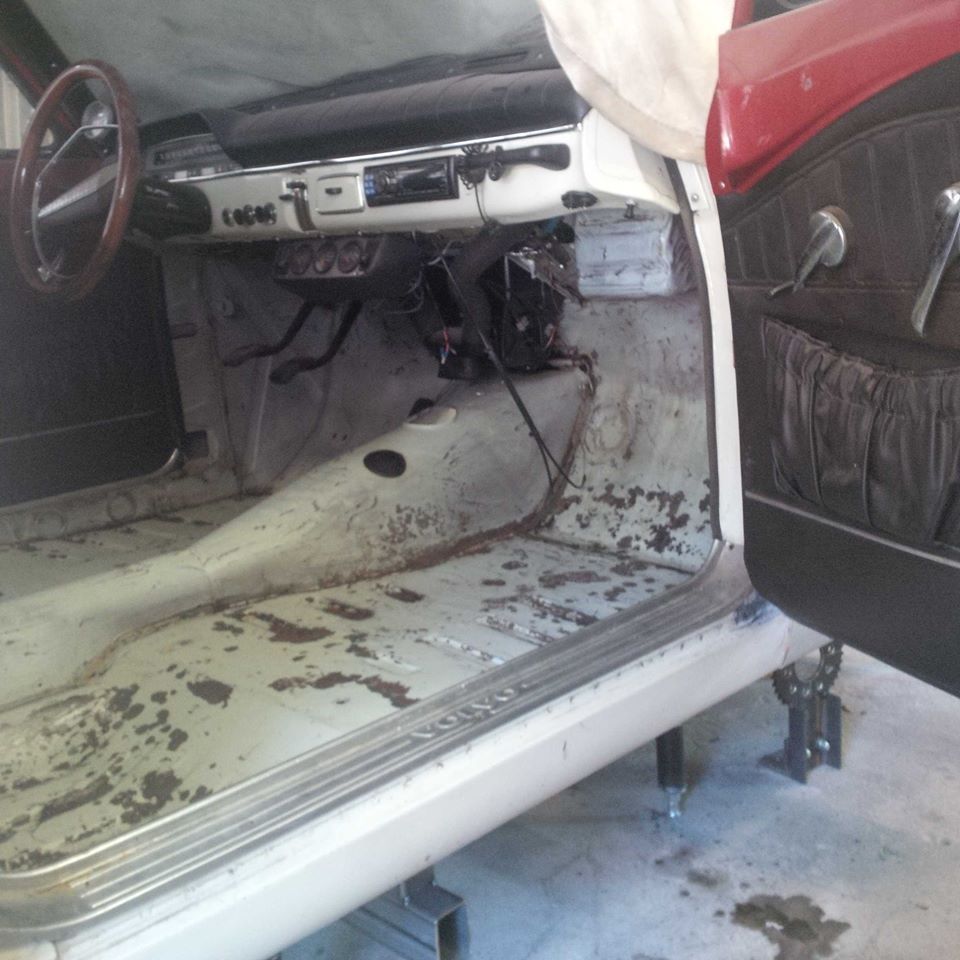
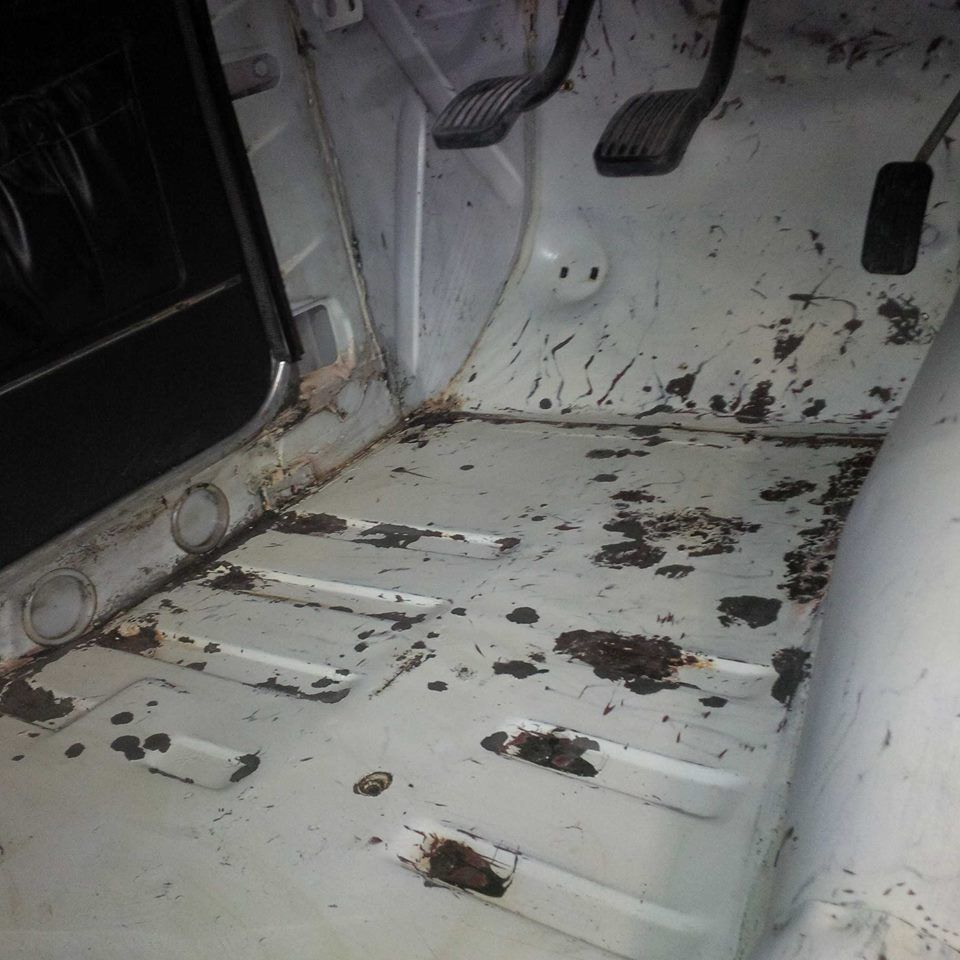
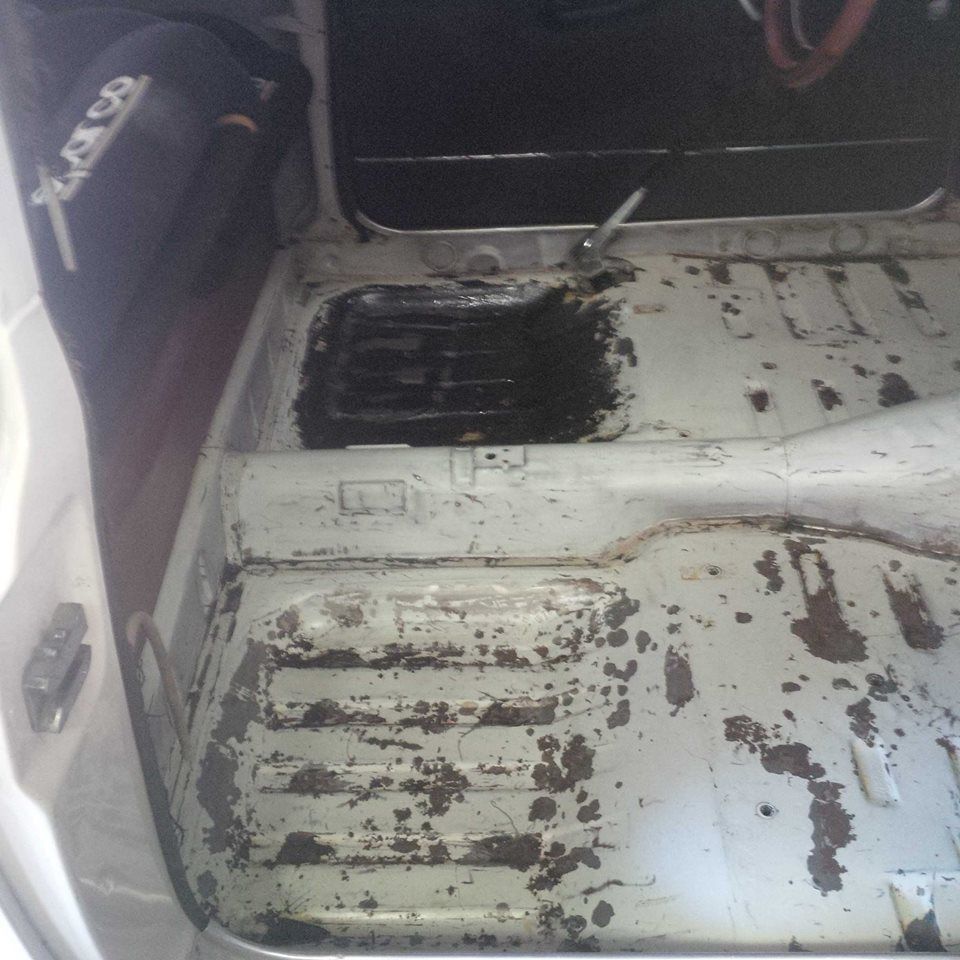
OK project update. Did I already mention that the sound deadening had to come out? I was pretty brain-damaged by the end of that effort, and I was doing that as I'm ready for the front suspension, which means the new clip, which means welding below the floor into a lot of flammable stuff. It cleaned up with 3 days of work.

To get me here.

Image

Not bad shape all things considered. No need to replace the front pans as far as I'm concerned.

Drivers side...one little hole.

Image

Worst of the lot is the drivers side rear. Previously repaired by me.

Image

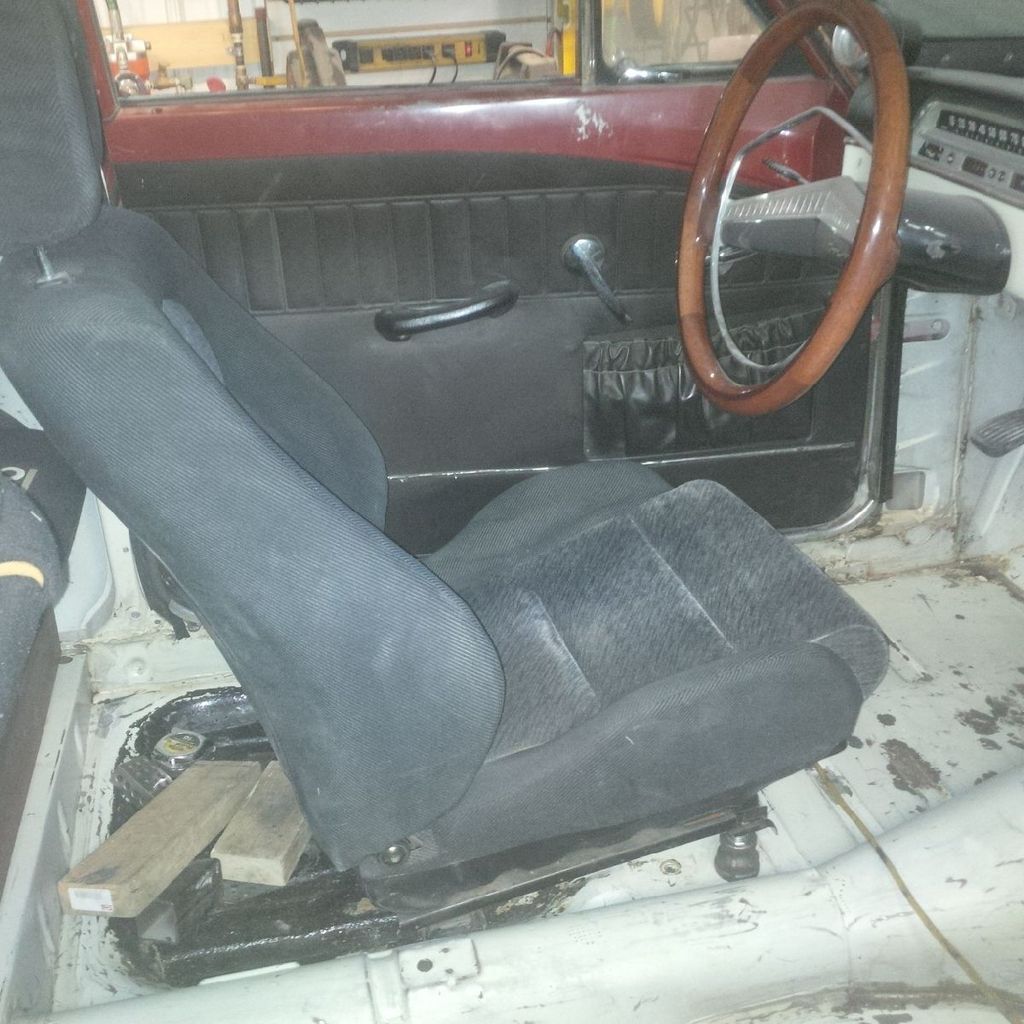
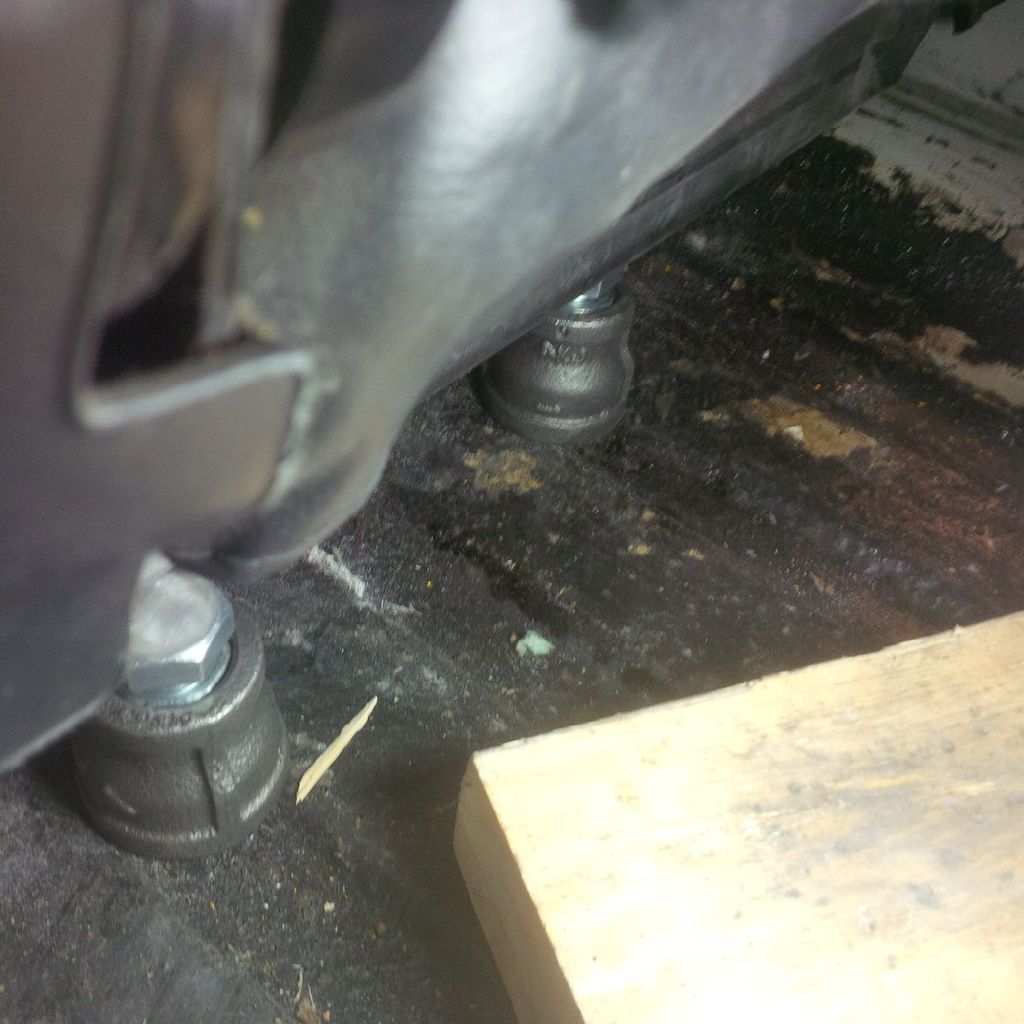
Test fit the new seats...fall off the seats multiple times (stop using wood - make small jacks).

Image

Find a good place for the seat. Looks like a good fit.

Image

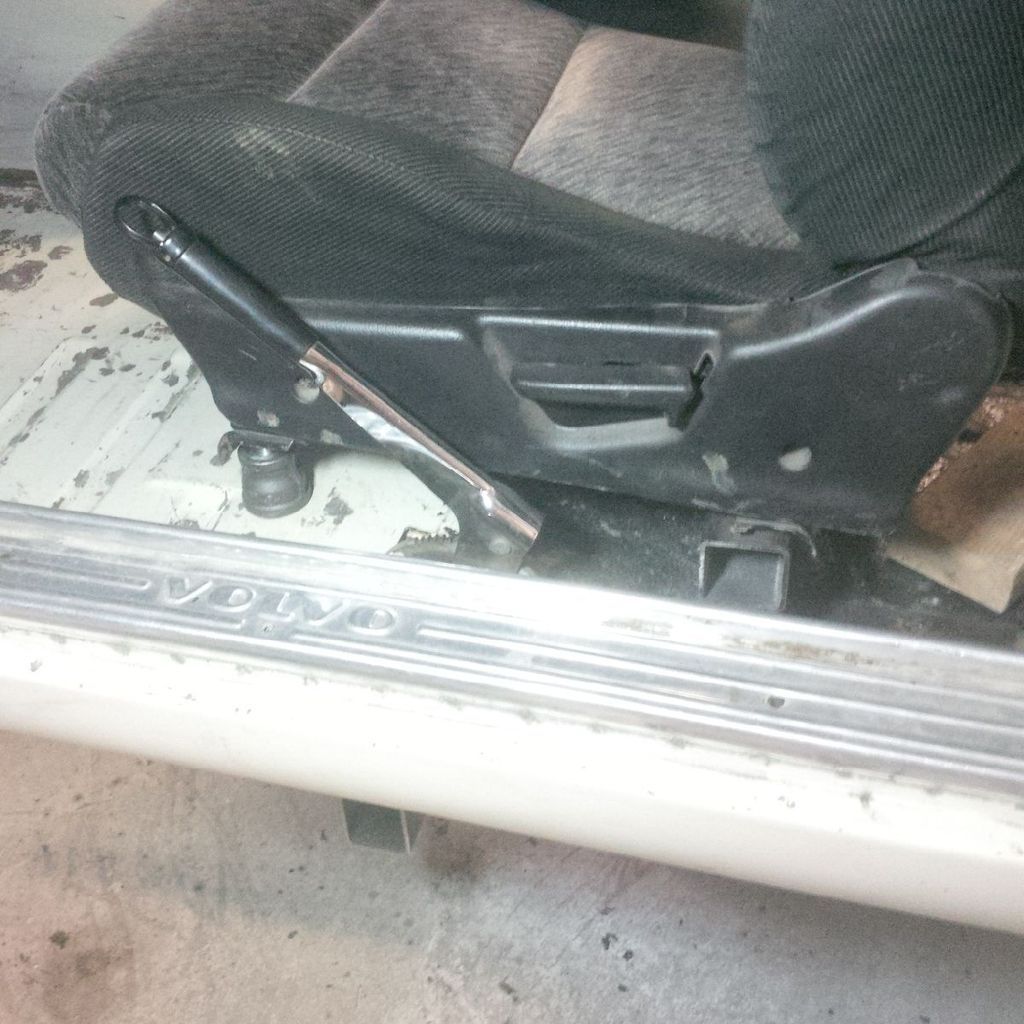
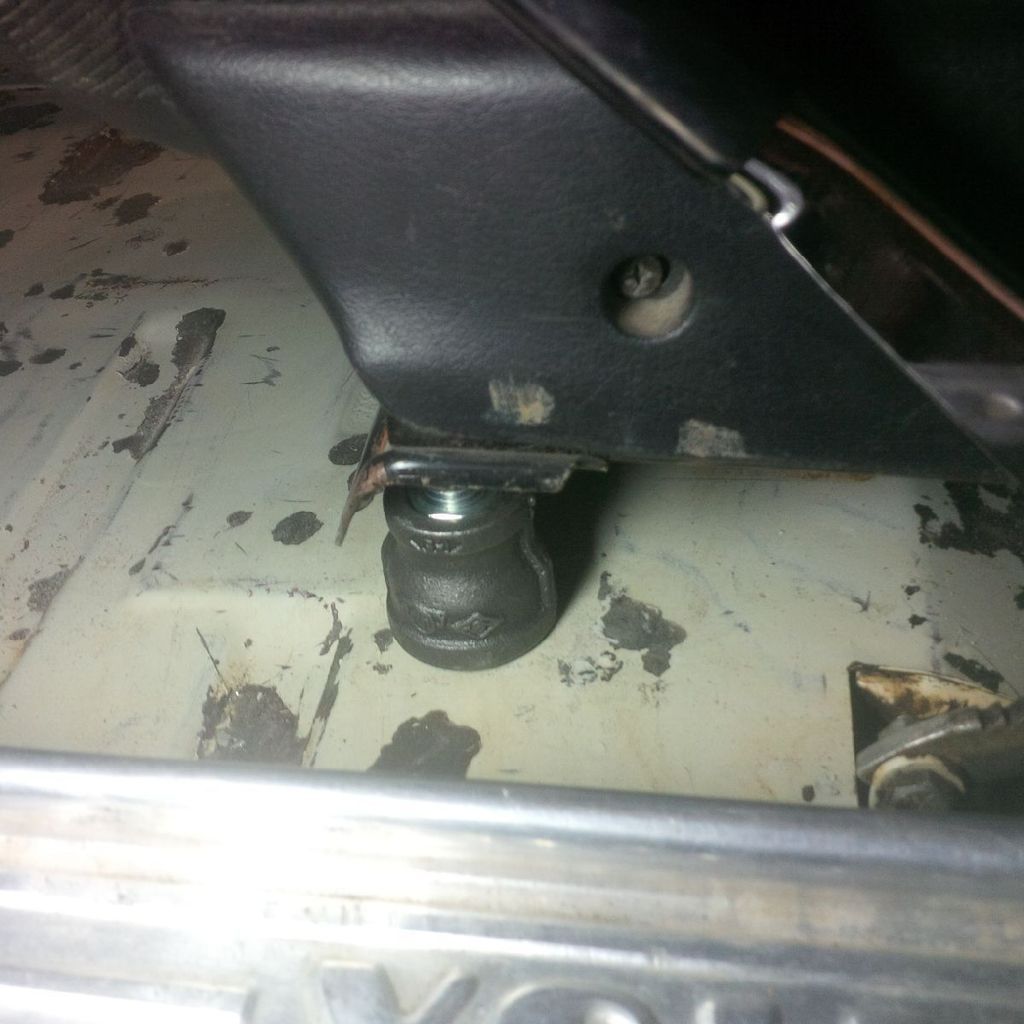
Jacks front and back to fix a few reference points.

Image

Image

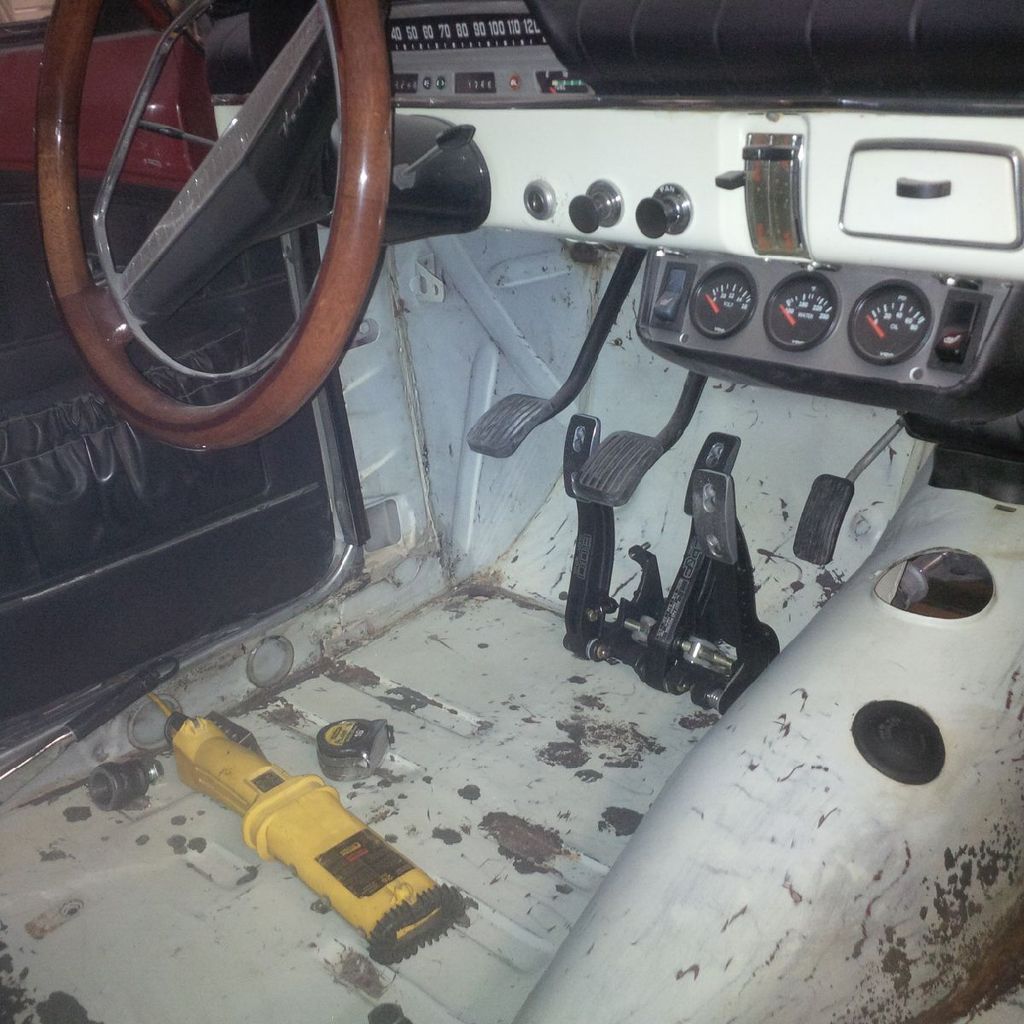
Test fit pedals. Going to need a little sub-floor. No problem.

Image

Now I was fitting the seats as I have to get that set to set the pedals, and the pedals have to be set as they are on the floor and that can't be moved...and the master cylinders will have to go through the existing fire wall. So the frame kick can't hit the MC's - so I need to know where this junk goes. It's not procrastination.

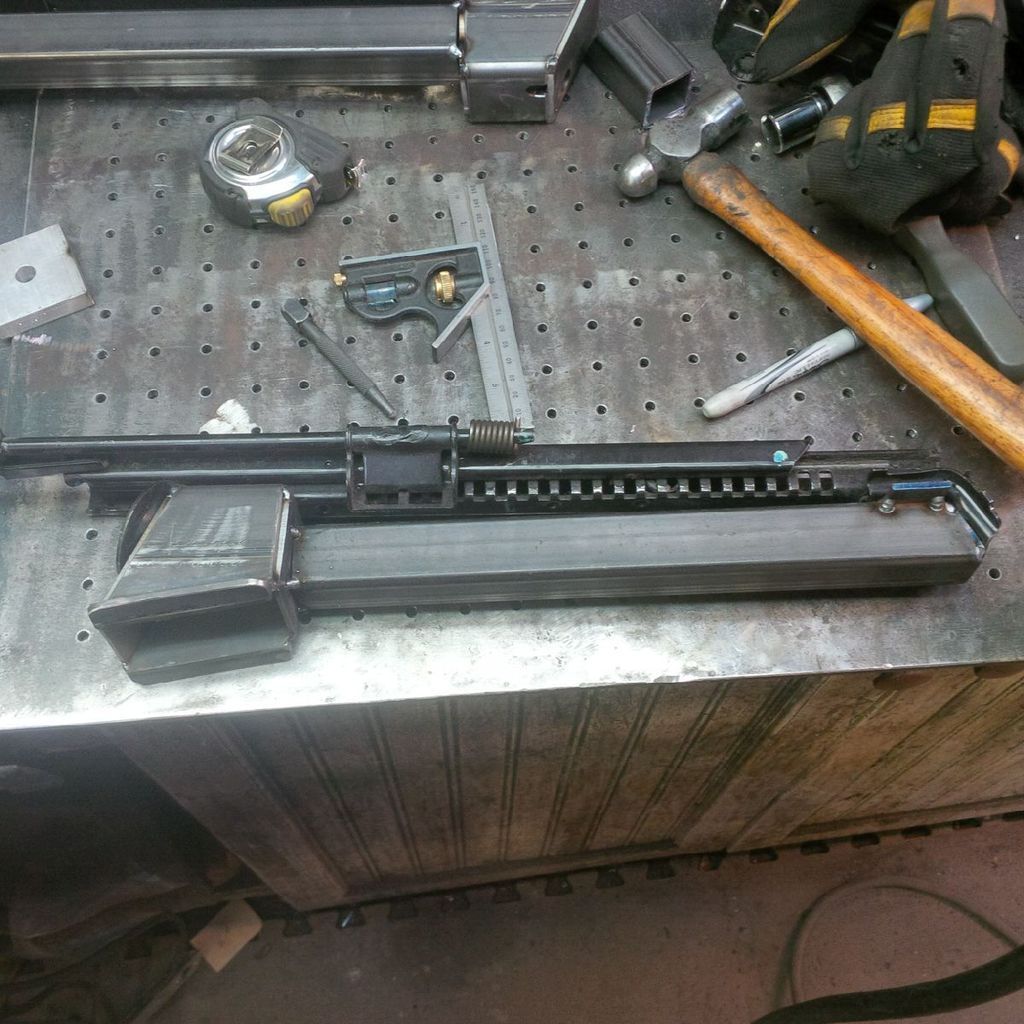
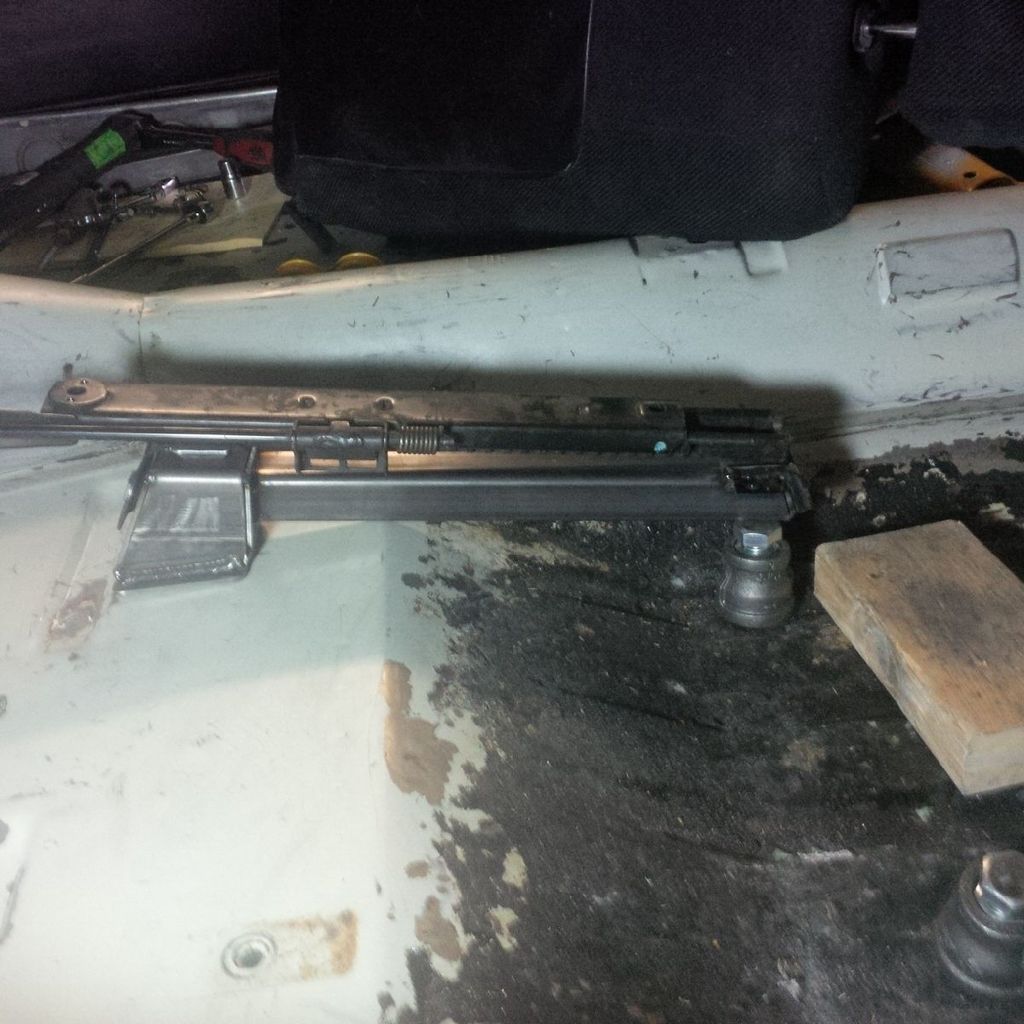
Working out the seat brackets was a peach. What a PITA. Angles all over the place. Well, here's the start.

Image

Image

And in the car - just need to build a bracket to the floor and tack them in place.

Image

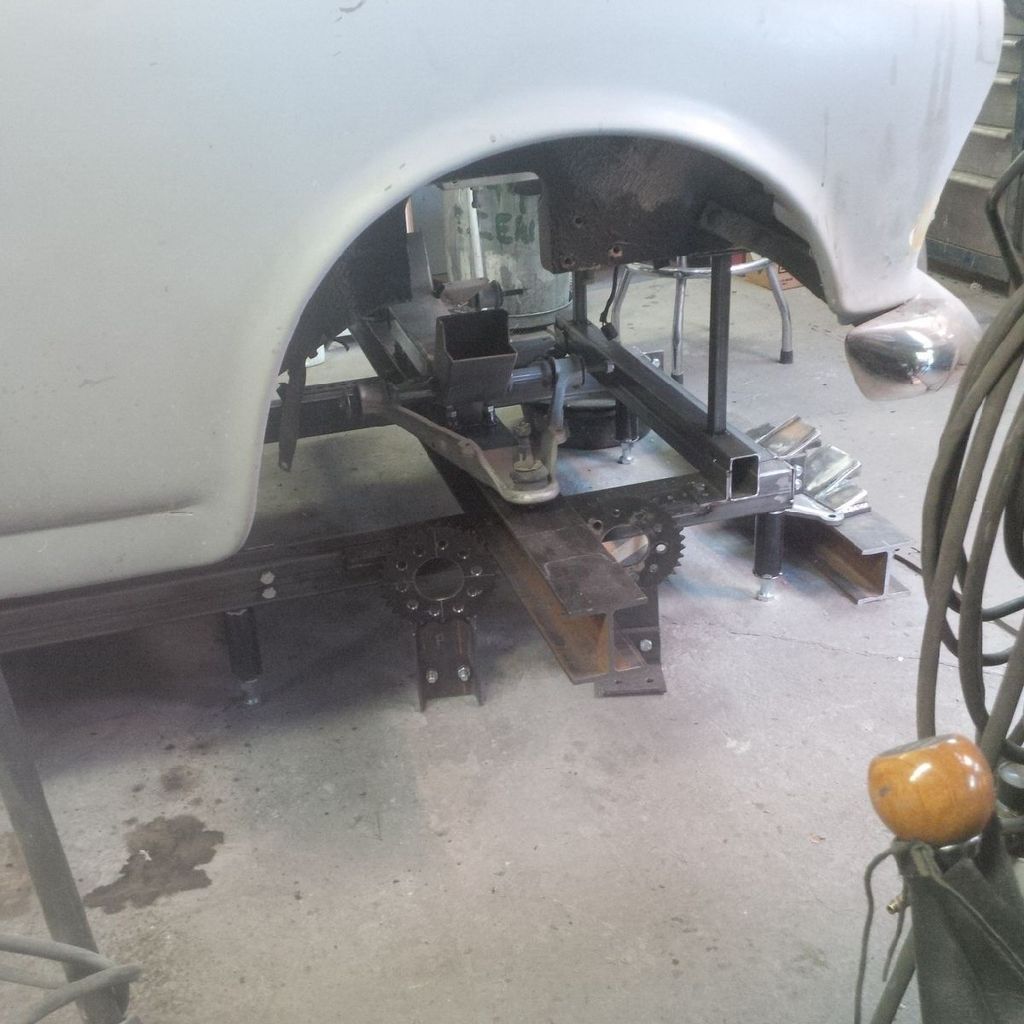
Front end is mocked up - sort of.

Image

More little jacks to get the cross member perfectly level.

Image

Whew - done for this update. More to come as the frame will be removed soon.

_________________
Coburn Performance - OCD comes naturally.


Top
 Profile  
 
 Post subject: Re: Project Canuck - 1966 Canadian Build Thread ... Finally
PostPosted: Tue Aug 04, 2015 10:21 pm 
Haha, I just built a W24 Octo-Turbo, now what?!
User avatar

Joined: Wed Dec 21, 2005 8:40 pm
Posts: 3492
Location: Calgary, Ab
Those brackets look great!


Top
 Profile  
 
 Post subject: Re: Project Canuck - 1966 Canadian Build Thread ... Finally
PostPosted: Wed Aug 05, 2015 10:34 am 
First volvo in outer space
User avatar

Joined: Fri Dec 14, 2007 1:46 pm
Posts: 1648
Location: East L.A.
More good stuff, apologies for never getting over and scraping that Dynamat off... :oops:

_________________
Jim

66 122S (Garage Queen)
89 244 (Hers)
90 745Ti (Mine)
89 744 (SOLD/Bought back for other daughter)
78 242GT (Project... LOL)
91 244 (Don't Ask!!)


Top
 Profile  
 
 Post subject: Re: Project Canuck - 1966 Canadian Build Thread ... Finally
PostPosted: Wed Aug 05, 2015 2:21 pm 
Haha, I just built a W24 Octo-Turbo, now what?!
User avatar

Joined: Wed Jun 14, 2006 4:19 pm
Posts: 3131
Location: Lethbridge, AB
woodenshoes wrote:
More good stuff, apologies for never getting over and scraping that Dynamat off... :oops:


Seriously, one of the worst jobs on the car. Not fun at all. I'm glad you didn't get the chance to do it.

_________________
Coburn Performance - OCD comes naturally.


Top
 Profile  
 
 Post subject: Re: Project Canuck - 1966 Canadian Build Thread ... Finally
PostPosted: Wed Sep 02, 2015 8:32 pm 
Haha, I just built a W24 Octo-Turbo, now what?!
User avatar

Joined: Wed Jun 14, 2006 4:19 pm
Posts: 3131
Location: Lethbridge, AB
Little update. I noted that the passenger side floor at the front was a little scrappy. It was pitted and I don't like pitted sheet metal...it will make you cry later if you don't cut it all out. I found that it was worse than I thought when I pulled the little closing panel off and found more rust at the join between the firewall and the floor section. I've never liked that join. The drain for the cowl vent gets plugged on these cars rather easily and then water that collects in the cowl area drains back through the heater...and if you're lucky it goes out the heater drain harmlessly on the transmission. This almost never happens - it usually ends up on the drivers and passenger floor over by the A pillar where the floor slopes - to rust away your floors.

I've had all these problems. I didn't think it was all that bad until I got poking around and dug out the seam sealer between the firewall/floor panel. It was pretty nasty. So out came the plasma, and off came the panel.

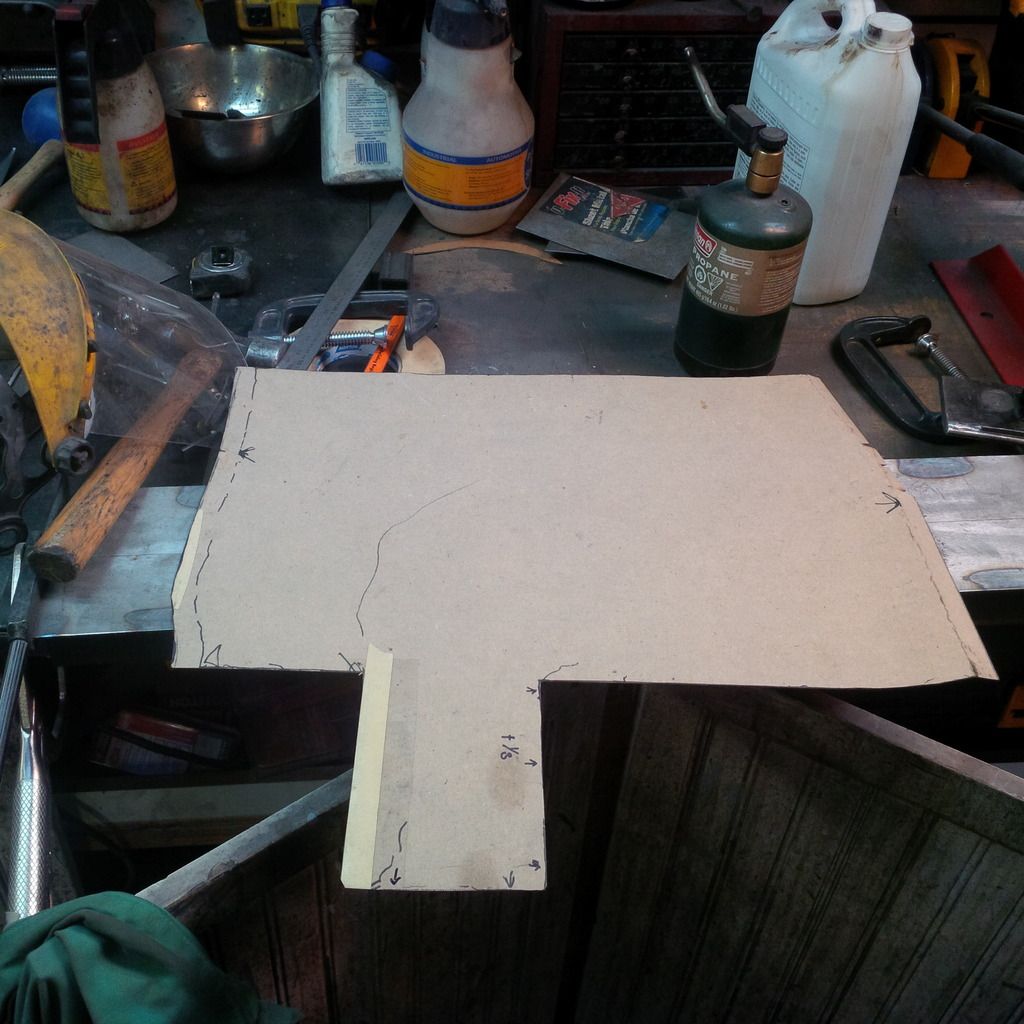
Here's my CAD (cardboard assisted drawing) template. Make these as accurately as possible. It needs to fit dead tight to make my weld process work.

Image

I was going so fast I forgot to take a picture of the panel out of the car...it looks just like the cardboard.
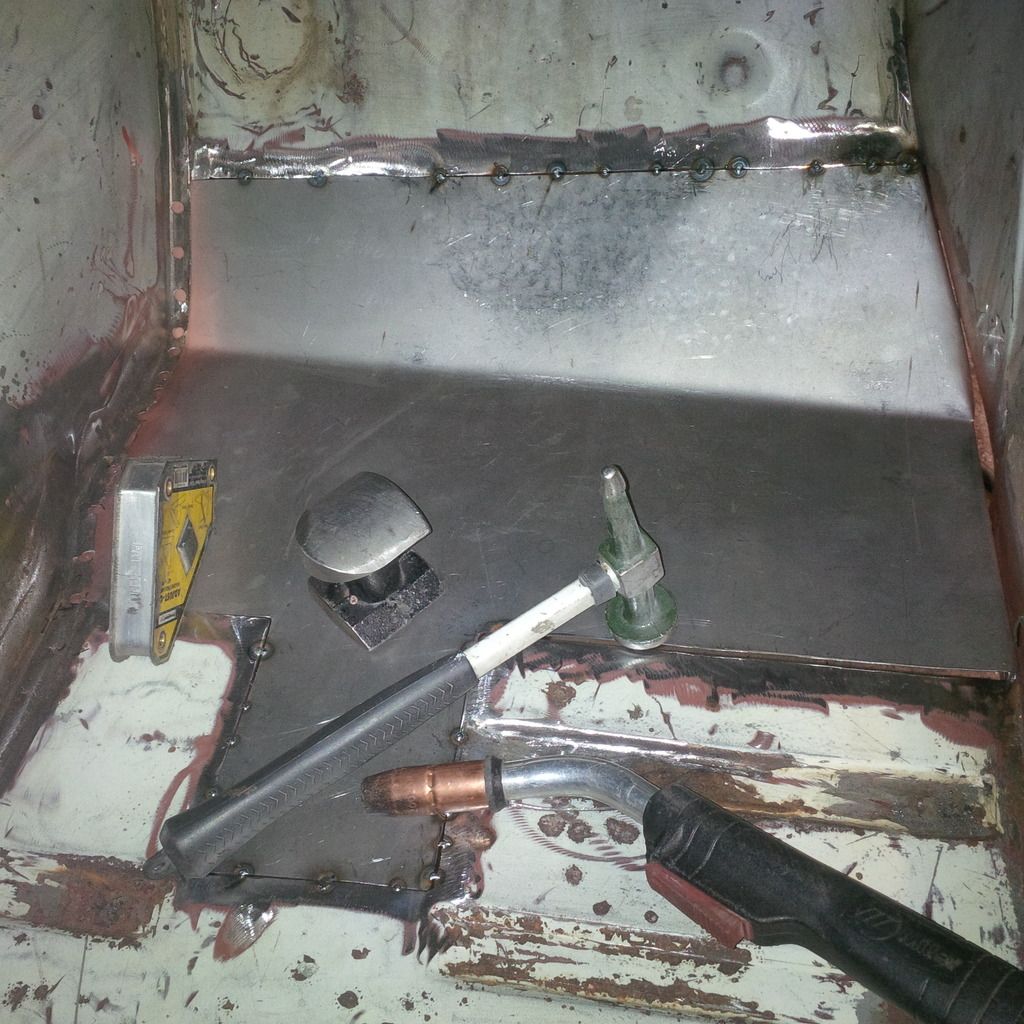
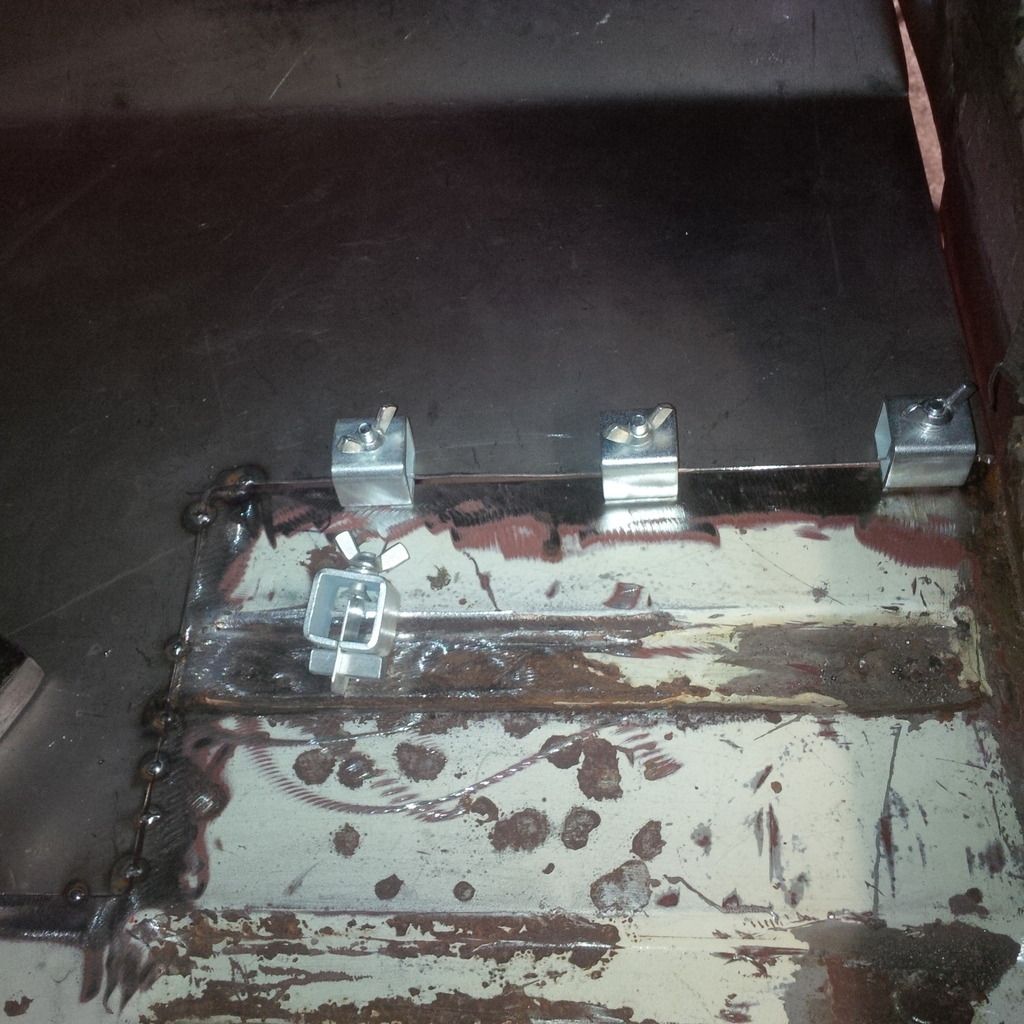
Tacked in place.

Image

The fit wasn't perfect - these little clamps help hold things in place. Lots of tack welds.

Image

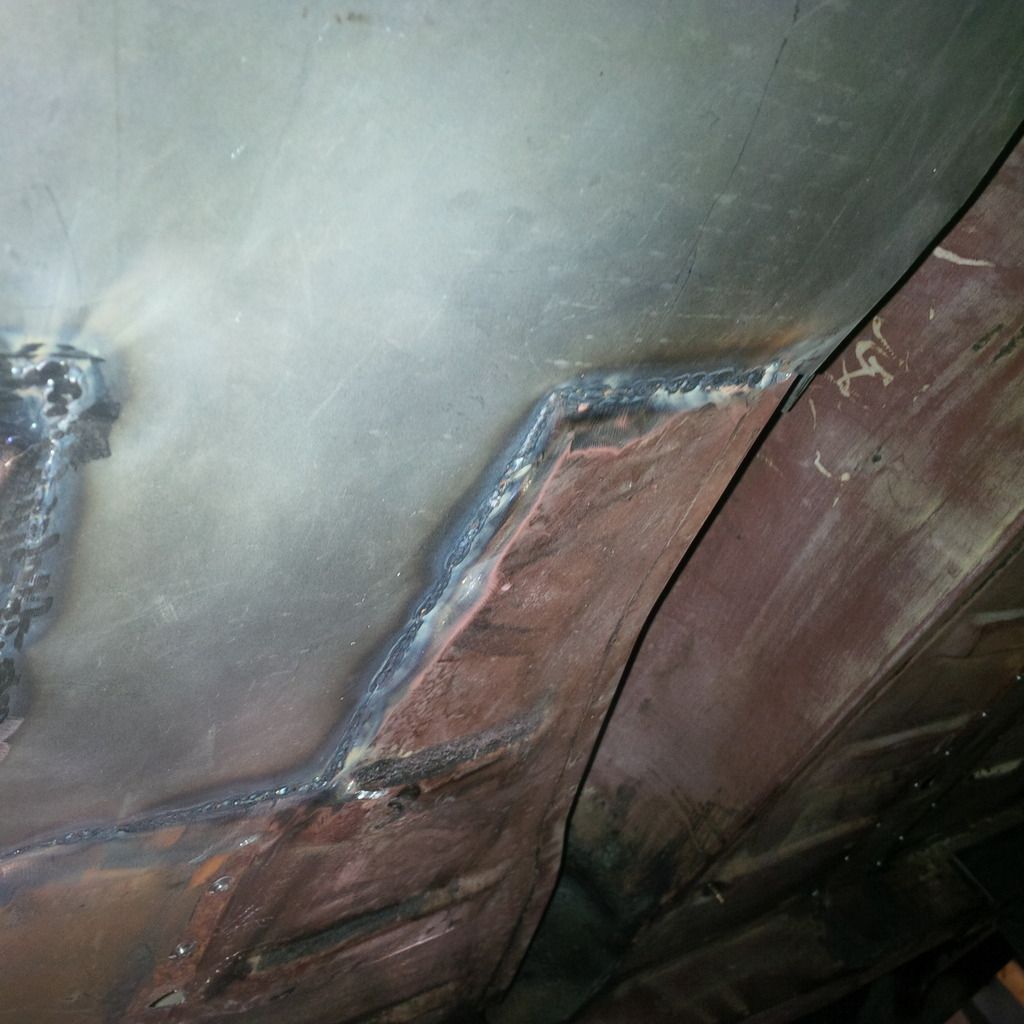
The old spot welds were drilled out and the panel was treated to some really good weld through primer. I generally hate this stuff, but the UPol brand with copper was as good as I've ever used. Use it - it keeps the corrosion between the panels down. Note I've also reversed how the panel overlaps the trans tunnel. It was just easier to go under instead of over.

Image

This shot shows the tacks and my use of a hammer to keep the panels parallel. Note, that the panel is not flat at the firewall, there is some shape. I hammered that bulge in over my wooden form and then planished it smooth.

Here it is on the other side.

Image

Should finish up pretty seamlessly.

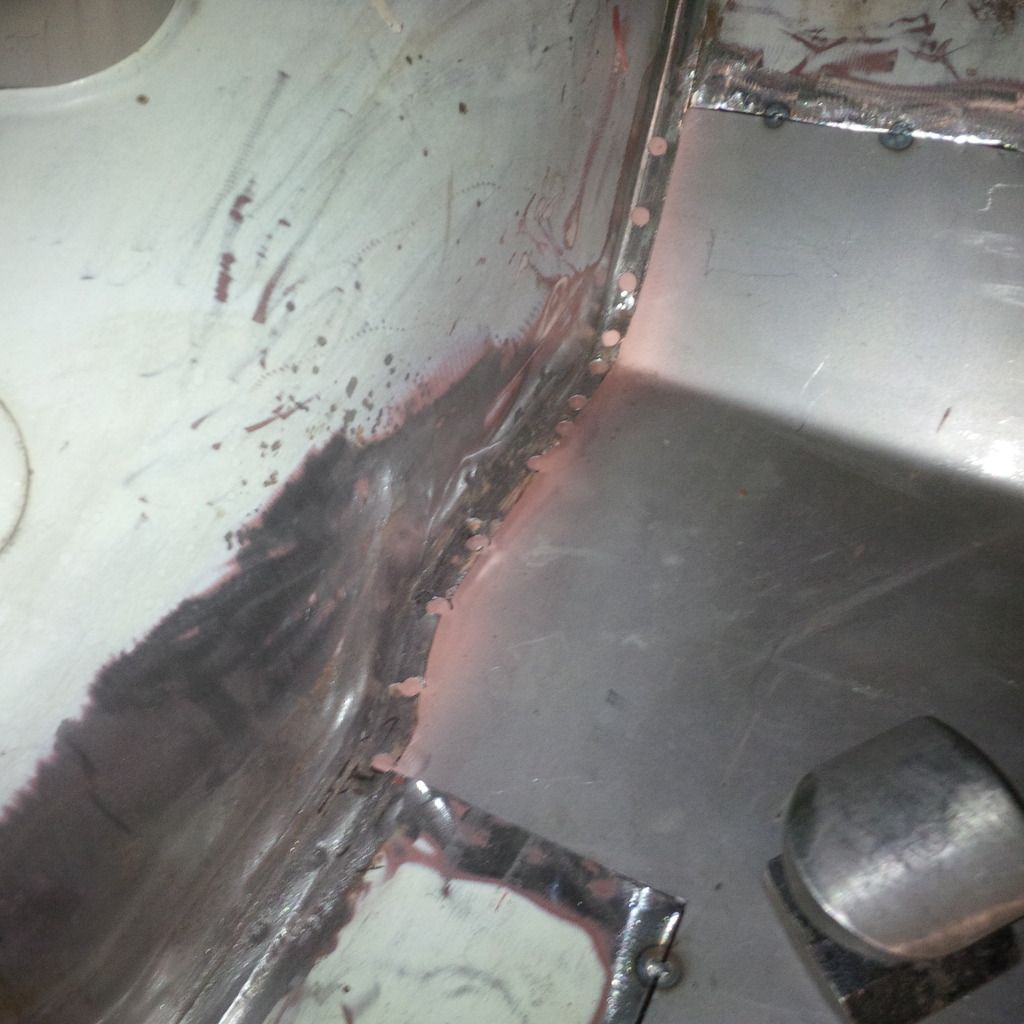
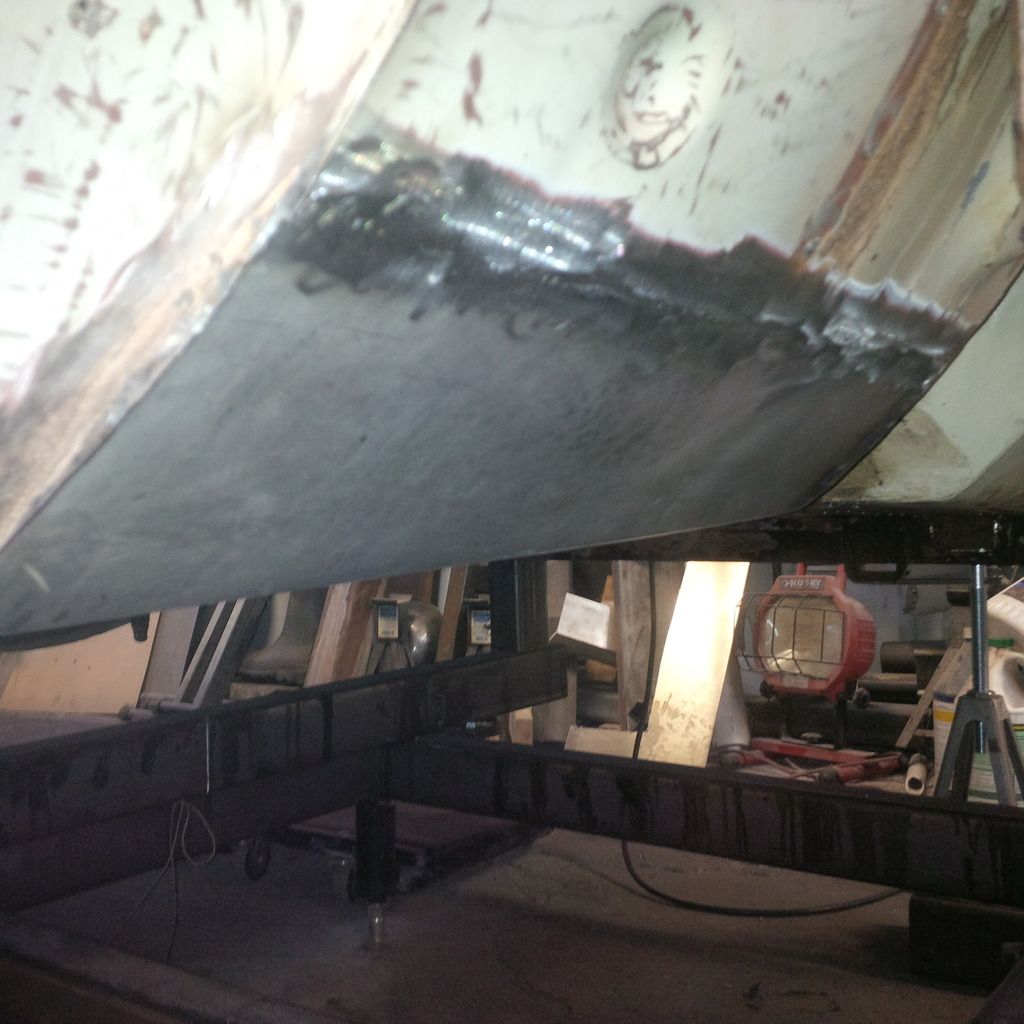
Get the welds tight and 100 % penetration and you're repaired. Again, I try not to stack tack welds to weld sheet metal as the distortion is crappy. Tight joins and small beads are your friends. It wasn't perfect, I had to stack a few tacks to fill a few 1/8" gaps. The welds are then ground top and bottom. Here's the back side.

Image

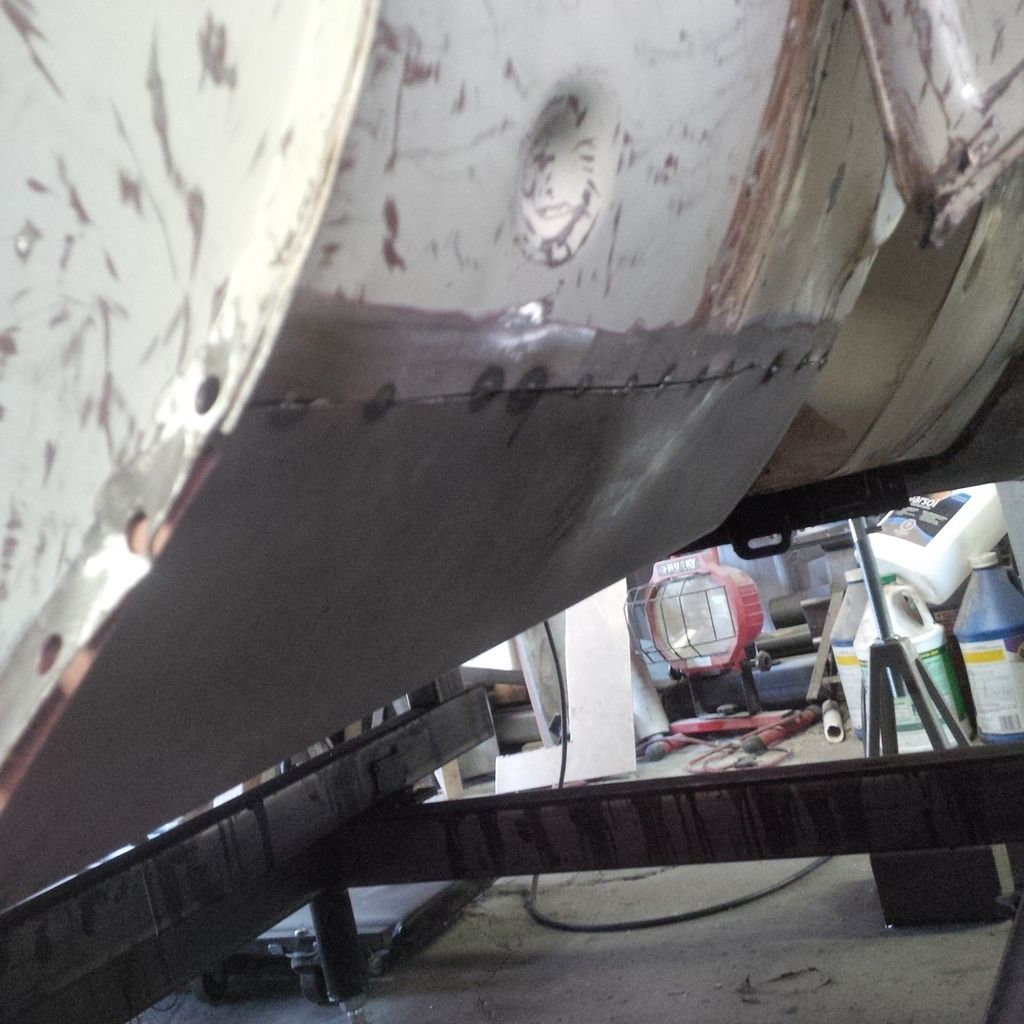
Finished - that'll do.

Image

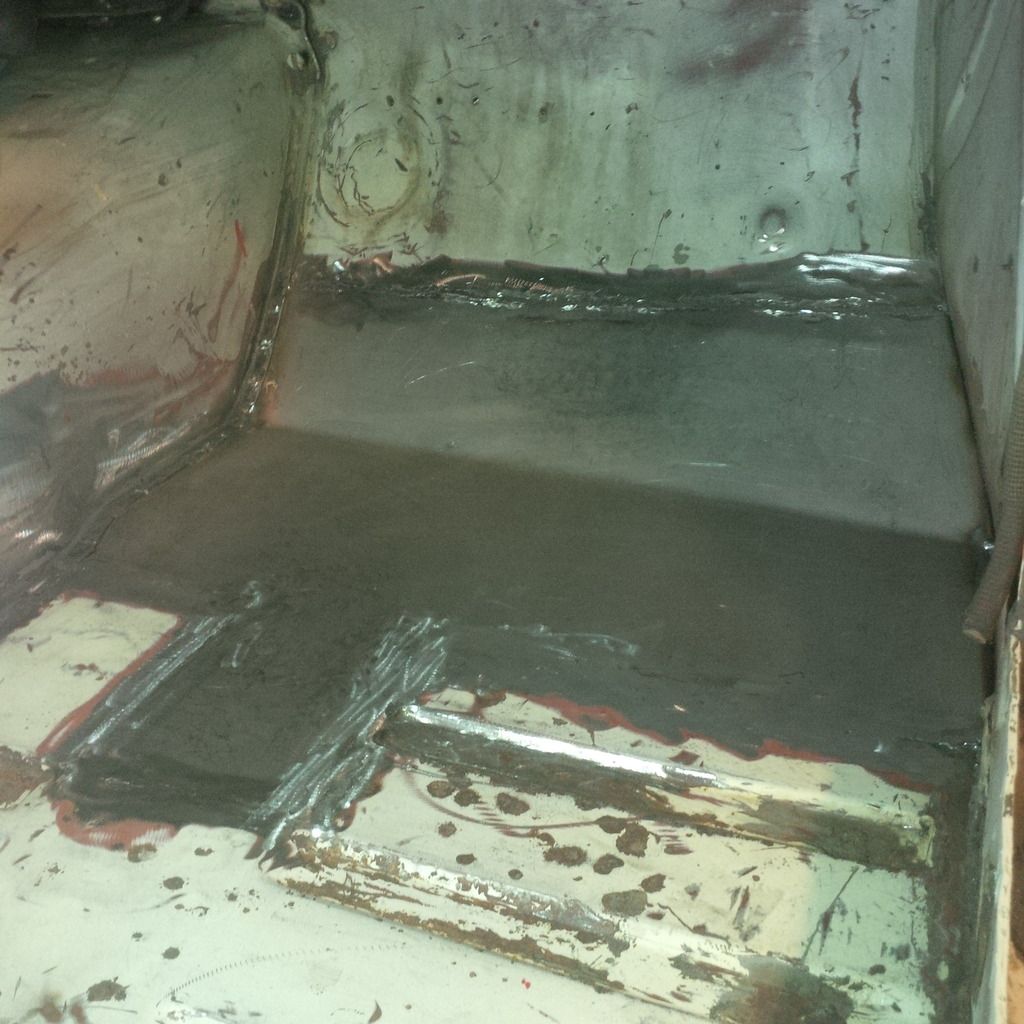
Inside - looking good. A little oil can - it'll straighten out when the frame rail and the outrigger are installed.

Image

On to the driver's side.

_________________
Coburn Performance - OCD comes naturally.


Top
 Profile  
 
 Post subject: Re: Project Canuck - 1966 Canadian Build Thread ... Finally
PostPosted: Sun Sep 06, 2015 7:18 pm 
Haha, I just built a W24 Octo-Turbo, now what?!
User avatar

Joined: Wed Jun 14, 2006 4:19 pm
Posts: 3131
Location: Lethbridge, AB
Moving on to the drivers side seemed easy enough...just get the pedal set clearance I need then fabricate a box to hold all the floor mount pedal goodness and be done with it. Not so fast Sparky. Staring at it for an hour yielded a few conclusions. First up, the placement of the engine shouldn't matter, or so I thought. I was more worried about the frame rail and it's relationship to the cross member. For those who have no idea why I'm rambling, you've never driven a 122. The accelerator pedal is painfully close to the transmission tunnel.

To fit the engine in the car, the transmission tunnel needs be be a little larger all over to fit the bell housing. But that growth should all by in the forward sloping area of the tunnel, not around the pedal area (which is low down). I had pulled the entire transmission tunnel from firewall back from a 240 - it's far too large to fit in a 122. I will need to use the back section to fit the transmission shifter, but the front is massive and I can't use it.

So to get this pedal cluster installed, I really have to mock up the engine and dare I say it...the transmission. Dammit. I was hoping to do this in the next step. So out of the shed the engine comes and I get started.

Oh boy...that's not going to work...firewall is going to need modification big time.
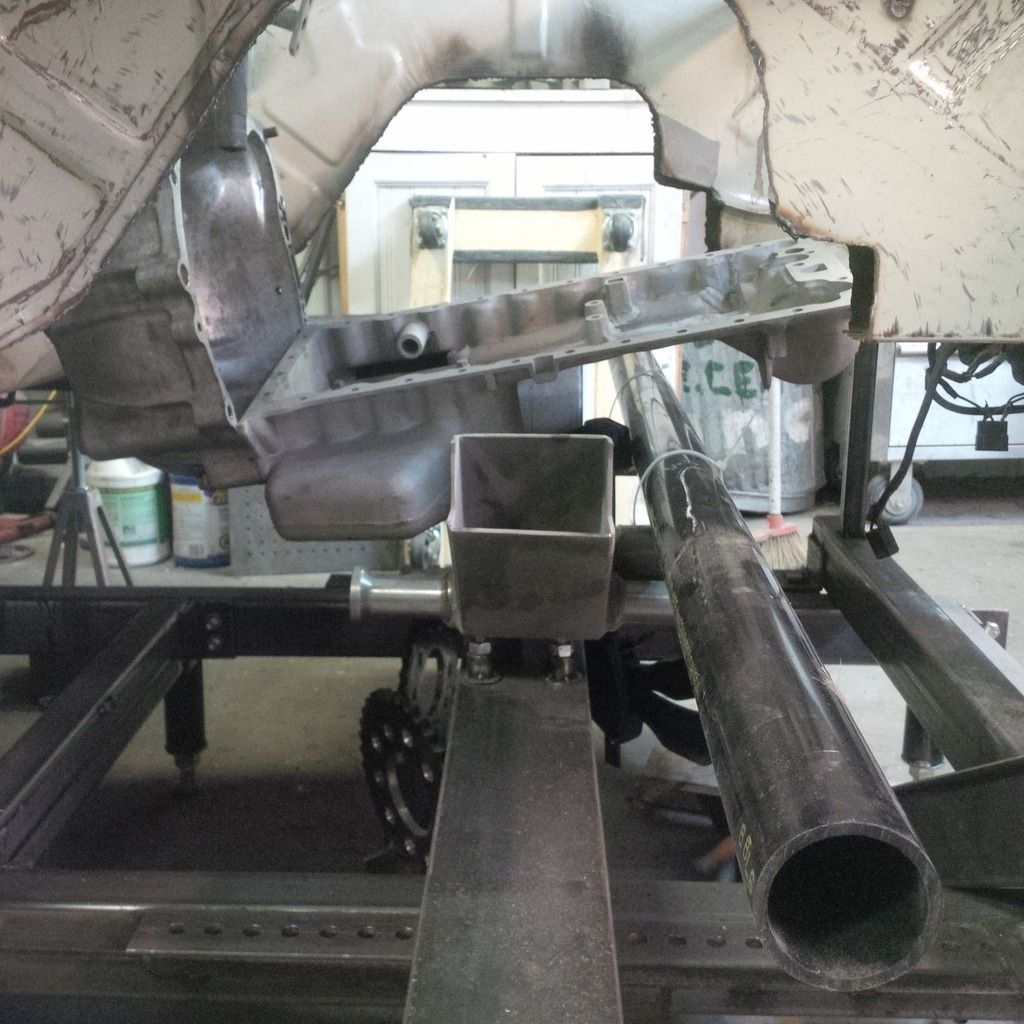
Image

I suspended the pan on the wiring harness binding strap (finally something they're useful for) and had a look at the clearance problem.
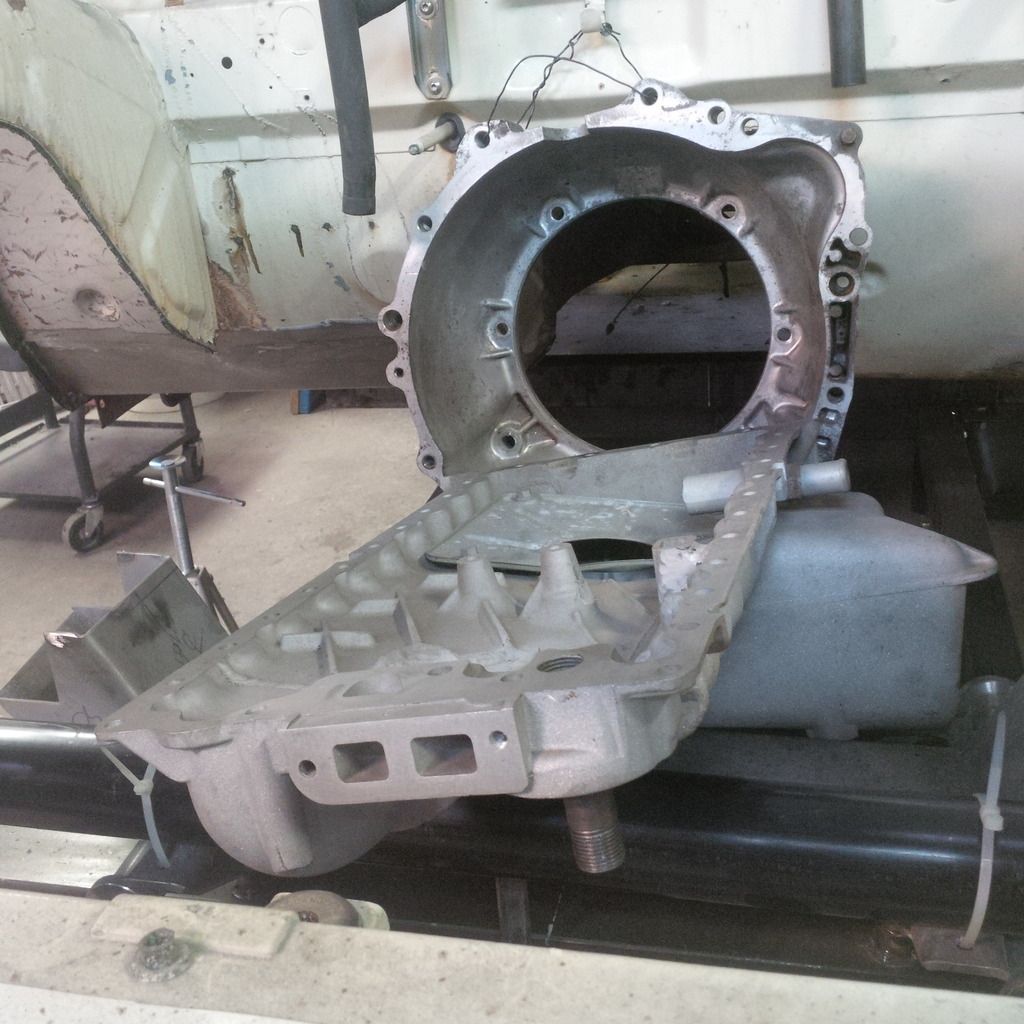
Image

It's gotta go down, but you get the idea.

A look closer to the back.
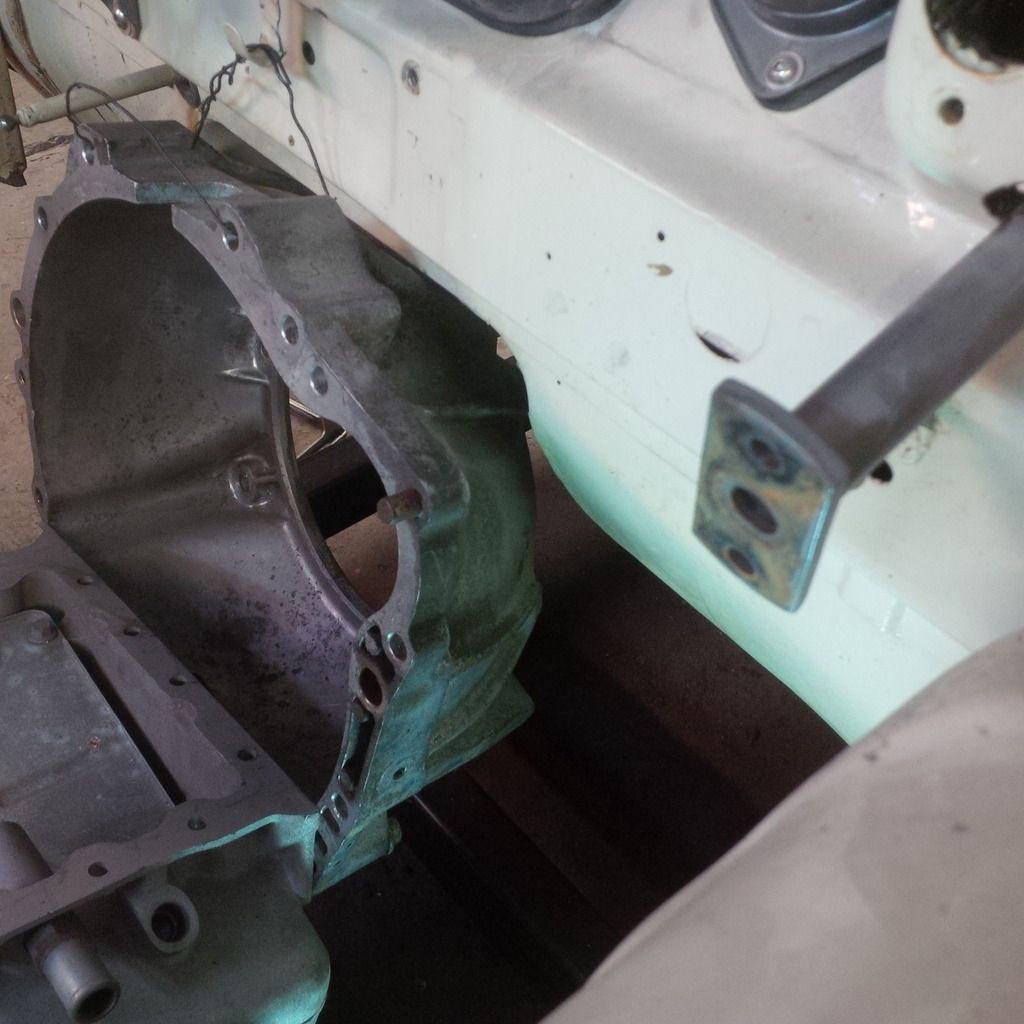
Image

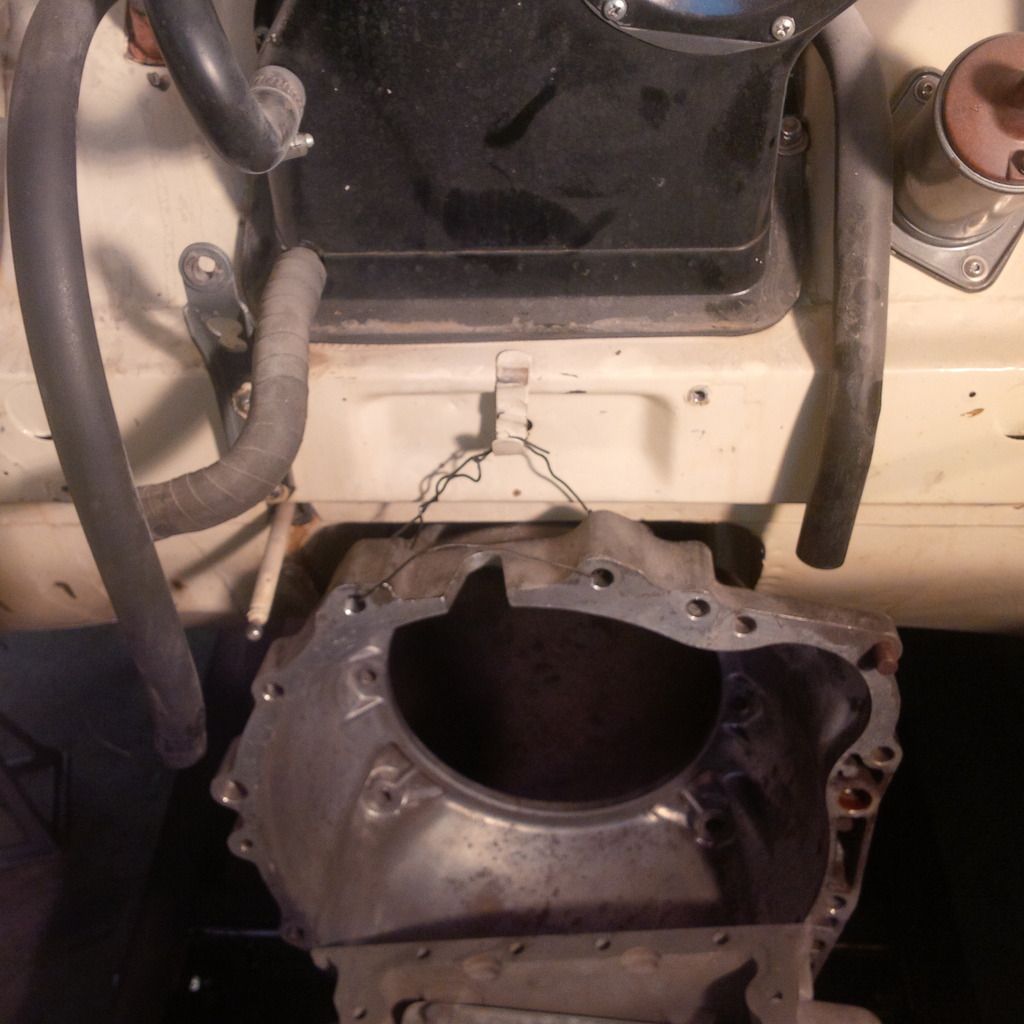
Starter is mounted high...and this presents some issues with clearance on the firewall.
Image

Enough with that play - it's clear that the firewall/engine/trans has to come first...then the pedal cluster. So the trans is going to have to come out of hiding and get stripped soon...like this week soon. I took the bell housing off the oil pan and levelled it in both dimensions. With a bit of ABS pipe serving as my steering rack and the cross member installed in place, I put the pan on to see where my engine clearance issues will be.

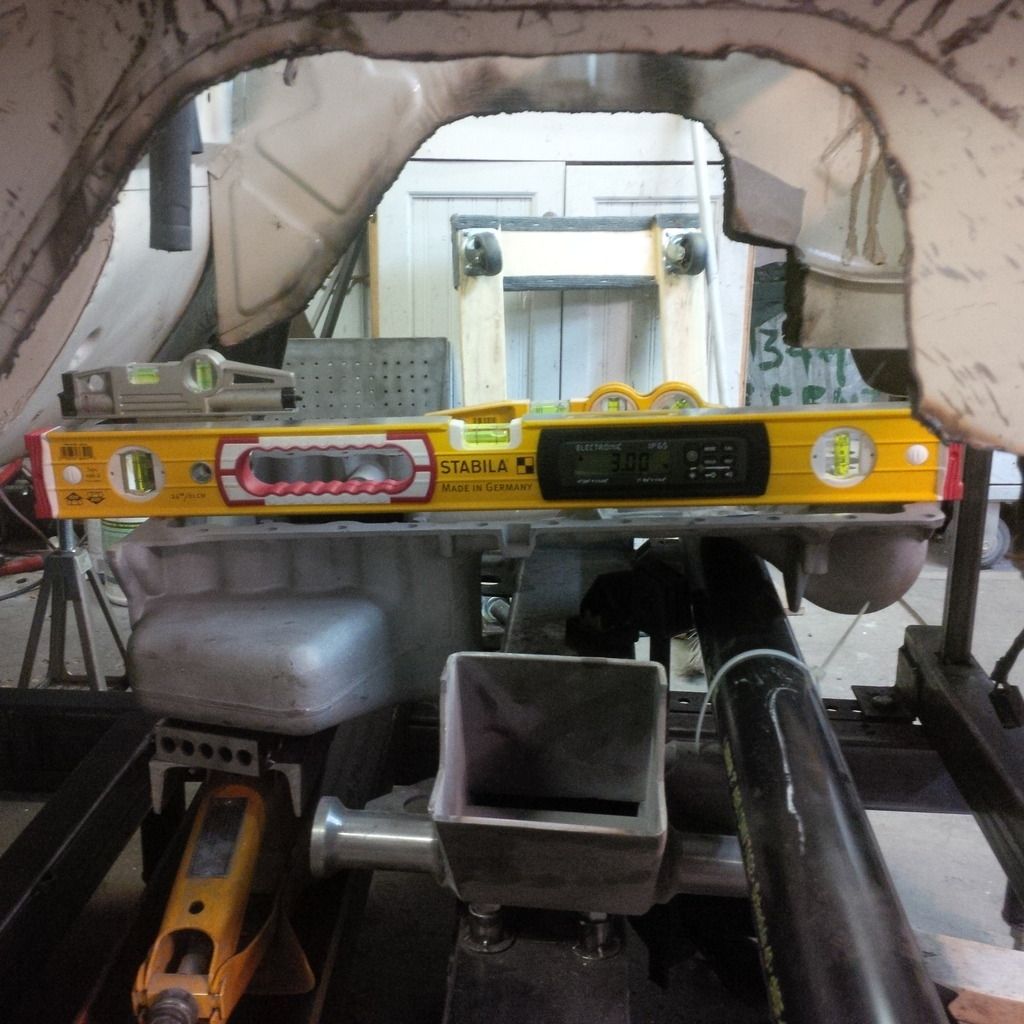
When I set a laser line up at the crank level, it was clear that the height of the steering rack is going to cause me a few issues. I expected as much, so no real surprise - the centre of the crank would be at the top of the tunnel, that's no good. Engines don't run level anyway...they all (pretty much) tilt to the rear to get some angle on the drive shaft u-joint. So I set it up at 3 degrees down...not enough, then I tried 4 degrees.
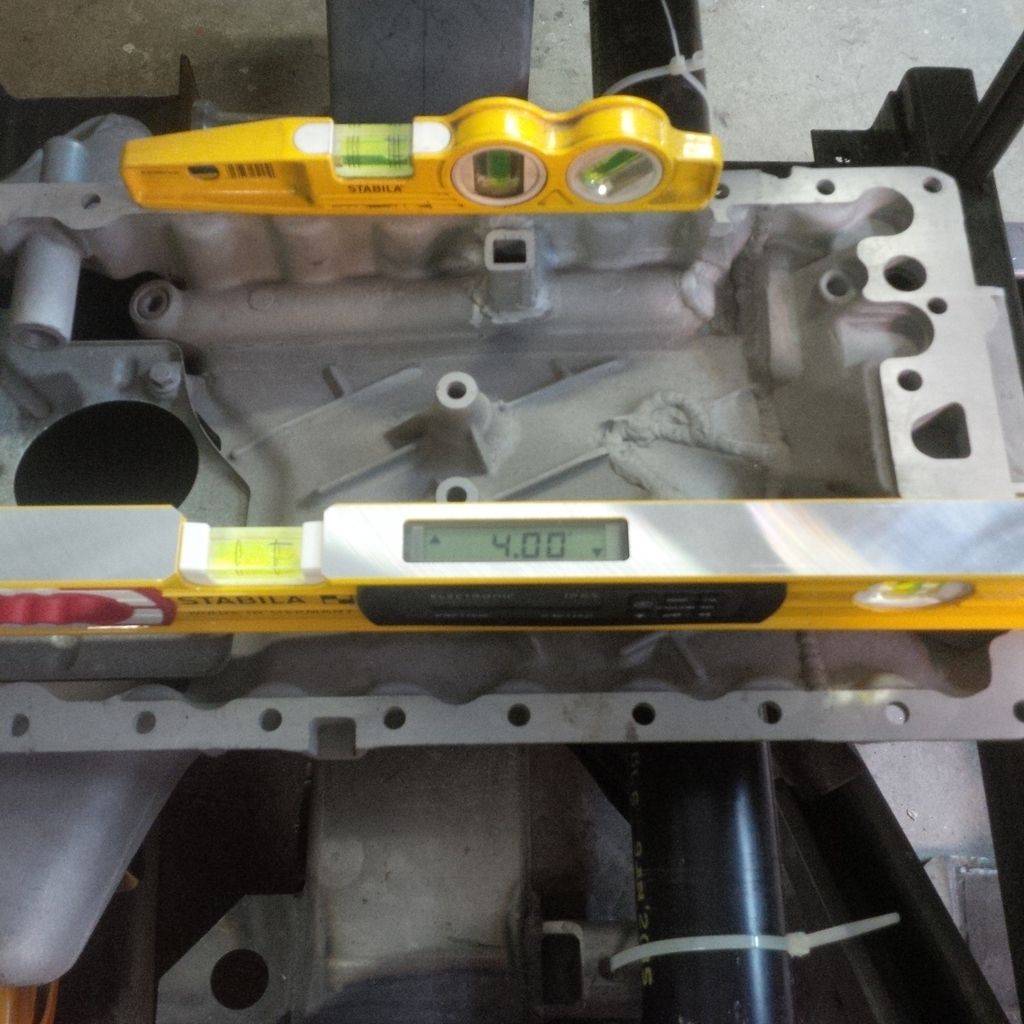
Image

This pic shows the level at 3 degrees...I didn't take a side shot of 4 degrees.
Image


So that's where we sit.

Things I know:

1. The real rack needs to go on the cross member with the rest of the parts.
2. The transmission needs to be bolted on the bell housing and the whole mess fitted in a real mock up.
3. More sheet metal needs to be cut/modified/put back together than I thought.
4. The pedals will have to sit for a little while as the rest gets sorted out.


In the mean time, the heater is now out as is the rest of the firewall junk. At least that got accomplished.

_________________
Coburn Performance - OCD comes naturally.


Top
 Profile  
 
 Post subject: Re: Project Canuck - 1966 Canadian Build Thread ... Finally
PostPosted: Mon Sep 07, 2015 3:53 am 
Haha, I just built a W24 Octo-Turbo, now what?!
User avatar

Joined: Wed Dec 21, 2005 8:40 pm
Posts: 3492
Location: Calgary, Ab
I'm glad we had that talk about what I've learned since picking up my car. Whew, you've come a long way in a short time, not just in the fabrication but in planning, problem recognition and trouble avoidance. Keep it up!

122_Canuck wrote:
In the mean time, the heater is now out


Yay!!!


Top
 Profile  
 
 Post subject: Re: Project Canuck - 1966 Canadian Build Thread ... Finally
PostPosted: Mon Sep 07, 2015 8:22 pm 
Haha, I just built a W24 Octo-Turbo, now what?!
User avatar

Joined: Wed Jun 14, 2006 4:19 pm
Posts: 3131
Location: Lethbridge, AB
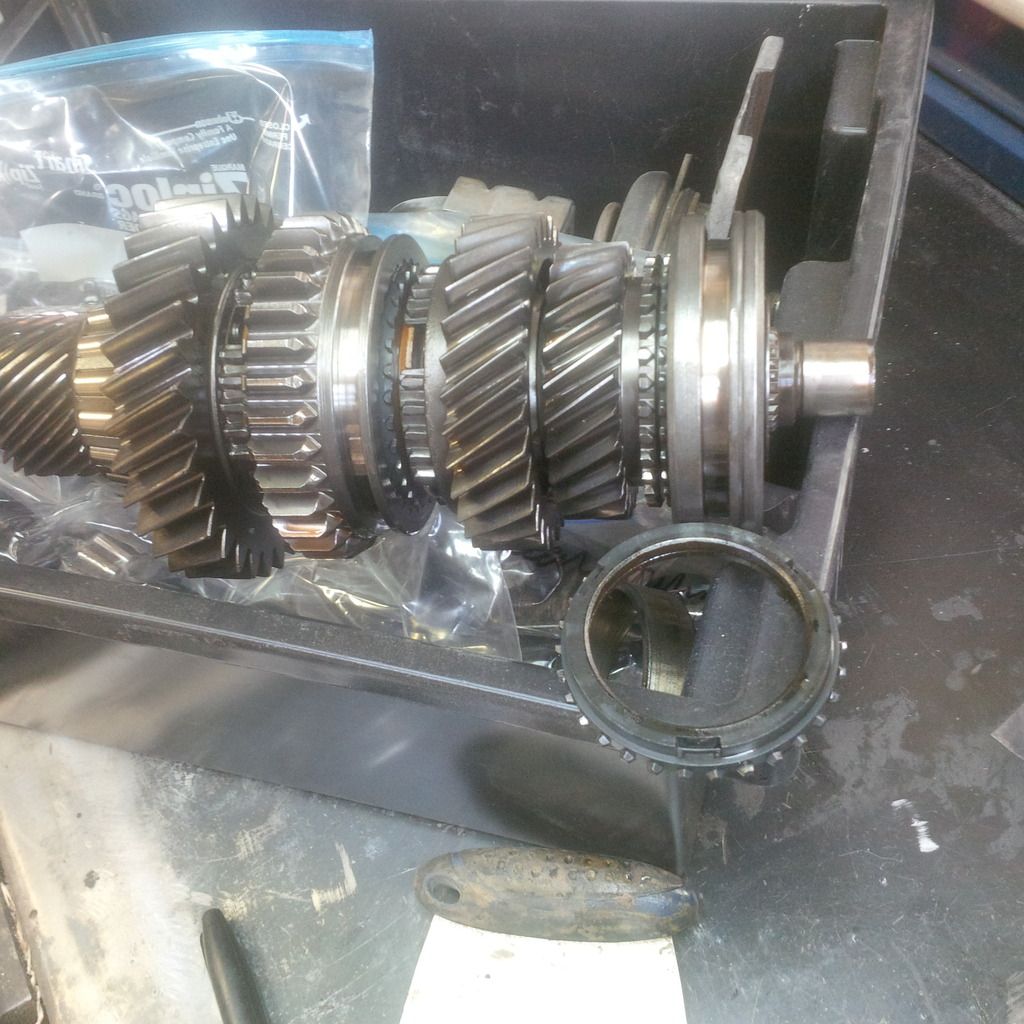
I dug out the T5 mock up transmission that will eventually be used in the car with new internals from the parts stash and pulled it all apart so I can mock the drive train into the car. I pulled this trans on my birthday 2 years ago and opening it up was a birthday present all over again. The internals are super clean...with the exception of reverse. That gear is done. The rest have sharp dogs and the syncro rings are literally perfect. Not a scratch on them. All gears on the layshaft are perfect. So instead of tossing it all in the scrap pile in exchange for new higher performance gears, this set is going to be spares for the trans in the 242.

Image

Look at these shifter detents. Perfect - literally like new.

Image

Tossed it back together and into the blast cabinet for a quick clean. Now done and ready to rock. I've got to get the adapter fitted to the trans/bell housing and it's got to be much tighter than the giant square that it is right now. Pitter-patter lets get atter this week.

_________________
Coburn Performance - OCD comes naturally.


Top
 Profile  
 
 Post subject: Re: Project Canuck - 1966 Canadian Build Thread ... Finally
PostPosted: Sat Oct 24, 2015 6:27 pm 
Haha, I just built a W24 Octo-Turbo, now what?!
User avatar

Joined: Wed Jun 14, 2006 4:19 pm
Posts: 3131
Location: Lethbridge, AB
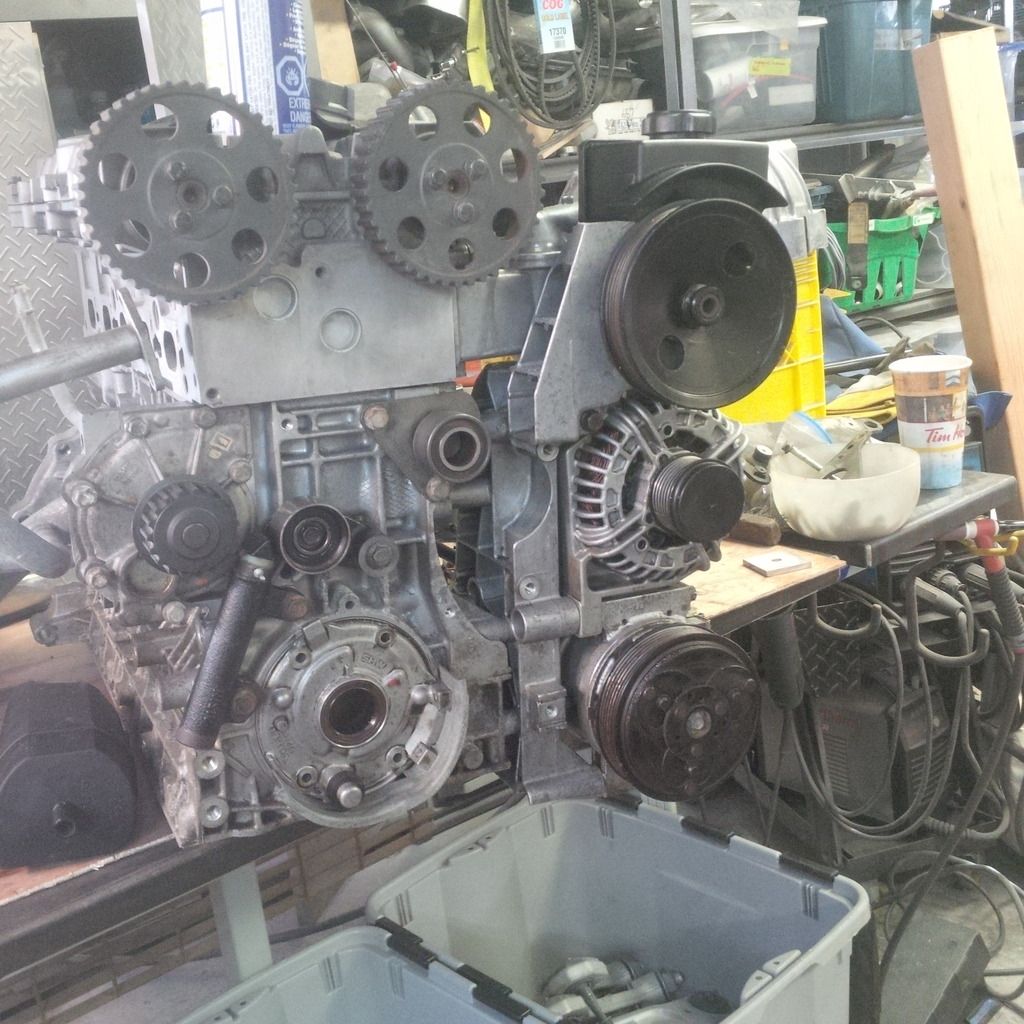
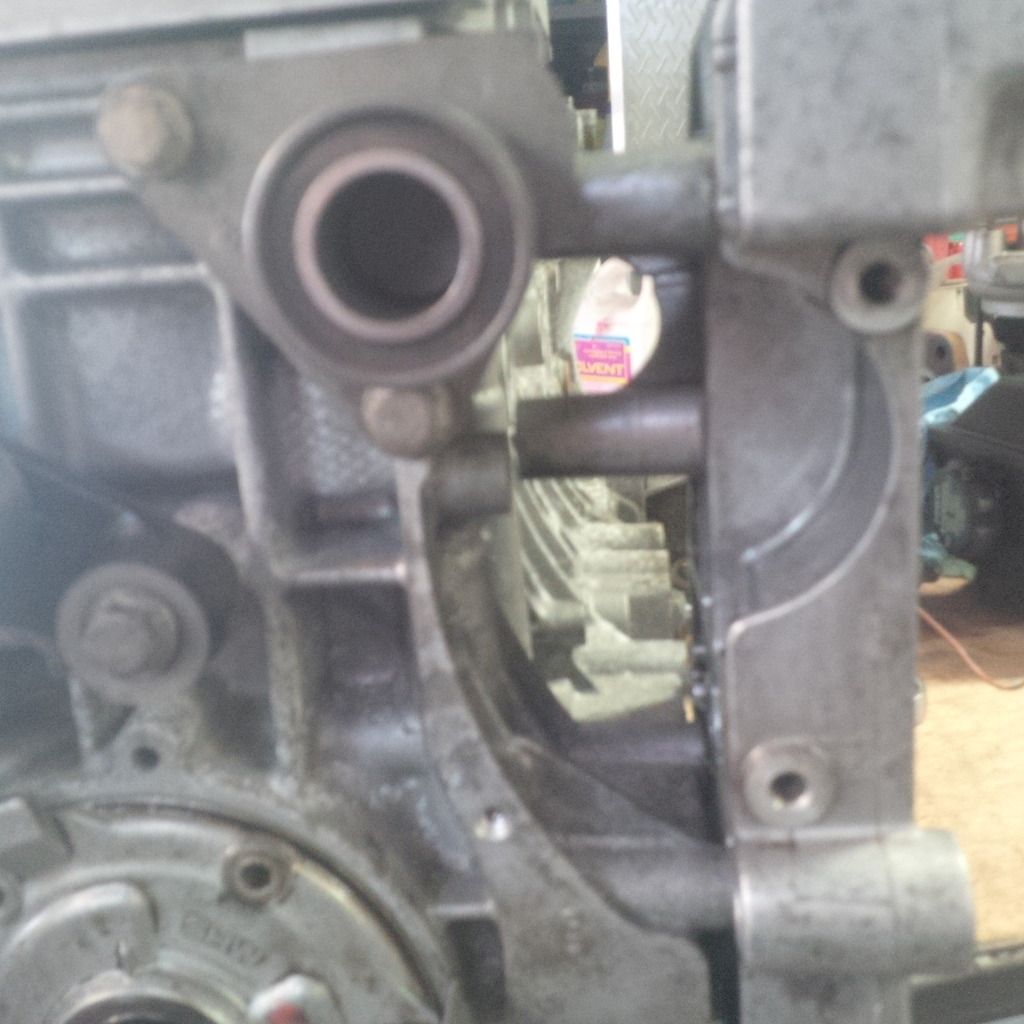
Time for a little update. I've been very busy with life and work and haven't had a ton of time in the garage. I've been trying to get the engine sorted out (or at least a little more clear). Here's where we sit, I've got an unknown B5234T RN short block. I have had it for a long time and it always looked in pretty good shape. I had an 850T head/block and accessories (N block) as well as a bunch of parts from a 960 (oil pans and such). Unlike every other Volvo engine I've worked on, these three engine are all different...sure they're related in some ways, but in many ways they are completely different. I thought I'd be able to use the accessories and bracket from the 850 on this short block and we know that the earlier head (non-vvt) fit just fine. That's about as far as the swapping can go.

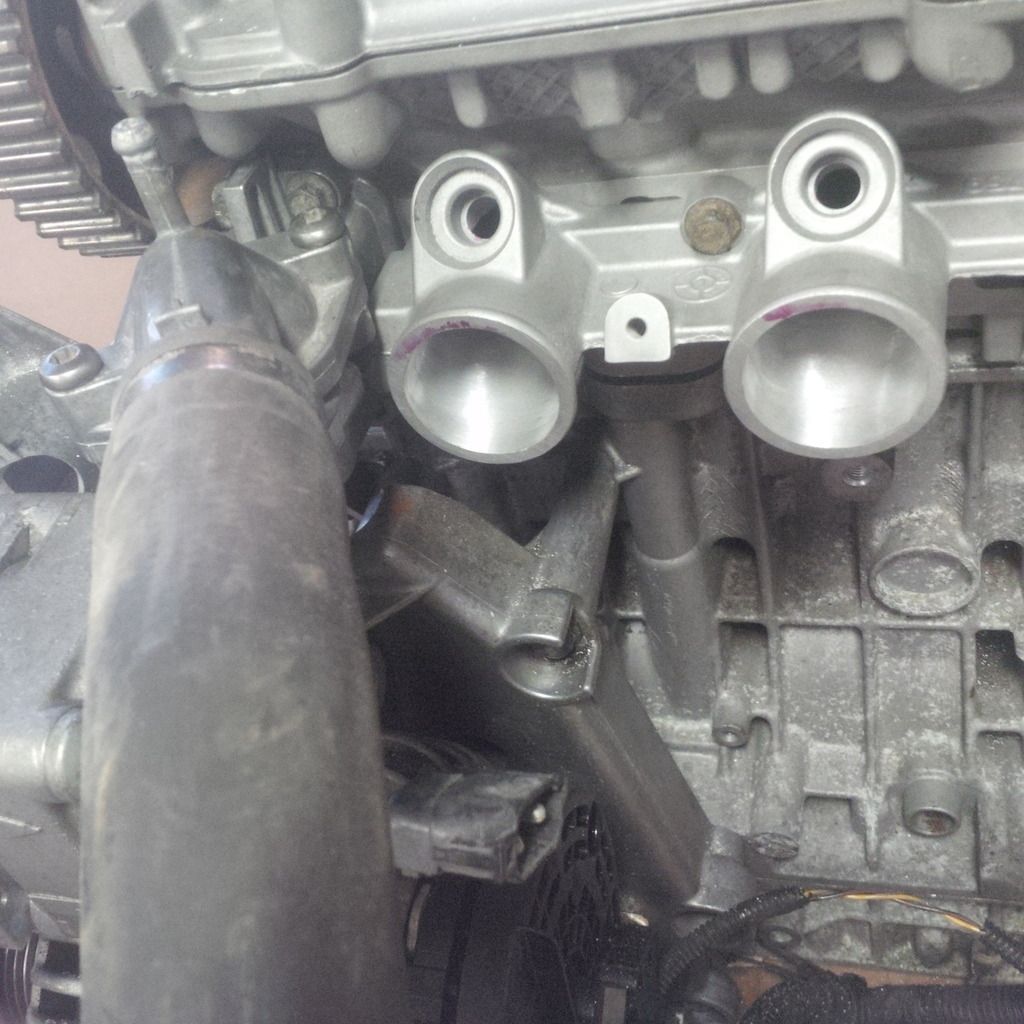
So the first shocker was that the 960 accessories and bracket do not fit on the 850 and that stuff won't bolt up to the RN blocks at all. Sure they look a like, but they are not the same. Here's a little look at the missing bosses for the later accessory bracket to bolt up to the earlier block.

Image

This also means that things like belt tensioners for both the timing and serpentine belt are not interchangeable either. So if anyone needs a few 850 parts - let me know.

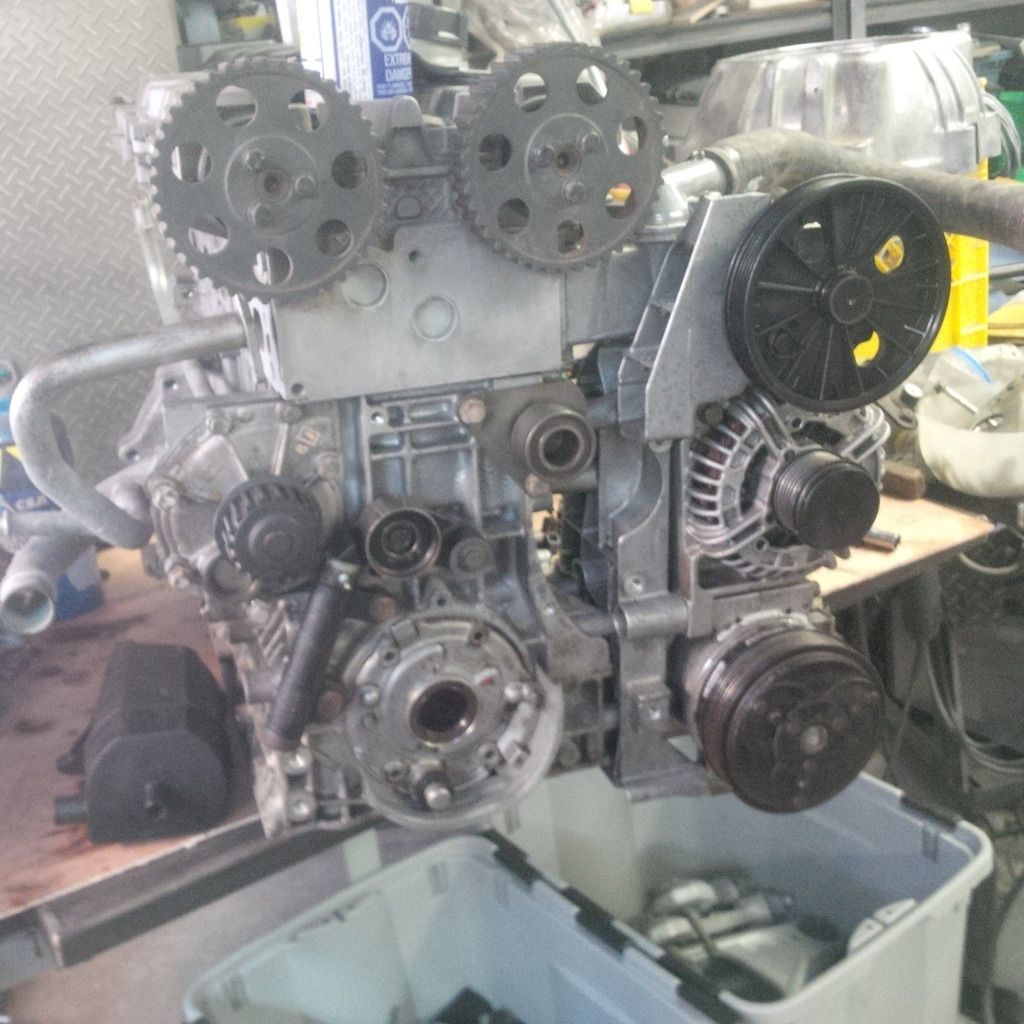
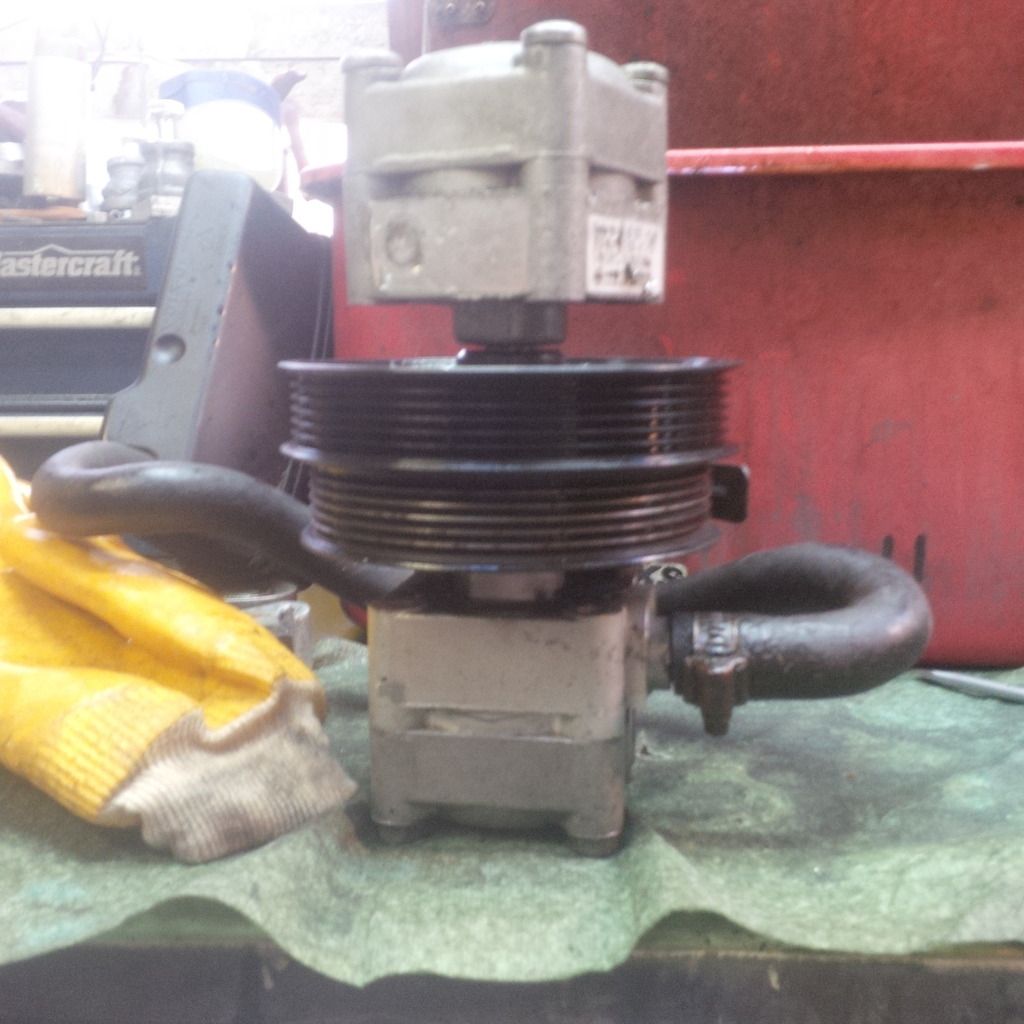
After finding out that basically nothing that I had would work even for a mock up engine, I drove to Calgary to get access to their JY's and Matt and I pulled the accessories and bracket from an RN engined car (pulled them all from one car, so we know they're going to work. Just for fun, we found a power steering pump a different car and as someone had already pulled it and it looked clean, I took it home as well. Guess what, it's not the same as the pulley is a different diameter even though the pump is the same. Very un-Volvo.

Image

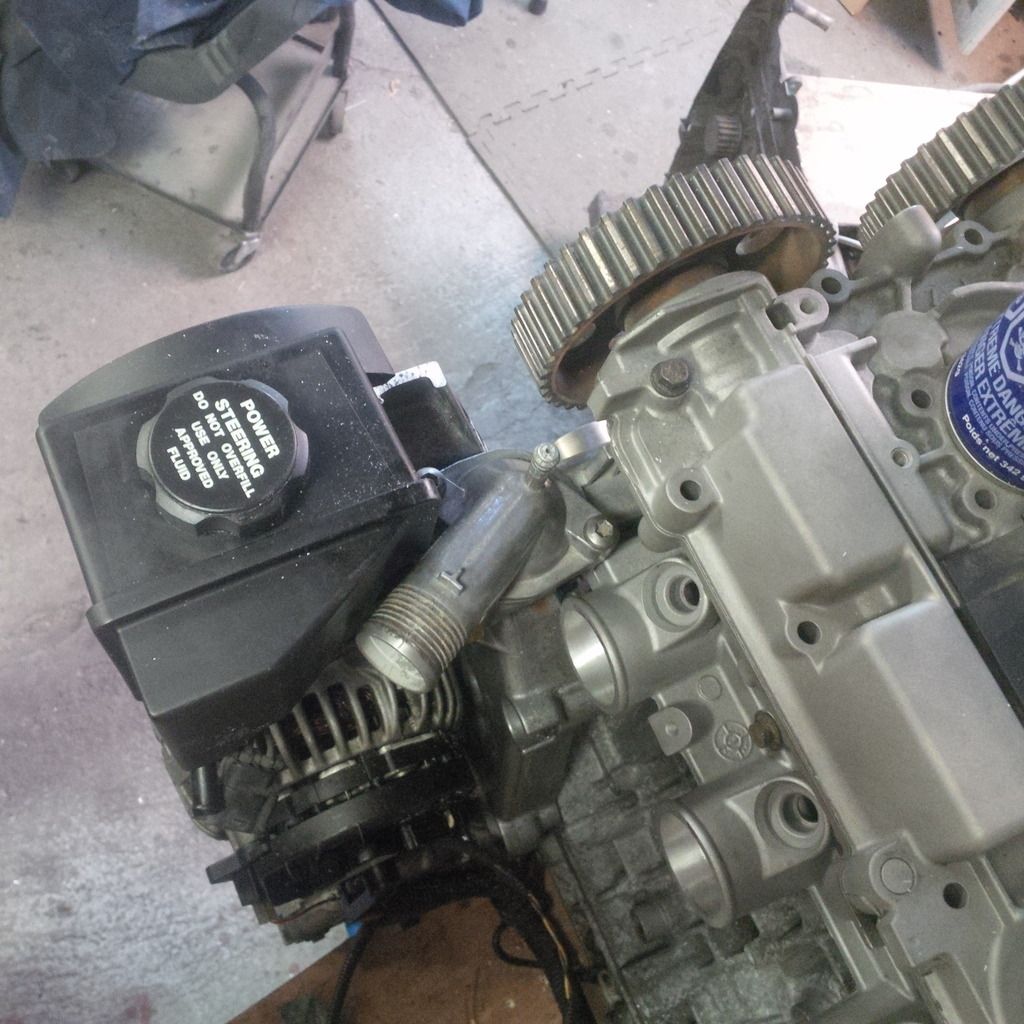
I wasn't planning on running this pump as it requires a remote reservoir and while I have one, it's just more clutter. So I thought I'd use the compact integrated pump. It does't mount to the later bracket properly and the holes don't line up. I tried cutting up the bracket in a vain attempt to make this all work, but the pump would need to be shimmed to get it to line up with the other accessories and then that puts the pump into the thermostat housing.

Image

Image

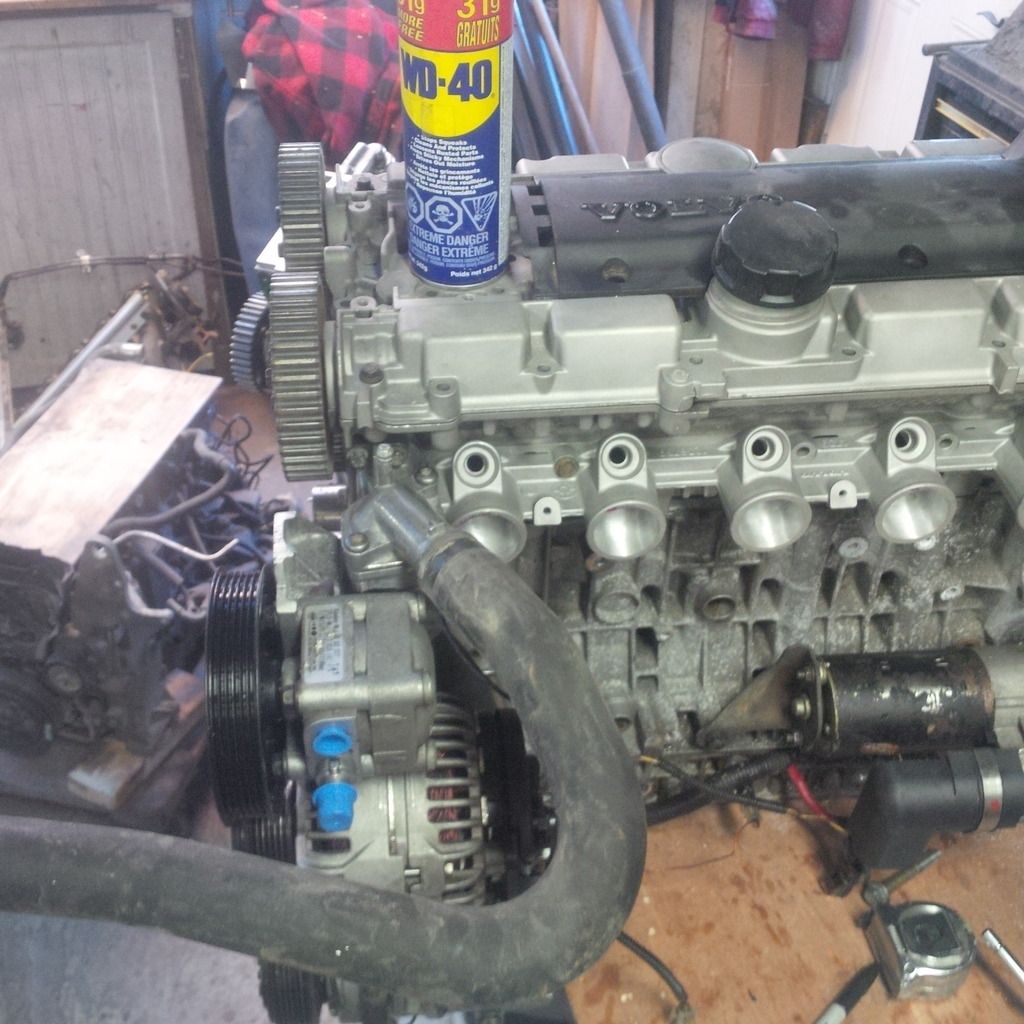
So to make my life easier, we're back to using the correct pump and remote reservoir.

I'm learning slowly - just don't mix and match this stuff.

Image

See, that works.

Not too sure how I'm going to make this first runner work, but I can't worry about it all that much until I've got it in the car.

Image

It's a bit lower as well and I'll be able to make use of the engine lift eye that I had cut off of the spare bracket.

Image

Next up was to try to work out which RN engine I've got. It looks to be a reasonably early engine which is good as the 2.3 is stiffer walled than the 2.5 - but they changed to the longer rod RN in 2002 and I was hoping to get the longer rods/shorter pistons and something like 7 kg lighter rotating assembly. This would be the engine to have. Well, this "low mile" engine hadn't been cracked by me - so it was time to see what I had. That way I could order up the right H-beams and get the thing deglazed and put a set of rings in it and get the real engine built.
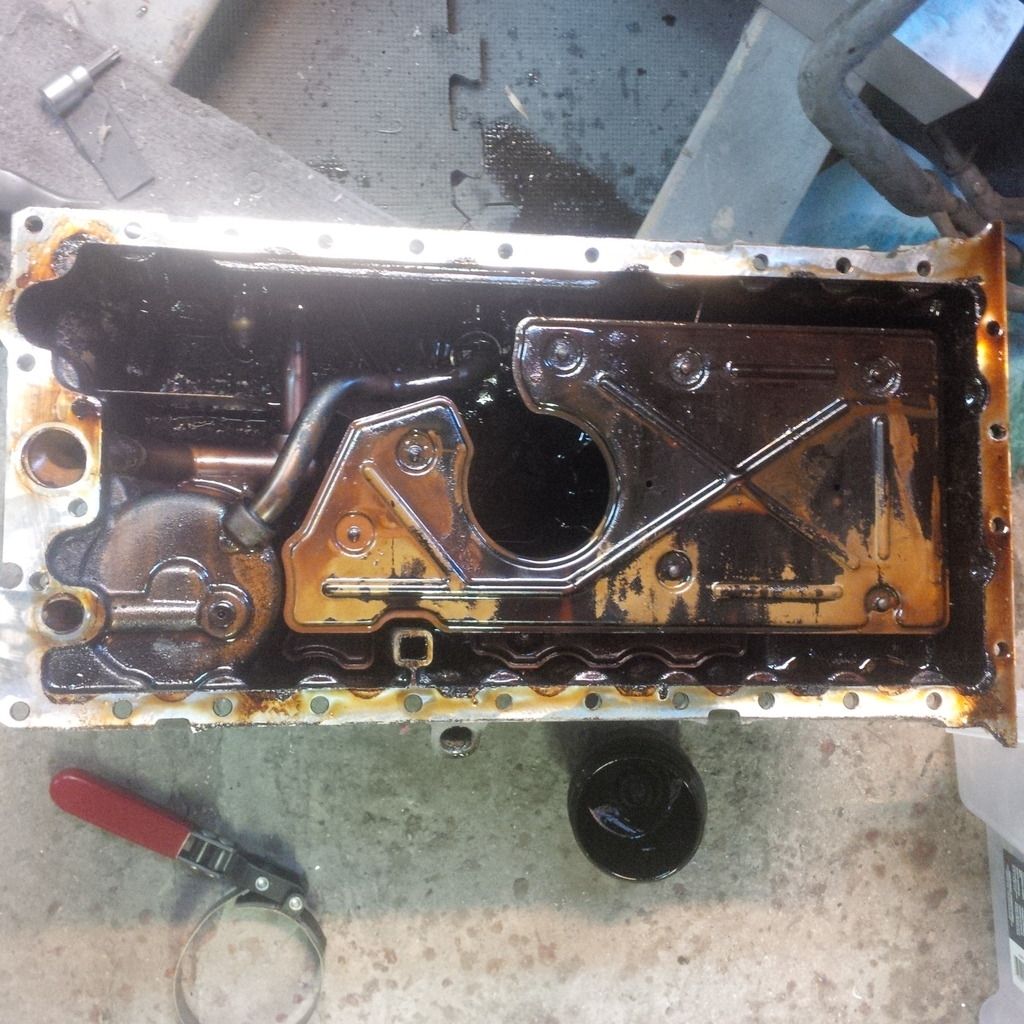
So I knocked off the pan - YIKES - WTF do people not change their oil?

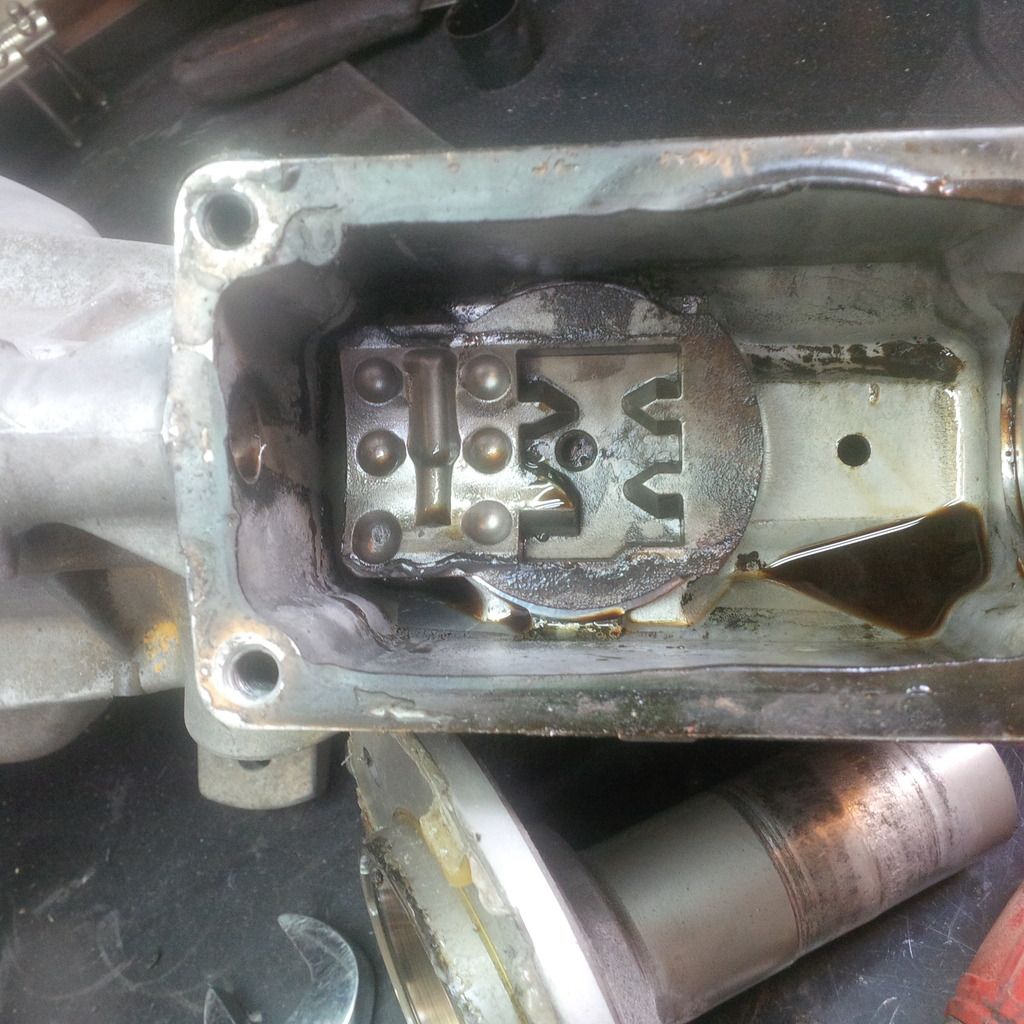
Image

Look at the insides...note the girdle is not "windowed" - look at that build up. That's not going to come clean without a lot of effort.

Image

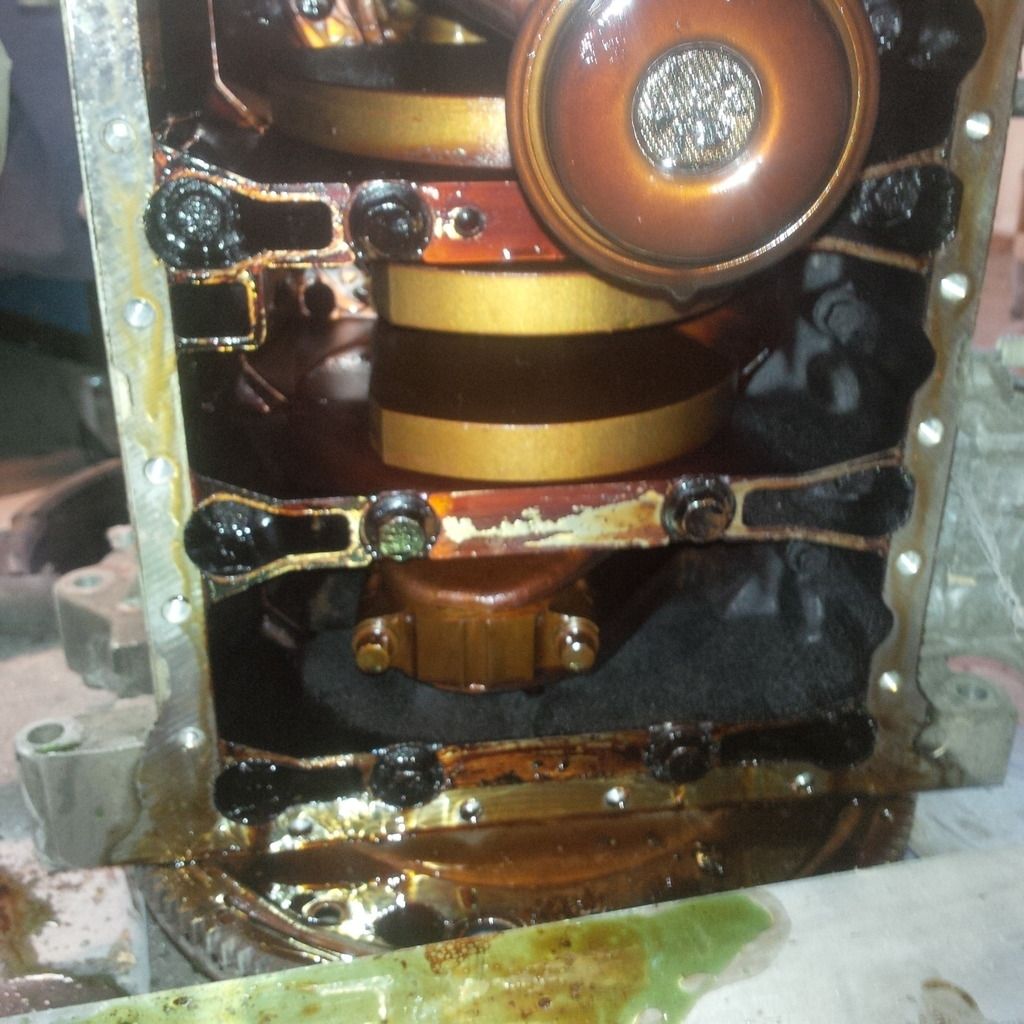
And it's got the short rods and heavy crank - DAMMIT. Not too sure what to do now.

Image

Pistons are NOT scuffed but the rod bearings are done and I suspect the mains are not better. I hate people that don't change their oil.

_________________
Coburn Performance - OCD comes naturally.


Top
 Profile  
 
 Post subject: Re: Project Canuck - 1966 Canadian Build Thread ... Finally
PostPosted: Sat Oct 24, 2015 8:14 pm 
Haha, I just built a W24 Octo-Turbo, now what?!
User avatar

Joined: Wed Dec 21, 2005 8:40 pm
Posts: 3492
Location: Calgary, Ab
Frustrating, to say the least!


Top
 Profile  
 
Display posts from previous:  Sort by  
Post a new topicPost a reply Page 31 of 54   [ 801 posts ]
Go to page Previous  1 ... 28, 29, 30, 31, 32, 33, 34 ... 54  Next


Who is online

Users browsing this forum: No registered users and 2 guests


You cannot post new topics in this forum
You cannot reply to topics in this forum
You cannot edit your posts in this forum
You cannot delete your posts in this forum
You cannot post attachments in this forum

Jump to:  
cron


Powered by phpBB © 2000, 2002, 2005, 2007 phpBB Group
610nm Style by Daniel St. Jules of Gamexe.net