Change font size
It is currently Sun Jun 08, 2025 4:36 am


Post a new topicPost a reply Page 13 of 54   [ 801 posts ]
Go to page Previous  1 ... 10, 11, 12, 13, 14, 15, 16 ... 54  Next
Author Message
 Post subject: Re: The B20 Assembly Thread
PostPosted: Wed Sep 23, 2009 5:59 pm 
Haha, I just built a W24 Octo-Turbo, now what?!
User avatar

Joined: Wed Jun 14, 2006 4:19 pm
Posts: 3131
Location: Lethbridge, AB
Stedenko wrote:
I just wanted to drop in to say that I'm on the edge of my seat with this thread. I went back and read the entire thing and loved it. I've got a '67 122S that I really like, but I need to do a few things so it'll pass inspection for insurance. The white backup lights don't work and the inspector said that there is some fluid leaking on the passenger side rear axle area near the wheel.

I'm a wannabe car mechanic (lots of enthusiasm, not much skill), but I've got all winter to figure a few things out. Your thread is inspiring. Thanks!


PM sent - just to keep the thread on topic.

_________________
Coburn Performance - OCD comes naturally.


Top
 Profile  
 
 Post subject: Re: The B20 Assembly Thread
PostPosted: Wed Sep 23, 2009 8:33 pm 
Haha, I just built a W24 Octo-Turbo, now what?!
User avatar

Joined: Wed Jun 14, 2006 4:19 pm
Posts: 3131
Location: Lethbridge, AB
So, more quality time in the garage...if Matt could be more right I'd be scared. How much off was Greg's timing mark? I attached the chop stick to my dial indicator to get a very accurate measure of TDC from the pulley. My mark was 5 degrees off! That makes a little difference. Shit - why didn't I think to check that mark.

I've pulled the plugs for your inspection - I was very pleased with my photo's and expect lots of complements on my photo skills. These are the best close-ups I've every taken with the crap camera. They look just fine to me with similar colour down the ground strap (a little lighter at the bottom), insulator clean all the way down, sides are not showing rich at idle. Have a look.

Back showing ground strap
Image

Front
Image

Top (it's darker in the photo).
Image

Shining a little light on the insulator - these are cold plugs, this is the entire insulator.
Image

They have 2000 miles on them.

_________________
Coburn Performance - OCD comes naturally.


Top
 Profile  
 
 Post subject: Re: The B20 Assembly Thread
PostPosted: Thu Sep 24, 2009 12:13 am 
Site Admin
User avatar

Joined: Wed Dec 21, 2005 4:01 pm
Posts: 2005
Location: Always in front of a computer or behind a wheel
those look quite happy :)

nothing beats using chopsticks to find top dead center, in multiple ways :)


Top
 Profile  
 
 Post subject: Re: The B20 Assembly Thread
PostPosted: Thu Sep 24, 2009 9:14 am 
Haha, I just built a W24 Octo-Turbo, now what?!
User avatar

Joined: Thu Dec 29, 2005 12:29 am
Posts: 1790
Location: Eating tofu and legumes in my hippie shack
122_Canuck wrote:
How much off was Greg's timing mark?

Matt may remember exactly, but I think it was running WAY off, like 20 degrees off. I think the mark was fine, but the timing just wasn't set.

_________________
Image


Top
 Profile  
 
 Post subject: Re: The B20 Assembly Thread
PostPosted: Thu Sep 24, 2009 9:35 am 
Haha, I just built a W24 Octo-Turbo, now what?!
User avatar

Joined: Wed Dec 21, 2005 8:40 pm
Posts: 3492
Location: Calgary, Ab
Yes, I stated the lower DCR as being a good thing, though I didn't spell it out that way. Your DCR and cranking pressure is too high, from what I am understanding. Have you done the crude compression test yet? Anyway, a wilder cam would tame both down and might just eliminate the dieseling.

I'm not sure I got the camshaft thing from any book, rather than general talk and common sense once you think about it enough: If the piston dwells at TDC longer, the crank position for peak piston speed happens later, therefore you'd think that the lobe centers should be spread further apart than for an engine with a shorter rod, to take advantage of the later peak flow. The other thing to consider is that with the piston near TDC for longer, there is more time for scavenging to take place while the piston isn't doing anything. Backing this up is that because the piston is moving further and faster in the bottom half of the stroke with the long rod, IVC and EVO points should be moderated. Both of these issues suggest that the lobe centers should be TIGHTENED in a long-rod motor. Putting the three things together, you'd maybe run a smaller LSA than you normally would, but with lobes shaped to favour peak flow nearer the bottom half of the stroke.

But in practical terms, going from a 5.7" to a 6" rod on an engine with 3.15" stroke means the peak piston speed changes from 74.5* ATDC to 75.25* ATDC, not a huge difference.

Ian Rankin has a fantastic knowledge about camshaft timing events, etc., so I'm hoping he'll chime in here to (likely as not) correct me.

Oh, and Greg's timing mark was about 5 degrees off too, maybe a bit more, but I believe it was towards the retarded side. The timing was way off, set to about 5 degrees ATDC relative to the timing mark (10 degrees after true TDC). Those plugs look a bit cruddy, if anything, but it's been a while since I've looked at a carburated car. I would expect them to be a bunch cleaner for only 2000 miles. 1+2 look a R.C.H. richer than #3+4, but I think they're running cool enough, anyway.


Top
 Profile  
 
 Post subject: Re: The B20 Assembly Thread
PostPosted: Thu Sep 24, 2009 12:24 pm 
Haha, I just built a W24 Octo-Turbo, now what?!
User avatar

Joined: Wed Jun 14, 2006 4:19 pm
Posts: 3131
Location: Lethbridge, AB
Sweet Jesus man - it would take me quite a while to come up with that even if I was thinking HARD :D On the easy side, I'm going to swap in the hotter plugs just for giggles and to see if the crusty stuff on the bottom of the plug goes away with something hotter. To bad I can't get a plug somewhere inbetween these two.

The rest will have to wait for the dyno run next week. Let's see what it has first, then talk about a cam shaft. The biggest issue with the VPD cam is that it doesn't exactly perform as advertised from what I can tell (advertised as 50% more HP than stock). I did get a ride in a stock 1970 122 with a B20 (this one had 100 HP same as the 123GT of earlier years) and it had pretty good accelleration. Sure not as good as mine - but no dog either. I was hoping for more.

_________________
Coburn Performance - OCD comes naturally.


Top
 Profile  
 
 Post subject: Project Canuck - 1966 Canadian Build Thread ... Finally
PostPosted: Mon Sep 20, 2010 9:16 pm 
Haha, I just built a W24 Octo-Turbo, now what?!
User avatar

Joined: Wed Jun 14, 2006 4:19 pm
Posts: 3131
Location: Lethbridge, AB
Hi Guys,

I'm going to start to put some of the info on what I've done to the Canuck into one place. Matt was bugging me about this some years ago, so I'll get a start on this.

Image

I decided to pull the head to make removal a little easier, and to be honest I was interested to see what the insides looked like. To my surprise, everything looked pretty darn good. No cross-hatch left on the cylinder walls, but I wasn't expecting any. The valves were not recessed, and while #4 looks rich, the rest were burning OK. #3's combustion chamber was oily - lots of carbon on everything.

Image

Image

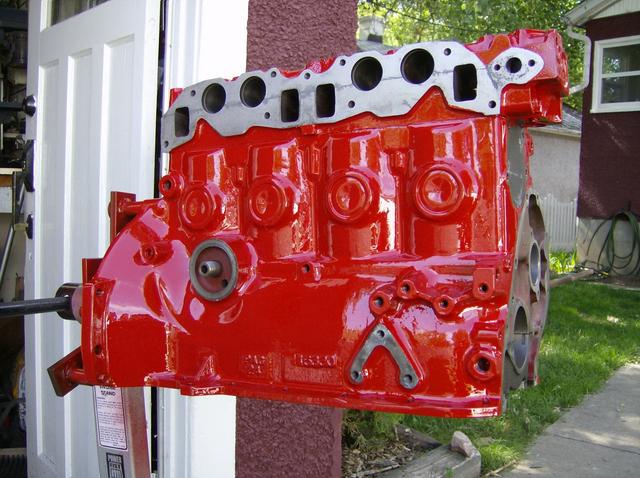
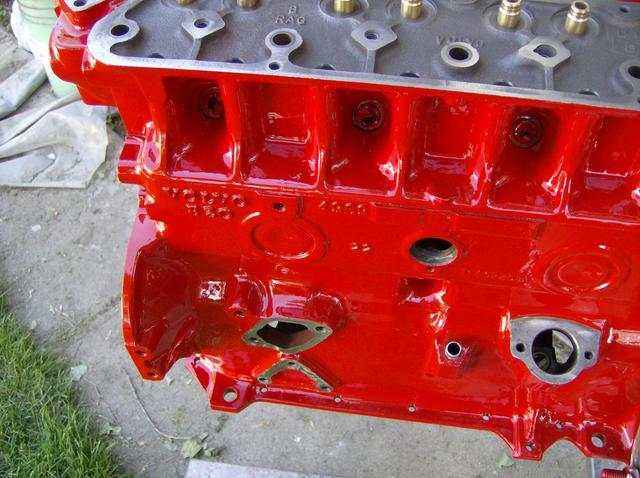
One to the new engine...after spending hours polishing the block and head I wanted to make sure the paint was going to last. POR to the rescue again. I cleaned all the parts a dozen times and they were about as clean as it gets. This took a full day - not kidding. Then they were acid etched with the POR metal prep and given a coat of POR-15 sprayed right from the tin. It sprays very well - nice shiney black.

Then after it flashed off - I top coated it with POR engine enamel. This stuff is so thick it can't be sprayed...had to thin it with laquer thinner. Then it would come out of the gun! While the regular POR flashes in a couple of hours, the engine enamel takes 24 hours to recoat :shock: It was still tacky after a full day of drying. On with the second coat - even better. The gloss is crazy.

Image

Image

Image

Image

The paint had better hold up - I'm not planning on doing this again! Since the block and head were polished, the resulting paint is very smooth and shiney.

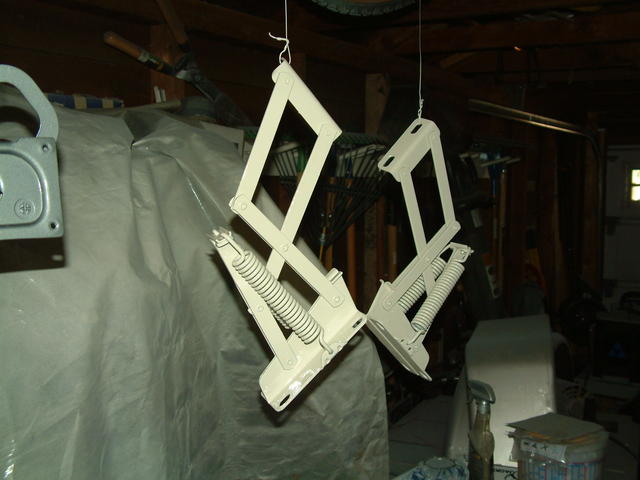
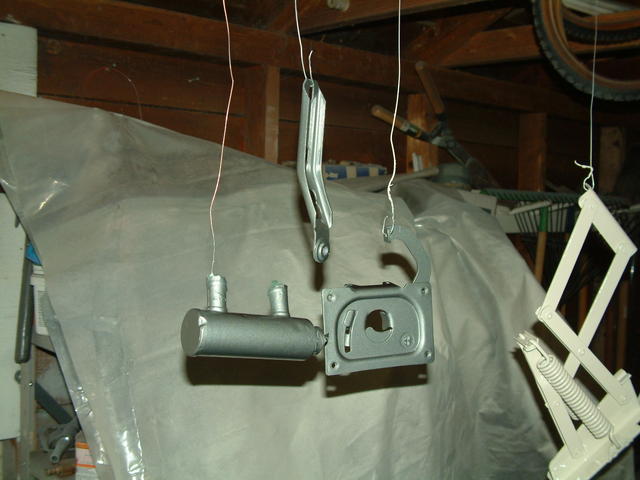
I've spent a lot of time getting everything else either polished or powder coated. Now I just have to get it assembled and put back in the car.

Image

Image

Engine details:

1975 B20 bored 0.030 over
Vintage Performance Head with 44/36 intake and exhaust valves -swirl polished
VPD Street Performance cam
ARP head studs
Polished and ceramic coated dual down cast manifold

Other Details:
The exhaust is 2.25" mandrel bent stainless steel.
VPD suspension
17X7 Wheels with Yoko S-Drive tires
Wilwood brakes up front - 11.75" vented disks with FSL-4's with Q compound pads.
Rebuilt M41
240 1030 (smooth bottom - I know they don't exist) differential with TrueTrac 3.73:1 gears.

And a bunch of othe custom stuff that I've built.

Here are some more photo's:

Dual down manifold
Image

Image

240 rear end install

Image

Image

Smaller stock wheel.

Image


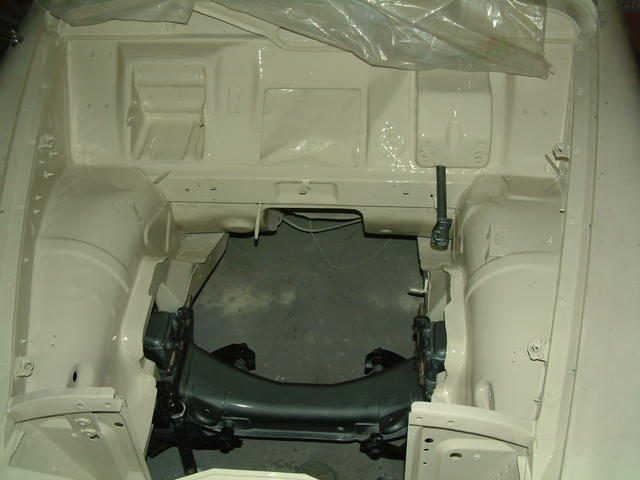
I'll let the pictures do the talking, here's the start point - not looking too pretty.

Image

Image

Image

Then came a coat of epoxy primer (no photo's) and a coat of 2K high build primer.

Image

Image

Image

Image

Image

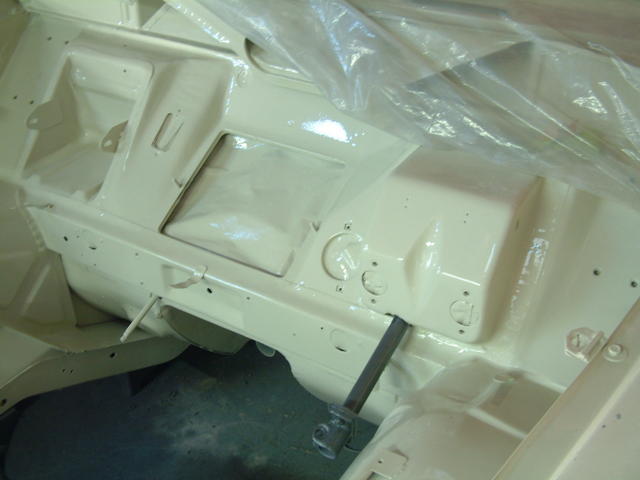
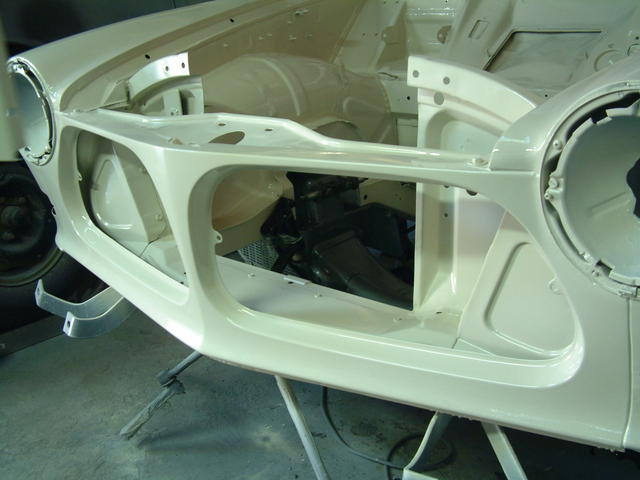
So after 12 hours it is all finished...now for some more sanding and filling and another coat of primer then on with the new top coat.


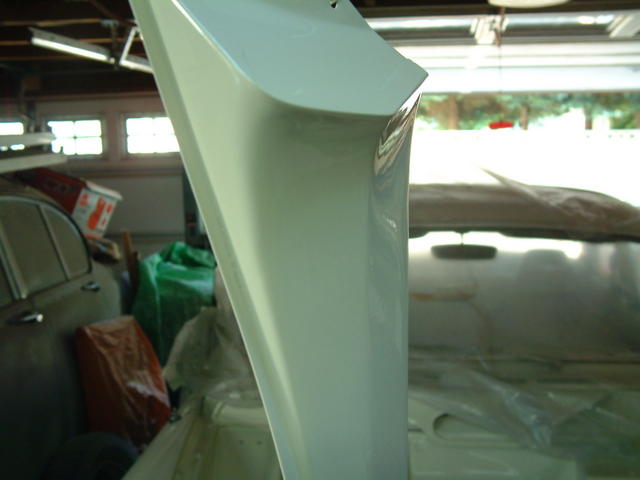
I've finished most of the painting that I'm doing for this year. I still have the under side of the hood to do, but that will wait for a week or two while I take a little break.

Here's the shots.
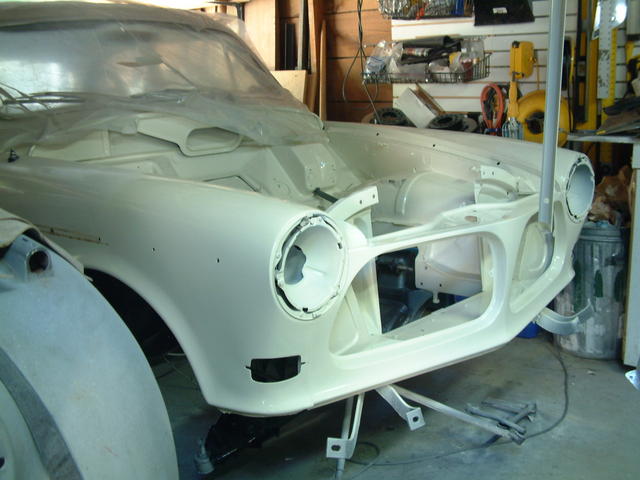

Image


Image

White is hard to photograph.


Image


Image


Image


Image


Image


Image


I'm now working on getting the interior panels installed and starting to put it all back together. Let the fun begin.

The brakes are finally installed and ready to go, still no engine but at least this part of the puzzle is finally off the drawing board and installed in the car.
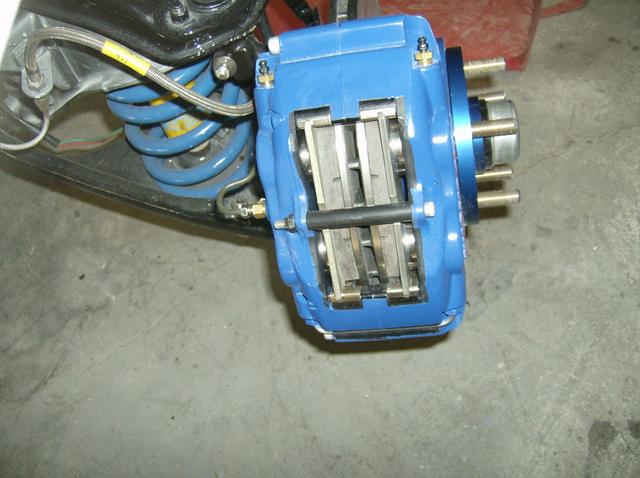
Image

Here you can see the brackets from the back side and the new brake lines.
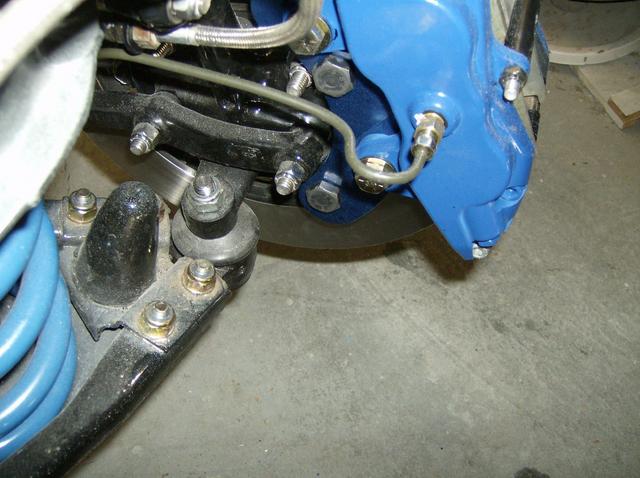
Image

Front suspension all rebuilt and as perfect as I can make it.
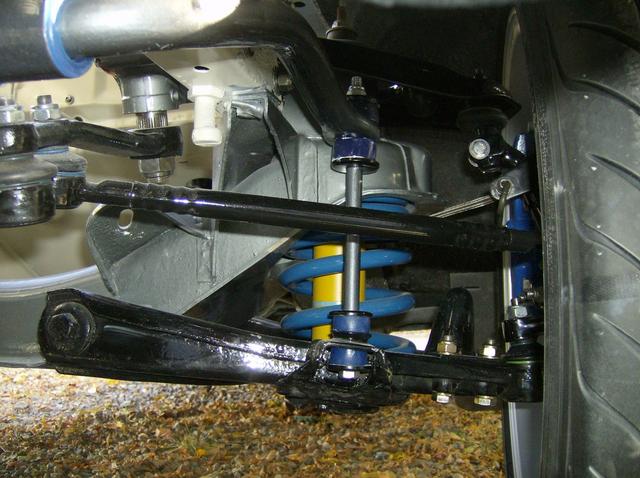
Image

Other side. There is some rubbing at full steering lock, but the wheels are 7" wide for heaven's sake.
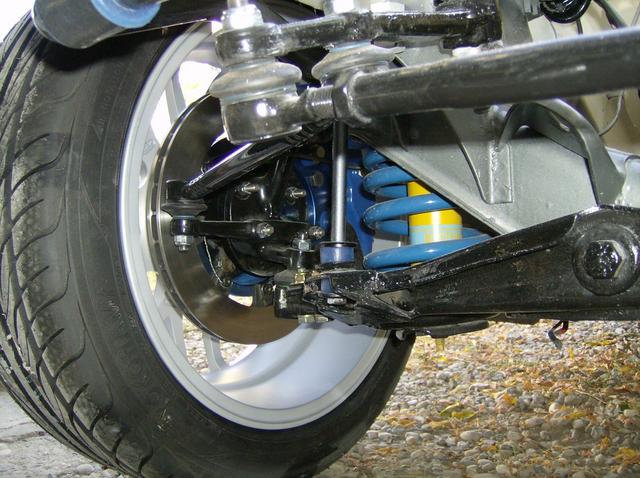
Image

View of the front with the relocated horns and relocated oil filter.
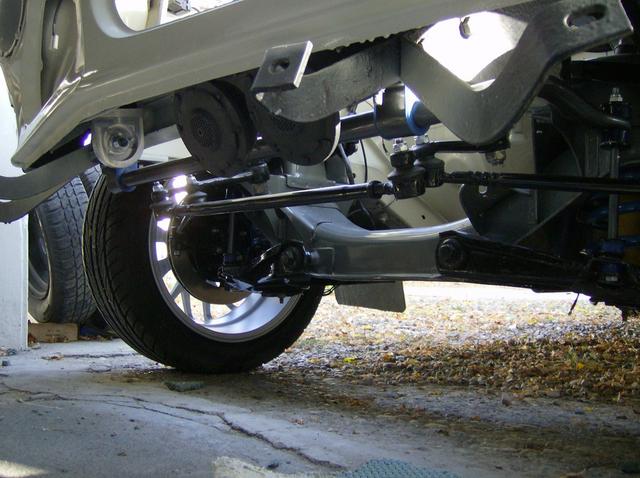
Image

For those that are wondering...yes those are 17" wheels, plenty of room for even larger brakes. I'm pretty sure these will be enough to slow me down.

Here they are from the side. I've added the Volvo hub caps and the brakes are sporting Q-Matrix pads.
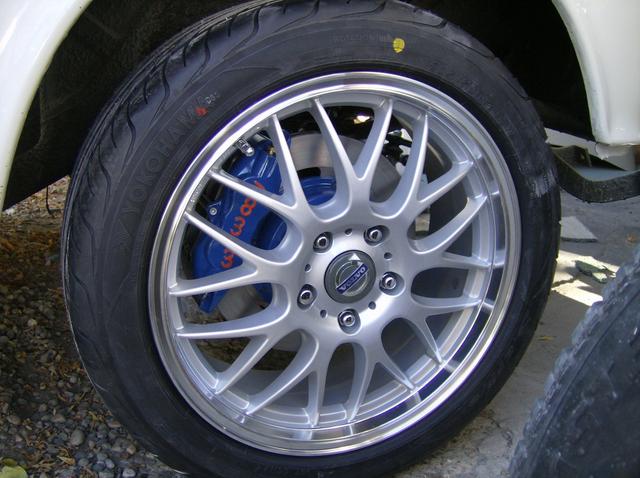
Image

Rear brakes, now you can finally see them.
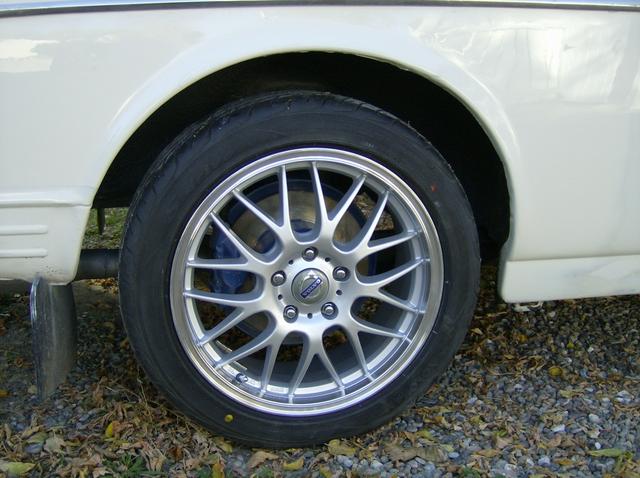
Image

Here's the view from the side - I'm liking it a lot. Definately not the look I was going for, but I like it.
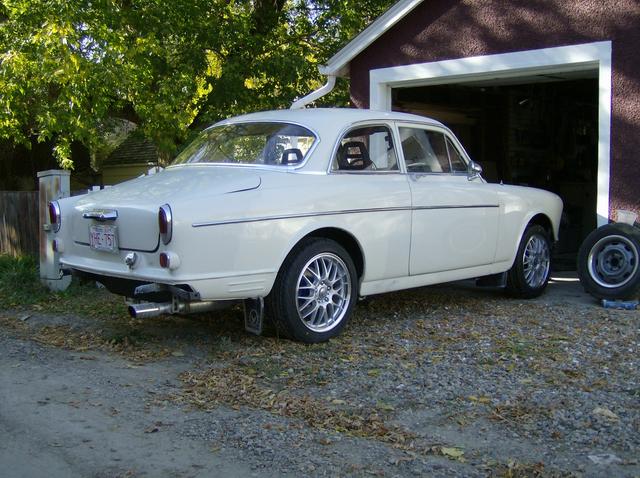
Image

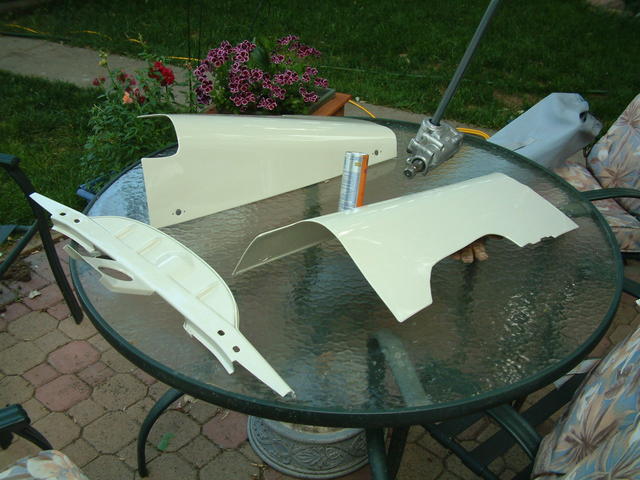
Here's my fender cover in place and painted...I polished it up a little. Looking very clean under the hood.
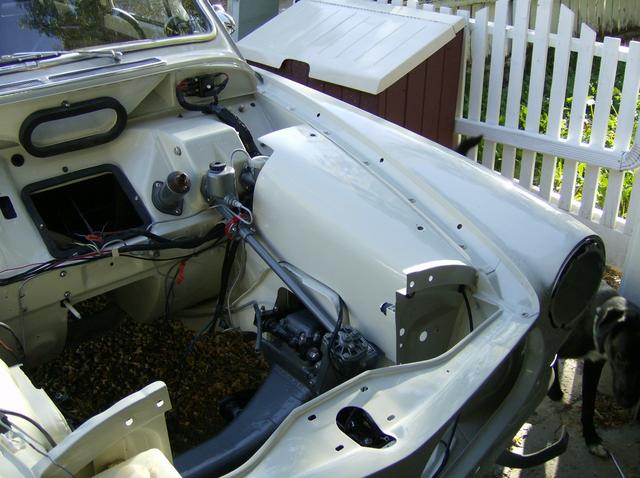
Image

And last but not least, by diff cover had a little leak, so I replaced it with this cover from Summit Racing. I painted it with PPG DCC Black and then brushed the ribs. The ribs needed some modification to clear the panhard rod. Looks loads better than the polished bling most go for.
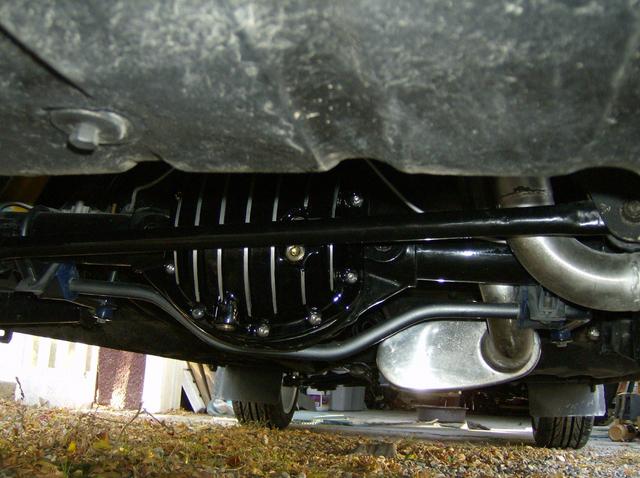
Image

Now all I need is my damn engine.

I spent the weekend getting the engine assembled and managed to get it installed with the assistance of Greg and Dale (Volvoshredder and Pylon). Here's the overall shot of the tight working conditions. Made tighter by the installation of 2X4's to keep the roof from collapsing. The overhead crane I build worked perfectly, but I sure was happy to have 3 sets of hands to get this damn thing in. Painted stuff makes me nervous.

After a long weekend of work - Greg (volvoshredder) and I got the 122 fired up and running tonight. I ran it for around 20 min at 2000 rpm or so to break in the cam. Still lots of tuning left to do and maybe put a bumper on it and a hood. But I'm real tempted to go for a rip. The throttle response is wicked - never had a B anything that snaps like this one - lightened internal and a lighter flywheel helps of course. On to the vids. Mosty in the first one you can hear the e-fan...it's jumpered to stay on at the moment. The second it the exhaust note.

<object width="425" height="350"> <param name="movie" value="http://www.youtube.com/v/3JjHVnjlqPc"> </param> <embed src="http://www.youtube.com/v/3JjHVnjlqPc" type="application/x-shockwave-flash" width="425" height="350"> </embed> </object>

<object width="425" height="350"> <param name="movie" value="http://www.youtube.com/v/IxTZauMt008"> </param> <embed src="http://www.youtube.com/v/IxTZauMt008" type="application/x-shockwave-flash" width="425" height="350"> </embed> </object>

This past week was a little nuts with carbs coming on and off and on and off again...Saturday I got the new fuel pressure regulator installed and built a new hardline for the engine (new flex lines were required as well). Dale (245GTI) came down from Calgary to lend a hand (2.5 hour drive!) and brought his fancy camera.

Here's the new lines, pressure gauge, and FPR installed.

Image


Image

Image

Image

We then hooked up the 4th gear lockout switch and the reverse lights...things are insanely clean.

Image


A few details.
Image

Image

Image

Then we bled the clutch and brakes and went for a drive...who needs a hood, headlights, turn signals or bumpers?
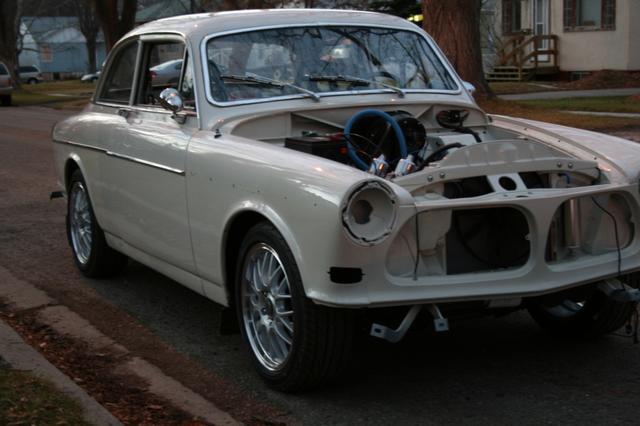
Image

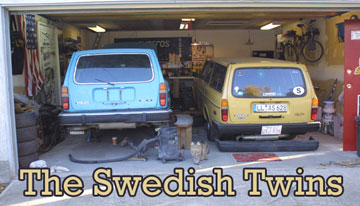
My two 2-doors meet for the first time...

Image

Back to the garage...for more finish work...fast. The transmission shifted great, brakes are very good, valves need to be adjusted again, and I've got an oil leak out the valve cover (IPD rubber gasket is terrible).

Image

I thought I'd post the results here just to add to the history. Image

All strapped down and ready to go...on to the videos.

This was the pull to 6000 rpm...cam gave no signs of giving up...

[url="http://www.youtube.com/watch?v=_ahajtQaMz8"]http://www.youtube.com/watch?v=_ahajtQaMz8[/url]

So we stepped it up to 6500 rpm.

[url="http://www.youtube.com/watch?v=eimDHKyvNHs"]http://www.youtube.com/watch?v=eimDHKyvNHs[/url]

And the results are...Max power 133.2 Hp (wheels) @ 5980 rpm with 135.1 ft/lbs of torque @ 4450 rpm.

AFR's are showing rich (with goofy stuff after 5000 RMP)) - so I'll have to find a leaner needle - yes this thing runs SU's.

Image

This image shows the torque and HP curves better.
Image

That about sums it up.

Craig
Image

Here's a couple of shots of the engine in it's new home.
Image

Image

Image

Now I've got to get the lines made and finish the electrical install and a few other things need to get reassembled. Should fire it for the first time next weekend.

Fingers crossed.

_________________
Coburn Performance - OCD comes naturally.


Top
 Profile  
 
 Post subject: Re: Project Canuck - 1966 Canadian Build Thread ... Finally
PostPosted: Mon Sep 20, 2010 9:25 pm 
Haha, I just built a W24 Octo-Turbo, now what?!
User avatar

Joined: Wed Jun 14, 2006 4:19 pm
Posts: 3131
Location: Lethbridge, AB
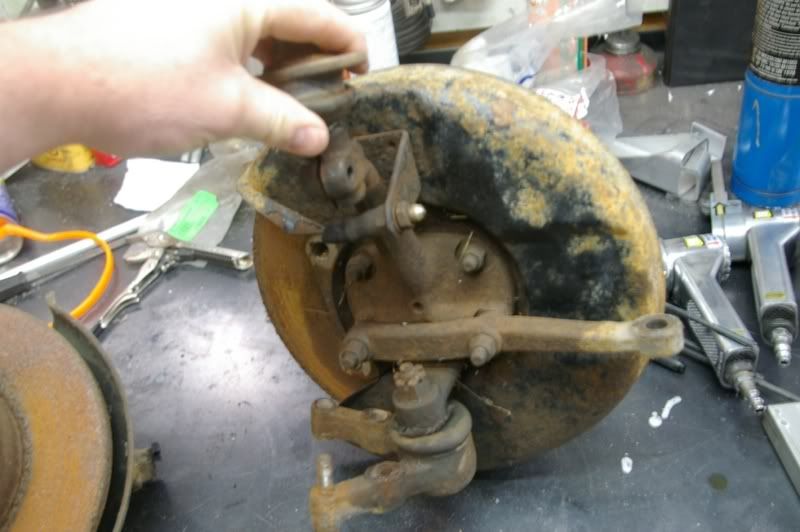
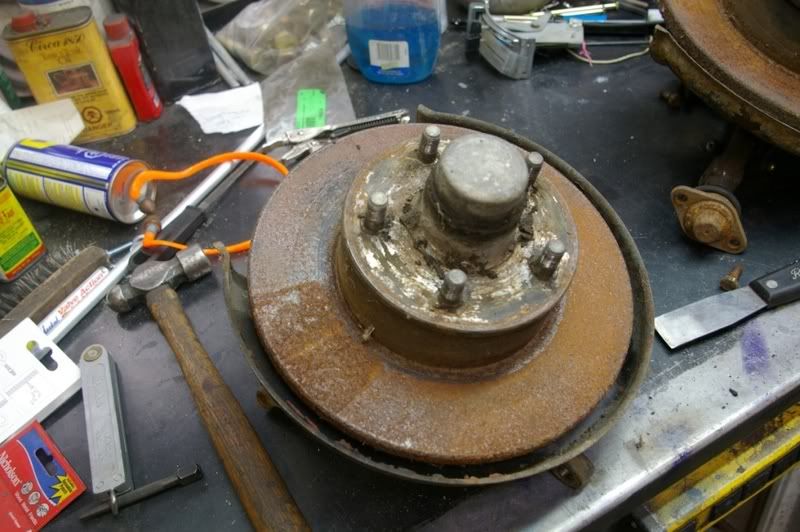
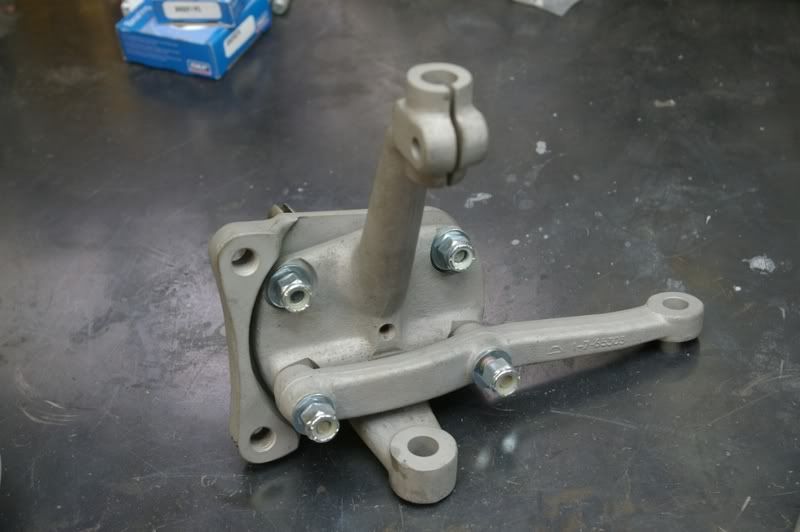
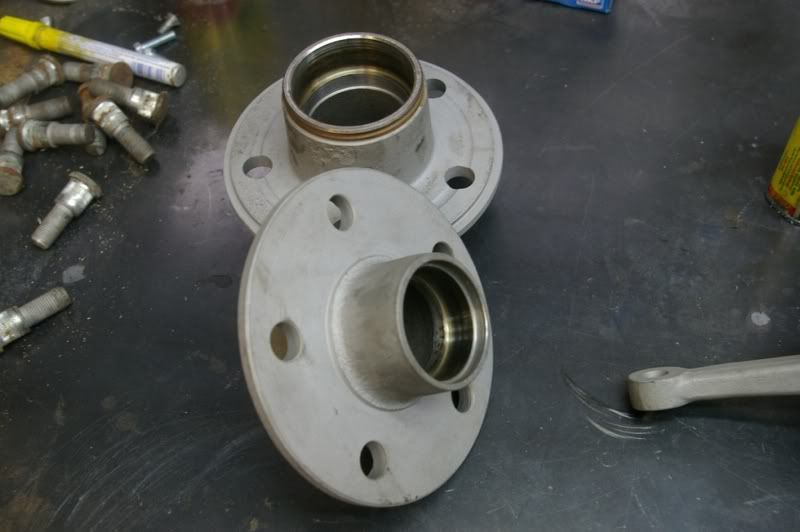
On to the current progress. I've been having trouble with wheel bearings and a little wobble in the front wheels. So I picked up a new set of hubs and have been rebuilding them.

Here's the start point - fresh from John Paulsen's compound....mmmm fresh.
Image
Image

A few hours of media blasting - blast cabinets are awesome.
"New" spindles. I probably won't change these parts, but at least I've got them.
Image

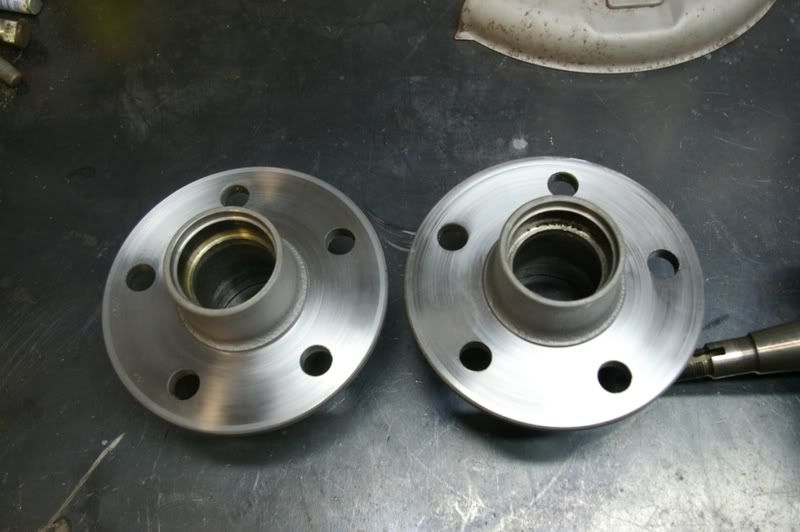
The new hubs had around 3-4 thou of run out...right on spec, but they could be better.

Image

So I chucked them in the lathe and turned them so they are perfect...no runout on this set!
Image


I just have to wait for some new studs and a set of bearings to come in the mail and toss some paint at these hubs. Then I should be all fixed except for a paint job.

_________________
Coburn Performance - OCD comes naturally.


Top
 Profile  
 
 Post subject: Re: Project Canuck - 1966 Canadian Build Thread ... Finally
PostPosted: Tue Sep 21, 2010 9:35 am 
0-60 in VERY FAST
User avatar

Joined: Mon Jul 27, 2009 10:58 pm
Posts: 158
Location: Coaldale, AB
is that a mkII I see in the background?

_________________
1970 Mercedes 220D
1971 Daimler ds420
1977 Mercedes 230
1979 Mercedes 300TD
1993 Honda Del Sol Si
1994 Honda Civic dx hatch
2015 Mazda CX-5
2020 Hyundai Elantra manual
1982 240 DL coupe


Top
 Profile  
 
 Post subject: Re: Project Canuck - 1966 Canadian Build Thread ... Finally
PostPosted: Tue Sep 21, 2010 9:36 am 
4 Valves per cylinder!
User avatar

Joined: Thu Aug 27, 2009 5:59 pm
Posts: 94
Unreal. Thanks for (re) posting that.


Top
 Profile  
 
 Post subject: Re: Project Canuck - 1966 Canadian Build Thread ... Finally
PostPosted: Tue Sep 21, 2010 10:45 am 
Haha, I just built a W24 Octo-Turbo, now what?!
User avatar

Joined: Wed Dec 21, 2005 7:14 pm
Posts: 1875
Location: Missing my garage in Sunnyside
You can repost that 1000x.

Hows she running? Did you get the needle/mix sorted out for the top end? looks like it's leaving alot on the table the way the torque starts tapering off after 4500. Or is that just flow limitations of the head/etc?

_________________
Hi, I drive a fictional star wars character with rear wheel drive. His name is Darth Wagon, he has a shiny helmet.
Image


Top
 Profile  
 
 Post subject: Re: Project Canuck - 1966 Canadian Build Thread ... Finally
PostPosted: Tue Sep 21, 2010 11:10 am 
Haha, I just built a W24 Octo-Turbo, now what?!
User avatar

Joined: Wed Jun 14, 2006 4:19 pm
Posts: 3131
Location: Lethbridge, AB
Unico wrote:
is that a mkII I see in the background?


It sure is...it's up for sale if you're interested. I'm either getting rid of it sometime soonish or I'm parting the car and sending it to the crusher.

_________________
Coburn Performance - OCD comes naturally.


Top
 Profile  
 
 Post subject: Re: Project Canuck - 1966 Canadian Build Thread ... Finally
PostPosted: Tue Sep 21, 2010 11:14 am 
Haha, I just built a W24 Octo-Turbo, now what?!
User avatar

Joined: Wed Jun 14, 2006 4:19 pm
Posts: 3131
Location: Lethbridge, AB
swedishmeatballrocket wrote:
You can repost that 1000x.

Hows she running? Did you get the needle/mix sorted out for the top end? looks like it's leaving alot on the table the way the torque starts tapering off after 4500. Or is that just flow limitations of the head/etc?


It's running great (except for the front wheel hubs) - I leaned out the needle with a BAG insteaf of a BBB and that helped a bit but I didn't get it back to the dyno for a check and won't have time this fall. The head is about as good as I care to get it and the cam is great, so I'm leaving that alone for now. Just have to get the bodywork sorted out and then piddle with little things (like some track time in the Spring!)

_________________
Coburn Performance - OCD comes naturally.


Top
 Profile  
 
 Post subject: Re: Project Canuck - 1966 Canadian Build Thread ... Finally
PostPosted: Sat Oct 30, 2010 4:55 pm 
Haha, I just built a W24 Octo-Turbo, now what?!
User avatar

Joined: Wed Jun 14, 2006 4:19 pm
Posts: 3131
Location: Lethbridge, AB
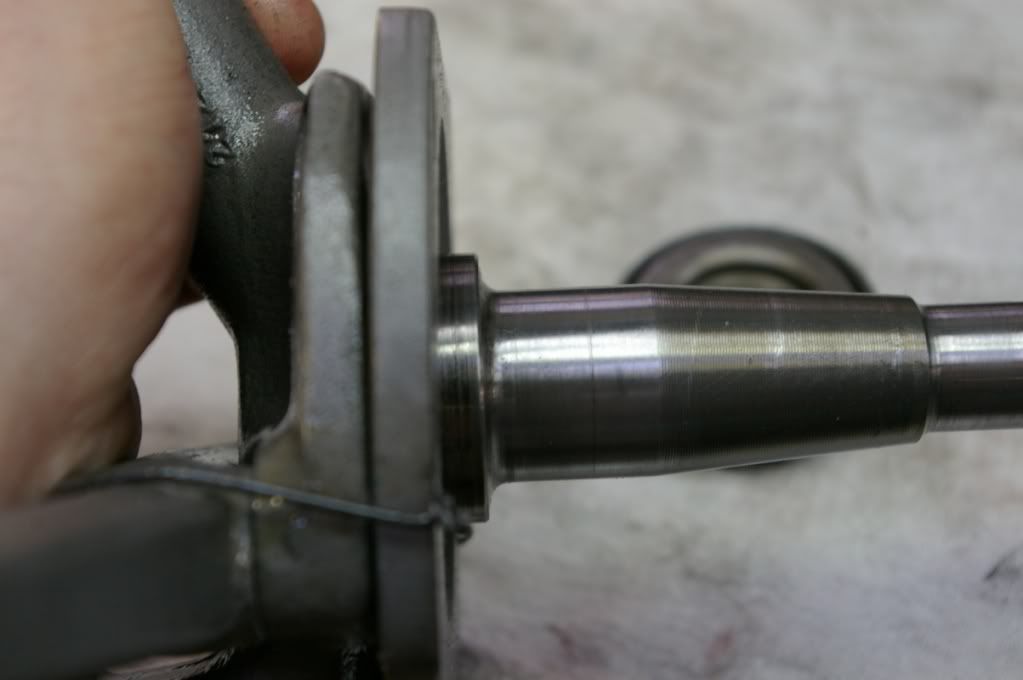
Well, I finally got around to cleaning up the garage after a busy couple of weeks. First up was to have a close look at why the front wheel bearings had gone south so fast. I've never had trouble with wheel bearings before, but the set that I got from Olof over at Vintage Import Parts seem to be jinxed.

I cleaned all the bearings off for a look to see if I could determine what had happened. I had to CUT the inner bearing off the spindle - I've done this before but as the idea is to load the bearing against the shoulder of the hub, as soon as the load is released, they should just slide right off. I kept one inner race for comparison to a standard Timken (they were replaced with SKF's).

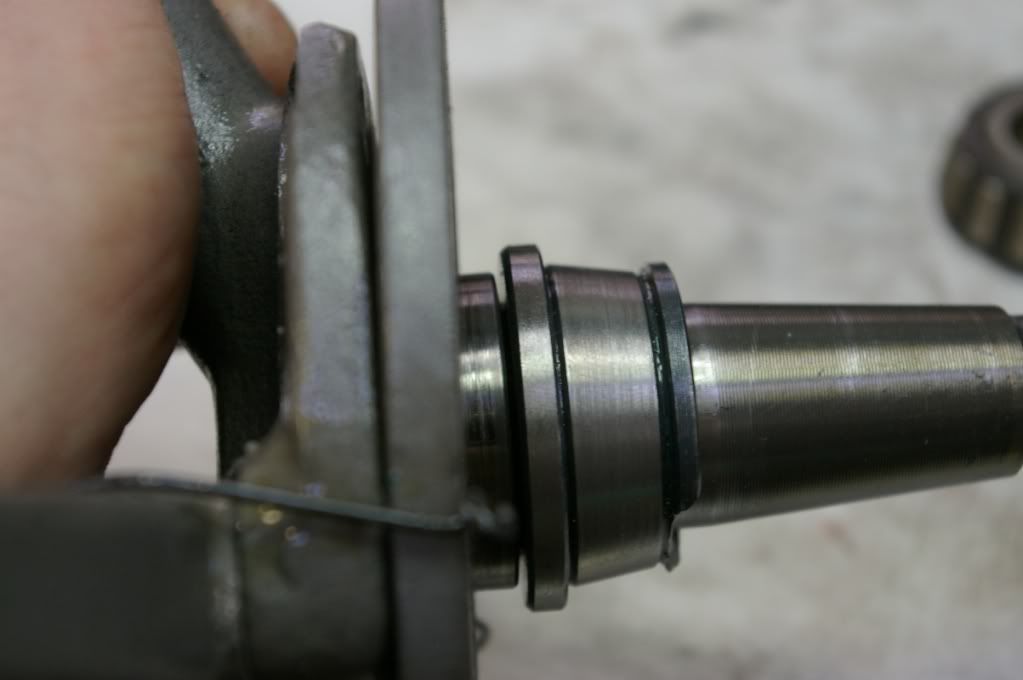
Here's the spindle - note the radius where the rear bearing mounts.
Image

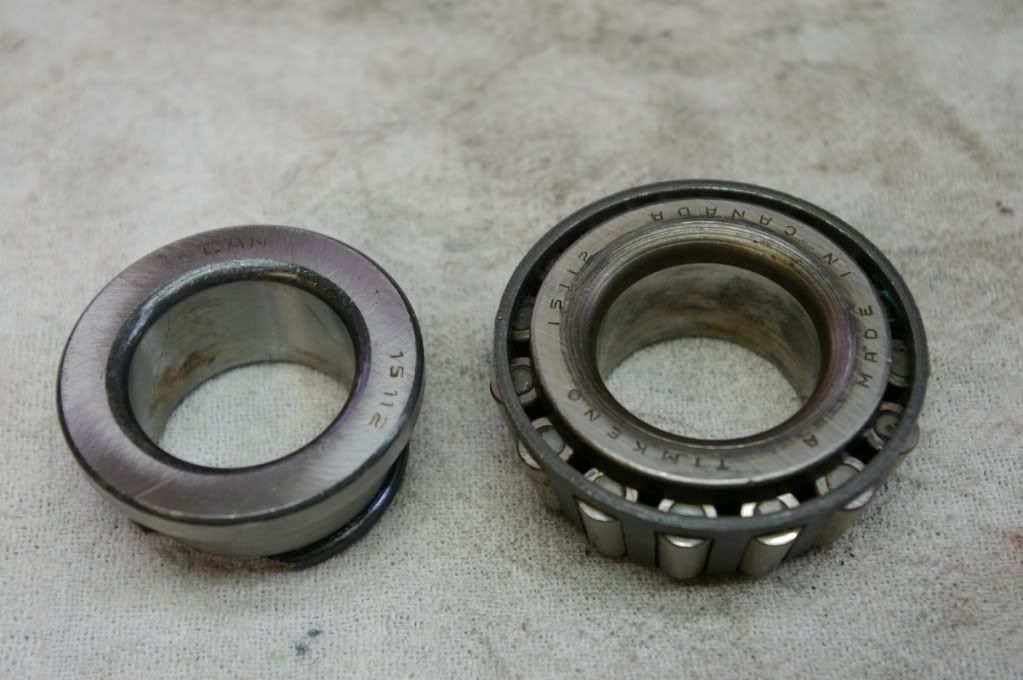
Now here are the bearings...
Image

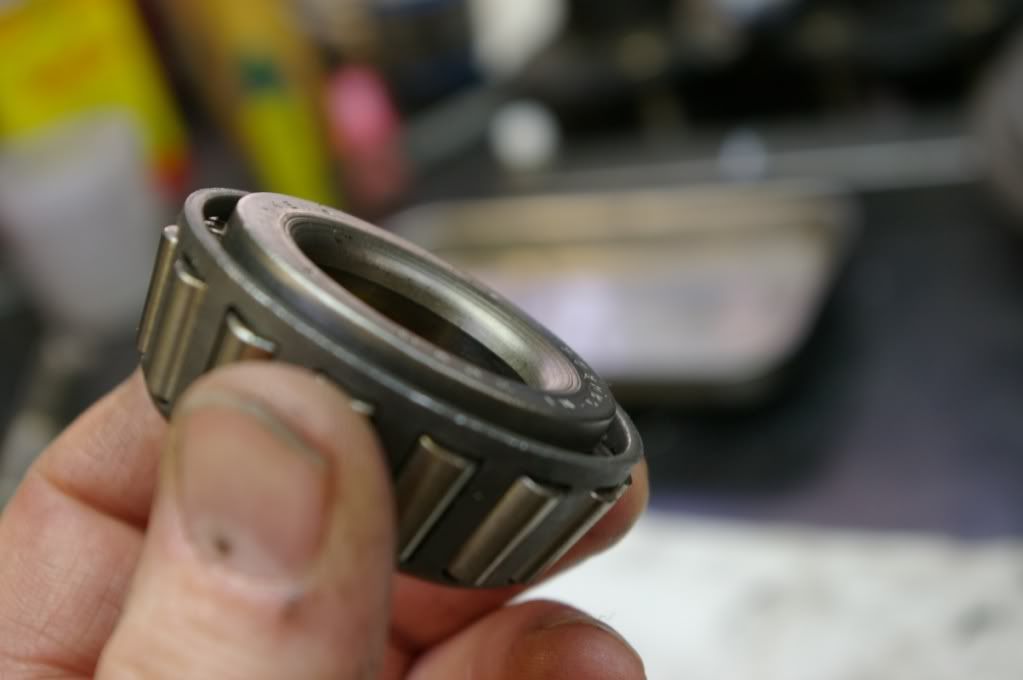
Note that the part numbers are identical.

Generous Timken radius.
Image

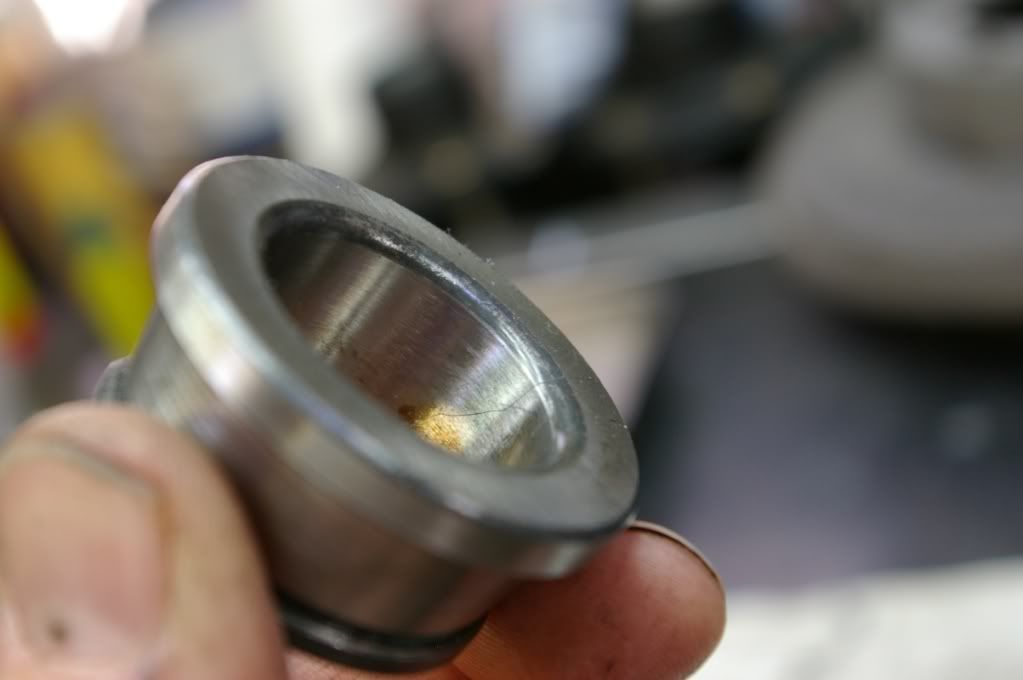
Not so generous Can radius. Note the shiny band right next to the radius.
Image

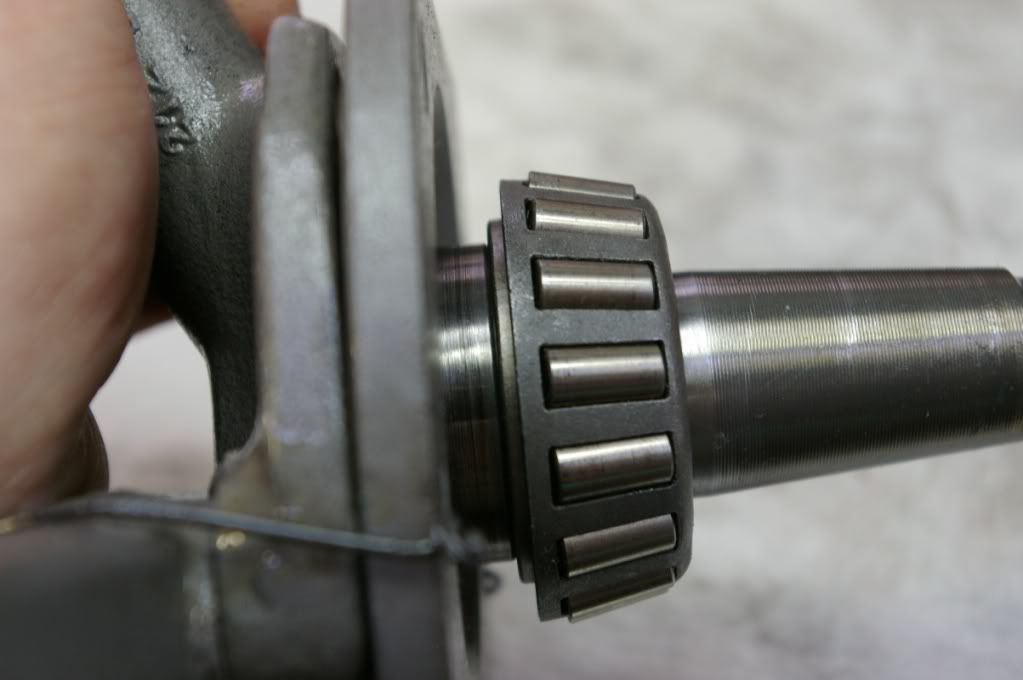
Timken in running position - fit is good.
Image

Can in running position...WTF.
Image

So this was the problem. I had already replaced the outer bearings that I got from Olof as the cups were not ground correctly and set the bearing cage too deep - I had already installed the inner bearings and didn't think that anything was wrong with them. Well, not much I can do now. Next time, I'll look at the radius of the bearings a little more closely.

Another mystery solved.

_________________
Coburn Performance - OCD comes naturally.


Top
 Profile  
 
 Post subject: Re: Project Canuck - 1966 Canadian Build Thread ... Finally
PostPosted: Sat Oct 30, 2010 5:32 pm 
Haha, I just built a W24 Octo-Turbo, now what?!
User avatar

Joined: Wed Dec 21, 2005 8:40 pm
Posts: 3492
Location: Calgary, Ab
Good work, and it explains so much!


Top
 Profile  
 
Display posts from previous:  Sort by  
Post a new topicPost a reply Page 13 of 54   [ 801 posts ]
Go to page Previous  1 ... 10, 11, 12, 13, 14, 15, 16 ... 54  Next


Who is online

Users browsing this forum: No registered users and 0 guests


You cannot post new topics in this forum
You cannot reply to topics in this forum
You cannot edit your posts in this forum
You cannot delete your posts in this forum
You cannot post attachments in this forum

Jump to:  
cron


Powered by phpBB © 2000, 2002, 2005, 2007 phpBB Group
610nm Style by Daniel St. Jules of Gamexe.net