Change font size
It is currently Thu Oct 31, 2024 9:31 pm


Post a new topicPost a reply Page 33 of 54   [ 801 posts ]
Go to page Previous  1 ... 30, 31, 32, 33, 34, 35, 36 ... 54  Next
Author Message
 Post subject: Re: Project Canuck - 1966 Canadian Build Thread ... Finally
PostPosted: Thu May 19, 2016 7:26 pm 
Haha, I just built a W24 Octo-Turbo, now what?!
User avatar

Joined: Wed Jun 14, 2006 4:19 pm
Posts: 3131
Location: Lethbridge, AB
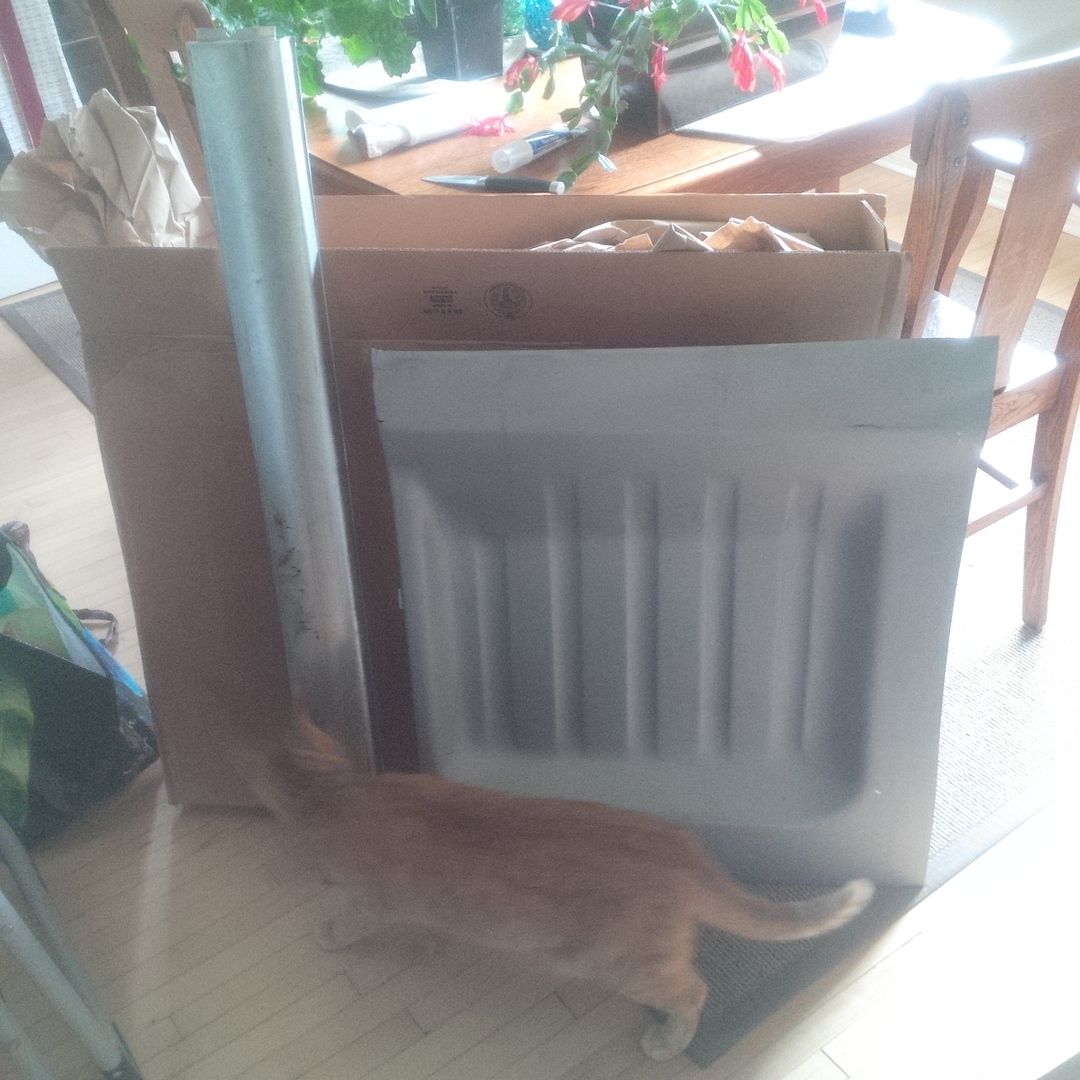
These panels got here today just in time for the long weekend. I am officially clear of other projects, so we're back on this project (with a little paint work to clean up on the 242 if the weather is nice). Let's make this a roller by the end of the summer!

Image

_________________
Coburn Performance - OCD comes naturally.


Top
 Profile  
 
 Post subject: Re: Project Canuck - 1966 Canadian Build Thread ... Finally
PostPosted: Sun May 29, 2016 9:26 pm 
Haha, I just built a W24 Octo-Turbo, now what?!
User avatar

Joined: Wed Jun 14, 2006 4:19 pm
Posts: 3131
Location: Lethbridge, AB
Time for a little update. I've cleared out all the other "work" in my shop and I'm back on the 122 project. I really hope I can ward off all the requests until I get MY car done. Facebook keeps reminding me how long ago it was that X part arrived and I think - "wow, has it been that long? Yikes!"

So up first, seats. I hear you need these in a car. The Acura seats I got from Matt were test fitted last year and I even started brackets. I just never got them installed. There were problems with getting the brackets fitted properly with all of the weird angles and rusty rear foot wells. It took a long time to work out what to do to get seats that are level. First, it was impossible to do this with the existing floor configuration - which is sloped to the outside of the car (only for the outside bracket) and towards the front. The seats need a level mount platform.

So I made some little sheet metal boxes. I don't have a box brake, so I make due.

Image

Tap it with my sheet metal chisel - with a radius edge.

Image

Sheet metal magic.

Image

These will sit through the floor and hold the bracket level.

Image

Chop a hole in the floor and find a way to level the pad.

Image

Image

That'll due. Note the angles needed to get things level.

Image

Welded in.

Image

Then I was freaked out because this might not be strong enough to hold the seat without a cross member. So I doubled up the base and joined it to the cross member. I will join it from the trans tunnel to the sill on the top side when I'm done working on the tunnel.

In the mean time - some plug welds.

Image

Weld through primer to keep it rust free.

Jacked up from below and ready to weld.

Image

Should be stiff enough when the top side is fixed.

Image

I simply plated the top of the other side - not much to look at - added some tricky rear brackets with various angles and pedestals and crap that you just have to do when working on a car. Note the condition of the rear foot well. That's the one I fixed 10 years ago to get the car on the road for the first time.

Image

Fast forward one week.

Now I have to get that foot well area replaced. Sure it's OK for a driver, but no longer good enough for my car.

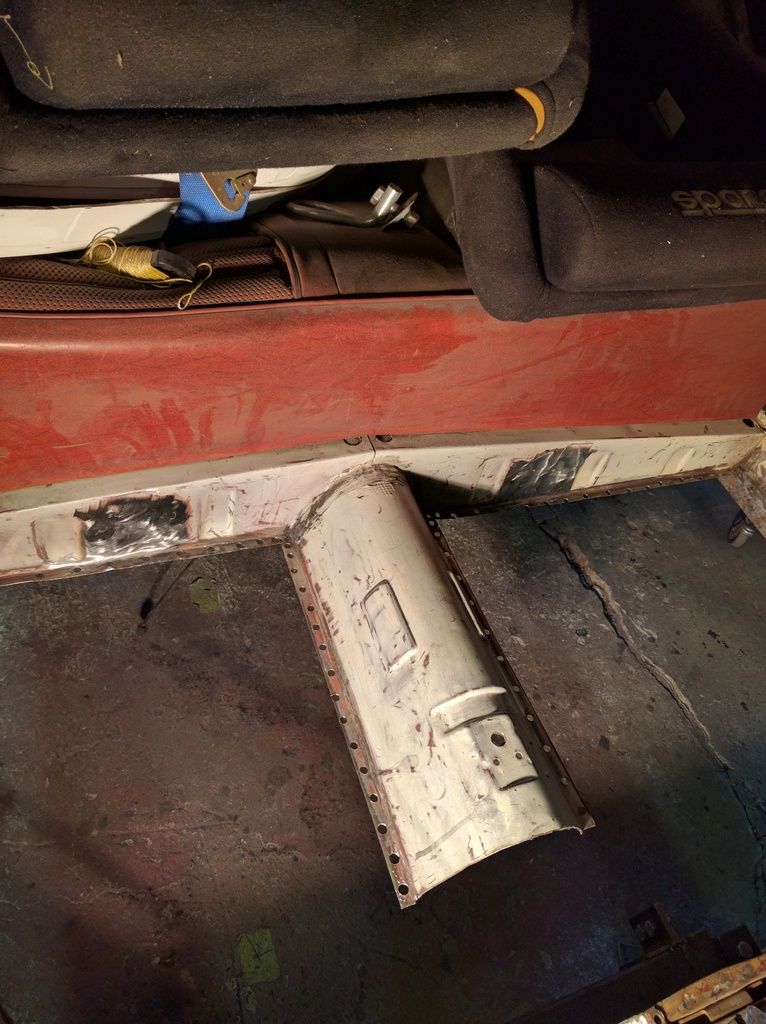
First start by looking at things and working out how the heck all this fits together. The floor pan is ONE gigantic pressing from the front to the rear cross member including the bottom of the trans tunnel. It's all ONE panel. So you've got to make some decisions on how it all comes out. I figured it was best to join the panel just on top of the front cross member and then take it all the way to the back where it originally went. This sounds great, but some finagling is required. I had to work out where I had to use the spot weld cutter to preserve a flange and where I could just drill (use cobalt or you won't get through the weld easily) - which is preferable to using the spot weld cutter. I figured it was OK to make a join at the bottom of the trans tunnel where it would not be noticeable and left the smallest area to seam weld.

The only problem was the transmission reinforcement loop...it is on top of the floor panel and the cross member. As it was one panel, I had to cut through various parts to get the parts of the old panel out so that the replacement looks flawless and is as strong as the original. So drill some holes.

Image

Use the plasma to then cut out the panel and clean things up a bit. Surgical.

Image

Remove various flanges and save parts to trace cut outs for the parking brake.

Image

Here you can see the trans loop issue. It's released and the new panel can be fitted this week.

Image

Nothing but fresh primer up under this box section. Happy to see that. Just have to clean up the flange and prime various areas (I will weld on that suspension bracket and reinforce it as I'm in there.

Image

Now we're moving. I've got to get this front end tidied up in preparation for the frame installation. I think the trans tunnel has to come out to make room (at least the front "tight" section where it necks down sure does. I'd better get this done before going a whole lot further. So while three edges can be welded right away - that tunnel section will get tech screws for a bit.

_________________
Coburn Performance - OCD comes naturally.


Top
 Profile  
 
 Post subject: Re: Project Canuck - 1966 Canadian Build Thread ... Finally
PostPosted: Tue May 31, 2016 1:33 pm 
First volvo in outer space
User avatar

Joined: Fri Dec 14, 2007 1:46 pm
Posts: 1648
Location: East L.A.
So much work and detail just to mount seats. =D> =D>

Edited because I don't want to clutter your build thread, I'm following just not posting as I don't feel worthy. :lol:

_________________
Jim

66 122S (Garage Queen)
89 244 (Hers)
90 745Ti (Mine)
89 744 (SOLD/Bought back for other daughter)
78 242GT (Project... LOL)
91 244 (Don't Ask!!)


Last edited by woodenshoes on Wed Jun 01, 2016 12:06 pm, edited 1 time in total.
Conserve thread space


Top
 Profile  
 
 Post subject: Re: Project Canuck - 1966 Canadian Build Thread ... Finally
PostPosted: Tue May 31, 2016 9:14 pm 
Haha, I just built a W24 Octo-Turbo, now what?!
User avatar

Joined: Wed Jun 14, 2006 4:19 pm
Posts: 3131
Location: Lethbridge, AB
At least I know someone reads this junk. I'll keep writing it and taking the blurry/out of focus pictures I'm famous for, but sometimes I wonder why.

_________________
Coburn Performance - OCD comes naturally.


Top
 Profile  
 
 Post subject: Re: Project Canuck - 1966 Canadian Build Thread ... Finally
PostPosted: Tue May 31, 2016 9:19 pm 
Canadian Tire Bolt ons
User avatar

Joined: Tue Aug 06, 2013 6:14 pm
Posts: 26
Location: NW Calgary
I'm definitely following it.
Sometimes I find it a little hard to see what part of the giant pile of weld it is that you're working on but I'm learning stuff about fabricating.


Top
 Profile  
 
 Post subject: Re: Project Canuck - 1966 Canadian Build Thread ... Finally
PostPosted: Wed Jun 01, 2016 7:07 am 
Haha, I just built a W24 Octo-Turbo, now what?!
User avatar

Joined: Wed Dec 21, 2005 8:40 pm
Posts: 3492
Location: Calgary, Ab
122_Canuck wrote:
At least I know someone reads this junk. I'll keep writing it and taking the blurry/out of focus pictures I'm famous for, but sometimes I wonder why.


Documentation, man... documentation.


Top
 Profile  
 
 Post subject: Re: Project Canuck - 1966 Canadian Build Thread ... Finally
PostPosted: Mon Jun 20, 2016 8:33 pm 
Haha, I just built a W24 Octo-Turbo, now what?!
User avatar

Joined: Wed Jun 14, 2006 4:19 pm
Posts: 3131
Location: Lethbridge, AB
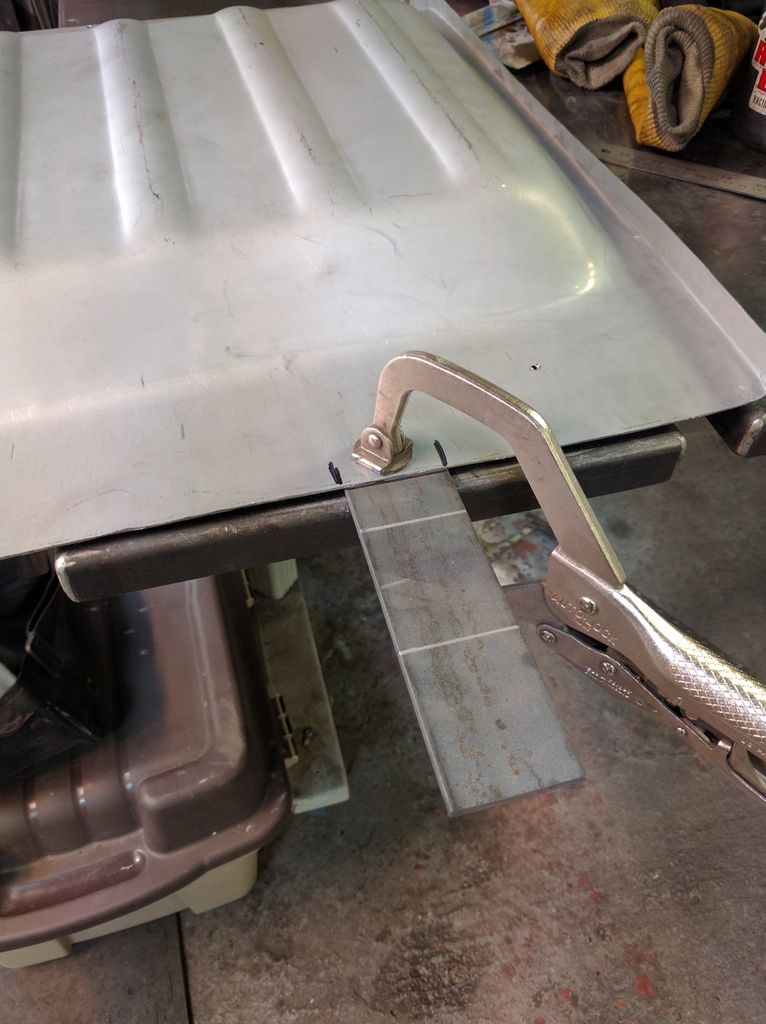
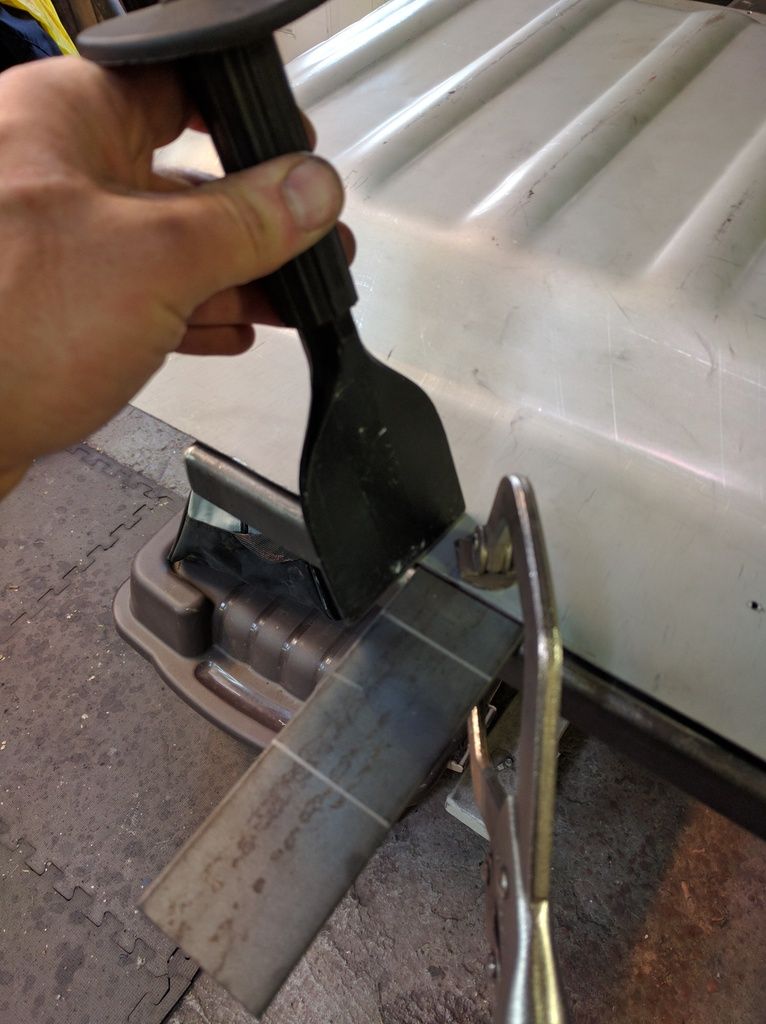
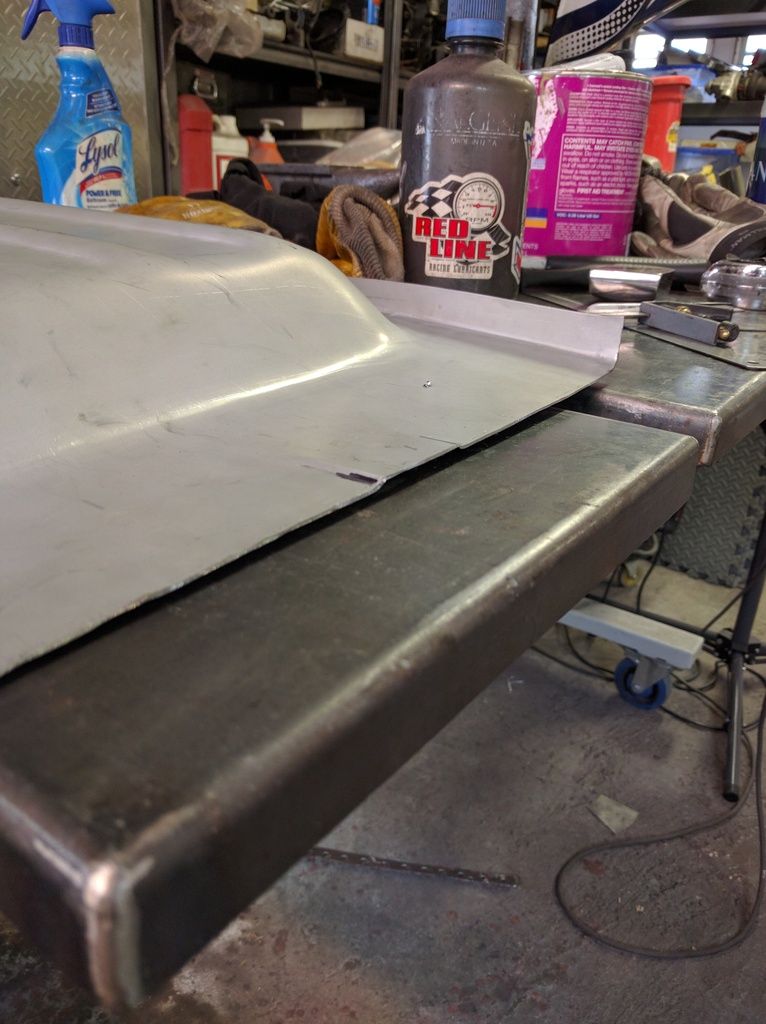
Time for an update - ran into a little back trouble that slowed me down for a couple of weeks...back on it now. I spent the weekend finishing up the drivers side rear floor pan. There are a bunch of details that had to get put into the panel including a little 1.5" step in the middle of the panel to accommodate the rear frame member. Here's how I accomplished this little swag.

First, I clamped a piece of 2" steel flat bar under the panel and clamped it down to my bench (the swag is exactly 2"). Then I used my modified chisels to swag the panel - holding them at an angle to exactly replicate what was there.

Image

Image

Finished swag.

Image

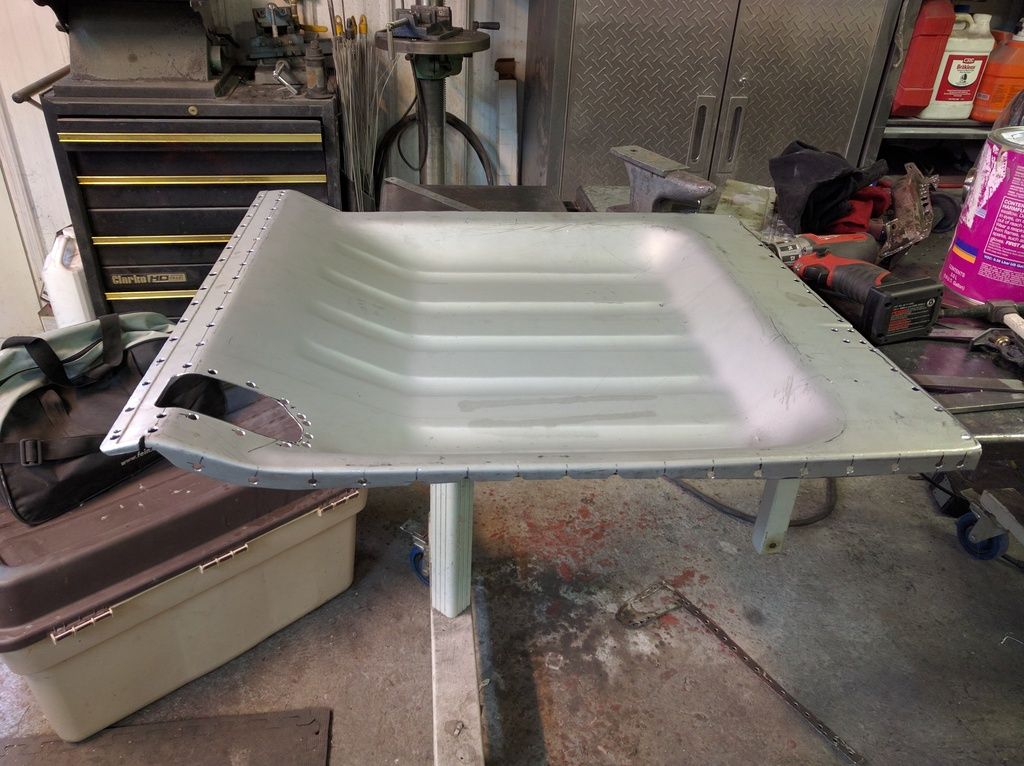
Then I had to drill all the spot weld holes...and there are a lot of holes. I also put a joggle in the top of the panel so when it's done you wont see what I've done.

Image

Then I made some doubling plates for the seat mounts. I'll show them in a later post.
Next job was to clear the undercoating off the passenger side pan to ready it for welding. Every single ridge on the bottom has a 1/2 circle cut which I assume was used to reference the panel in a jig in the factory. They were then pounded up sort of flush and after paint, the holes were covered in seam sealer on the top side and undercoating on the bottom. My intent was to weld these up.
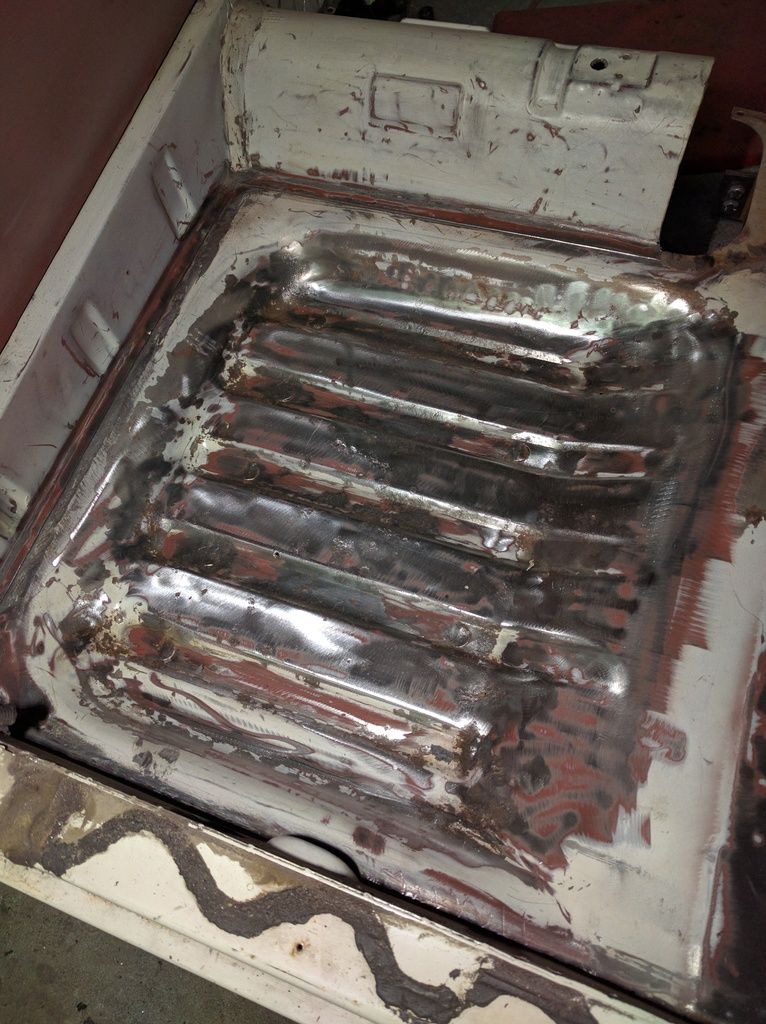
I thought that the panel was fine and when I chipped all the undercoating off (about 3 hours of "fun") I started to prep the surface for welding and found a lot of heavy pitting under the seam sealer and paint that I was not impressed. The bottom side is literally shiny and smooth.

A few minutes revealed this...
Image

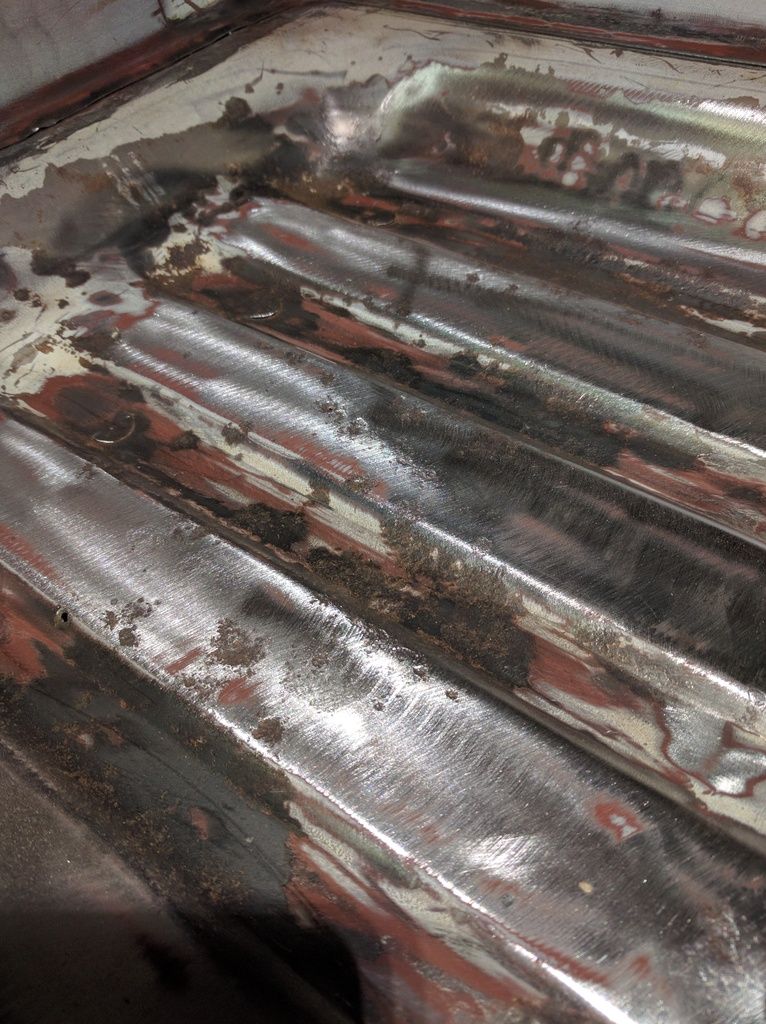
Close up of the craters.

Image

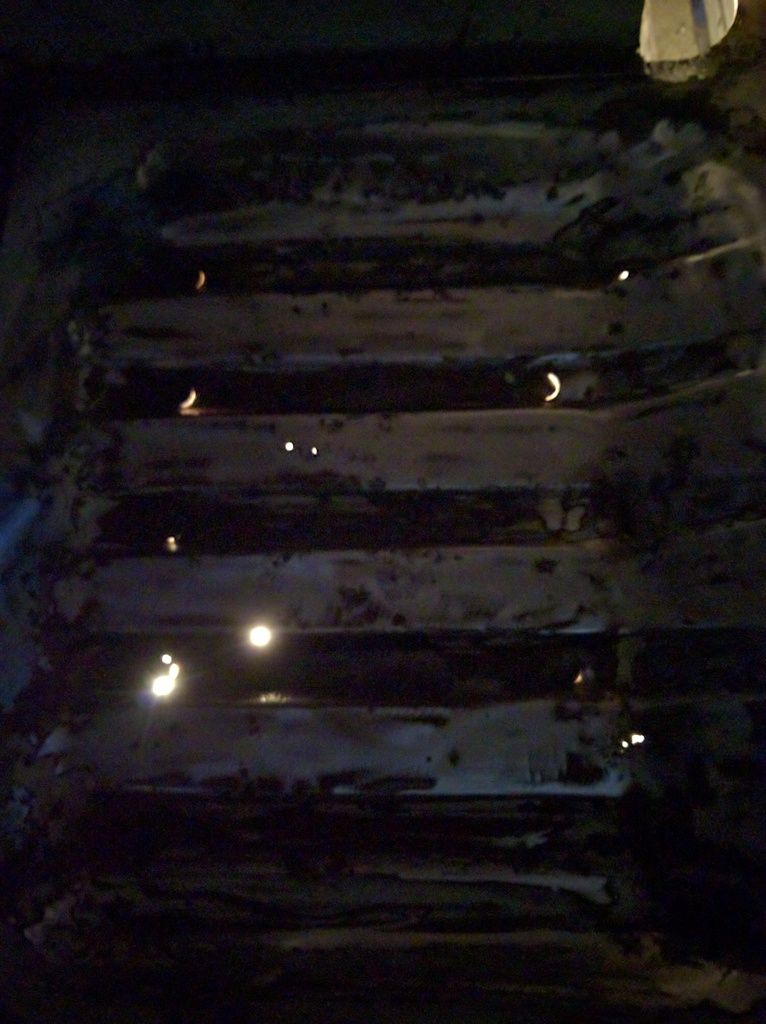
Then it failed the light test where I inspect the panel from below (don't worry about the half circle cuts) - that's a lot of little holes and large areas of pits.

Image

Including little wee ones that are hard to see without the light.

Image

This panel will come out tomorrow...I wish I would have known this before I chipped off the undercoating. I just couldn't see any of it without the undercoating removal. Looks like Olof gets another order!

_________________
Coburn Performance - OCD comes naturally.


Top
 Profile  
 
 Post subject: Re: Project Canuck - 1966 Canadian Build Thread ... Finally
PostPosted: Tue Jun 21, 2016 9:21 am 
Canadian Tire Bolt ons
User avatar

Joined: Tue Aug 06, 2013 6:14 pm
Posts: 26
Location: NW Calgary
Was that the factory seam sealer or did someone see holes and start bodging?

If nothing else, I guess you can take solace in the fact that you are going to be really good at making new floorpans.


Top
 Profile  
 
 Post subject: Re: Project Canuck - 1966 Canadian Build Thread ... Finally
PostPosted: Tue Jun 21, 2016 10:51 am 
Haha, I just built a W24 Octo-Turbo, now what?!
User avatar

Joined: Wed Jun 14, 2006 4:19 pm
Posts: 3131
Location: Lethbridge, AB
That's the factories good work on the seam sealer. It's on every car I've been involved with so far. Trunk and floor pans (all) have these same locating cuts and great gobs of sealer. Replacement panels have none of this nonsense...and I'm grateful for that.

_________________
Coburn Performance - OCD comes naturally.


Top
 Profile  
 
 Post subject: Re: Project Canuck - 1966 Canadian Build Thread ... Finally
PostPosted: Tue Jun 21, 2016 2:44 pm 
Bone stock

Joined: Tue Aug 06, 2013 1:07 pm
Posts: 6
Location: Austin, Texas
My 61 544 didnt seem to have any half moon cuts in the floorboards. No wait, there were no floor boards....only a few crumbs of rust left where they once existed....

dean


Top
 Profile  
 
 Post subject: Re: Project Canuck - 1966 Canadian Build Thread ... Finally
PostPosted: Tue Jun 21, 2016 7:47 pm 
Haha, I just built a W24 Octo-Turbo, now what?!
User avatar

Joined: Wed Jun 14, 2006 4:19 pm
Posts: 3131
Location: Lethbridge, AB
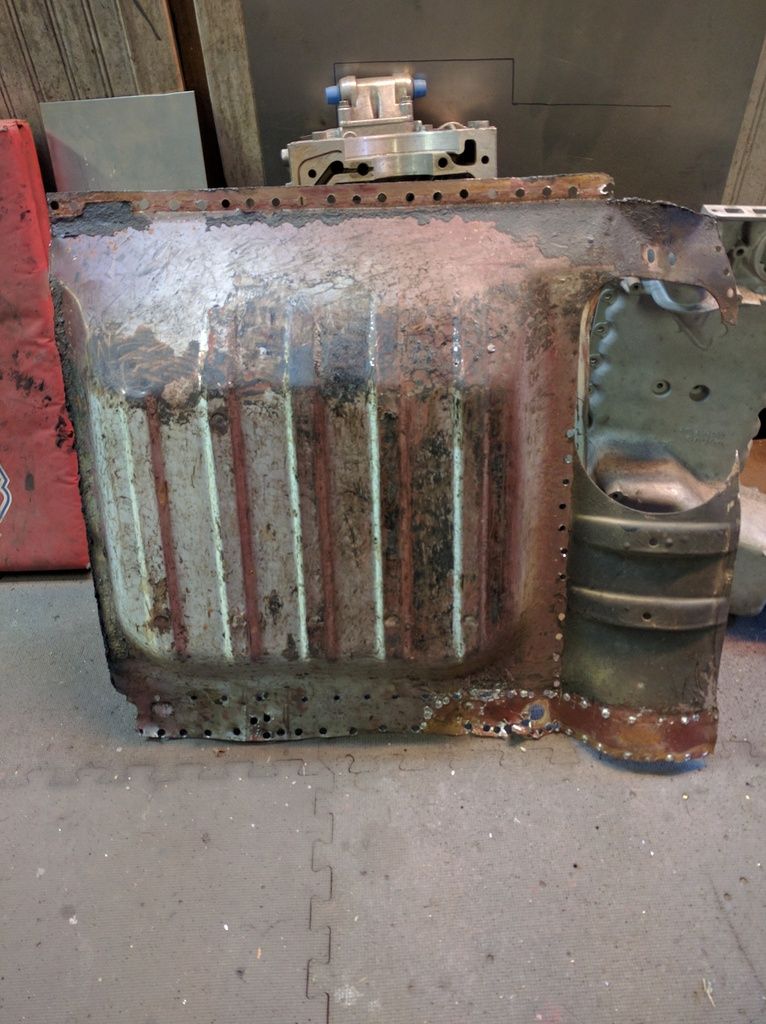
Here's the panel now extracted. See - it looks clean to me.

Image

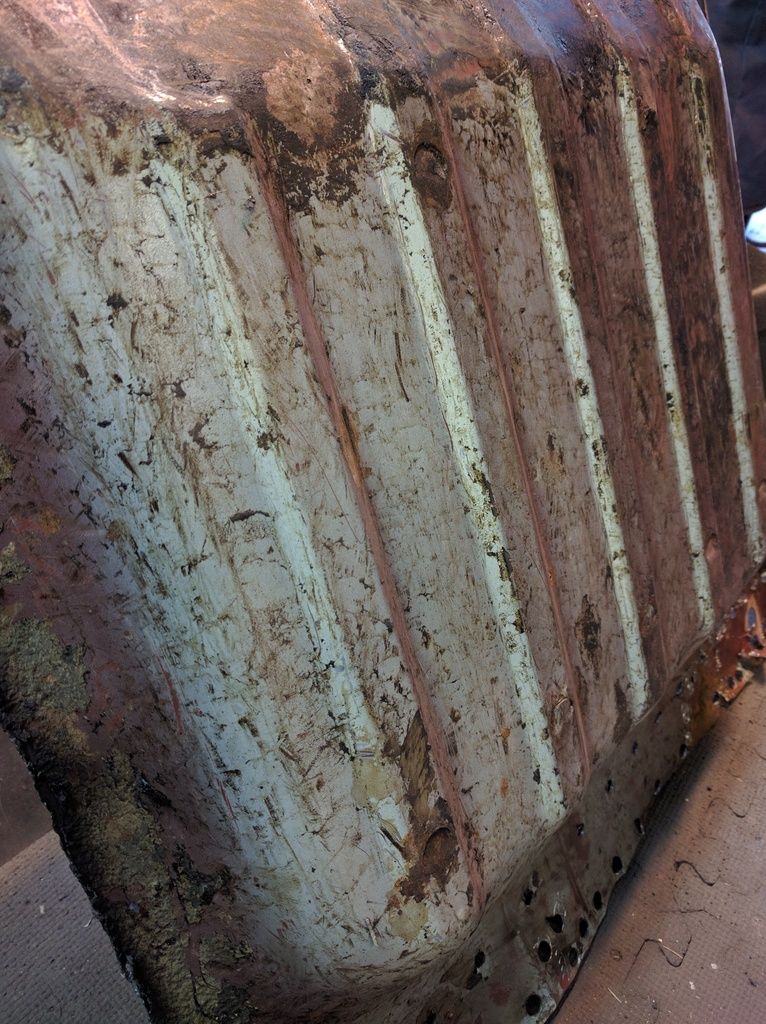
Factory fresh paint underneath...it was just a few spots where the water must have got trapped under the rubber matting and just like a water-jet, rusted through. Weird. There was no way to fix it and make it look good, so off it came. Note the condition of the underside and compare it to the top. Rusted from the inside out.

Image

Just a bit of prep and that's a wrap on the removal. Two weeks out for the replacement panel to get here. I've got some reinforcing and pedals and stuff to get done.

Image

_________________
Coburn Performance - OCD comes naturally.


Top
 Profile  
 
 Post subject: Re: Project Canuck - 1966 Canadian Build Thread ... Finally
PostPosted: Fri Jul 01, 2016 6:44 pm 
Haha, I just built a W24 Octo-Turbo, now what?!
User avatar

Joined: Wed Jun 14, 2006 4:19 pm
Posts: 3131
Location: Lethbridge, AB
Progress report time...this week was great as I was out in the garage fighting the car on my back welding over my head...you know all the stuff that makes you want to just tow the car to the wrecker and crush it! Long hot sweaty evenings of work saw the following get done by Canada day.

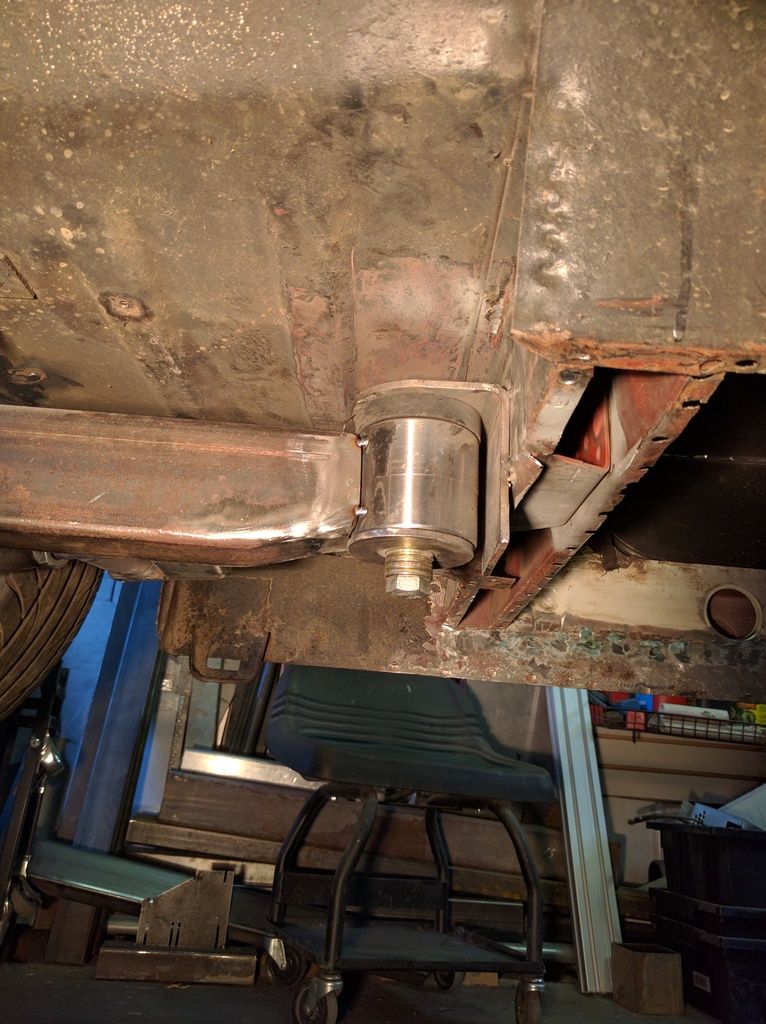
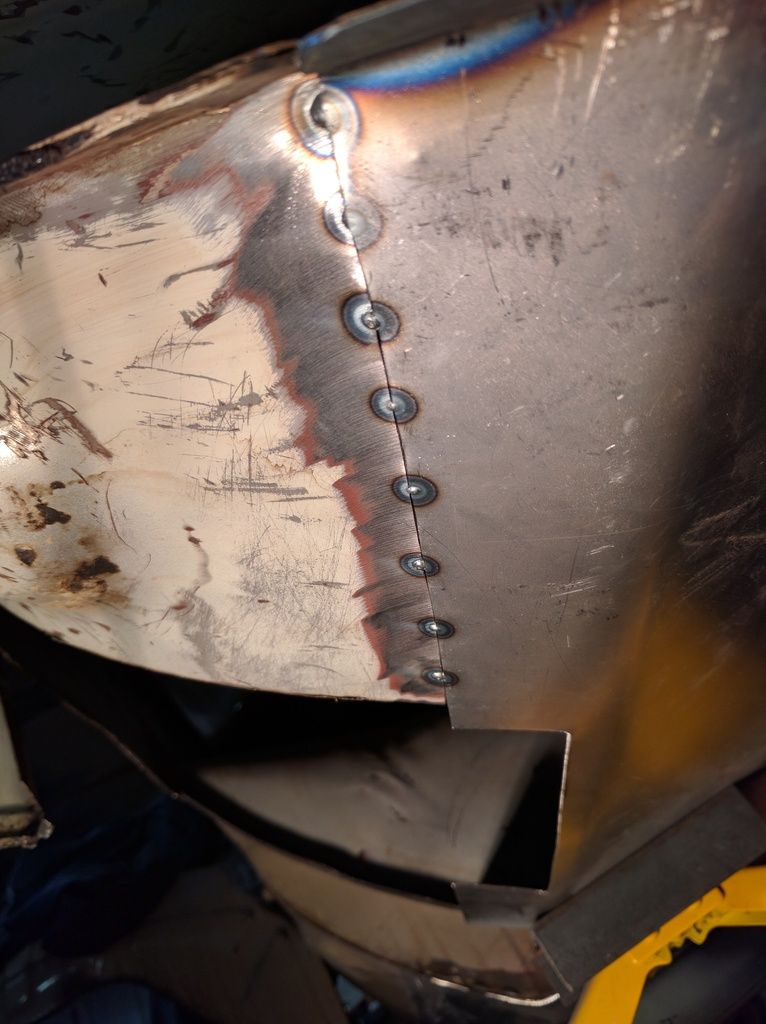
First up was getting the IRS subframe fixed up so that it was square to the car. It was set in the car a few years ago and we worked out that the drivers side front bushing was 1/8" too short. So it was always tacked out in space (the glories of MIG welding). I wanted that gone and fretted about it for years. How would I repair this and have it not look like poop and be strong. So I hacked the entire bushing arrangement off and carefully (in place mind you) welded the end of the tube from the inside out to ensure a strong joint with full material thickness. This had to be coped to refit the bushing. I got it all fixed up in one long evening. Welded back in place.

Image

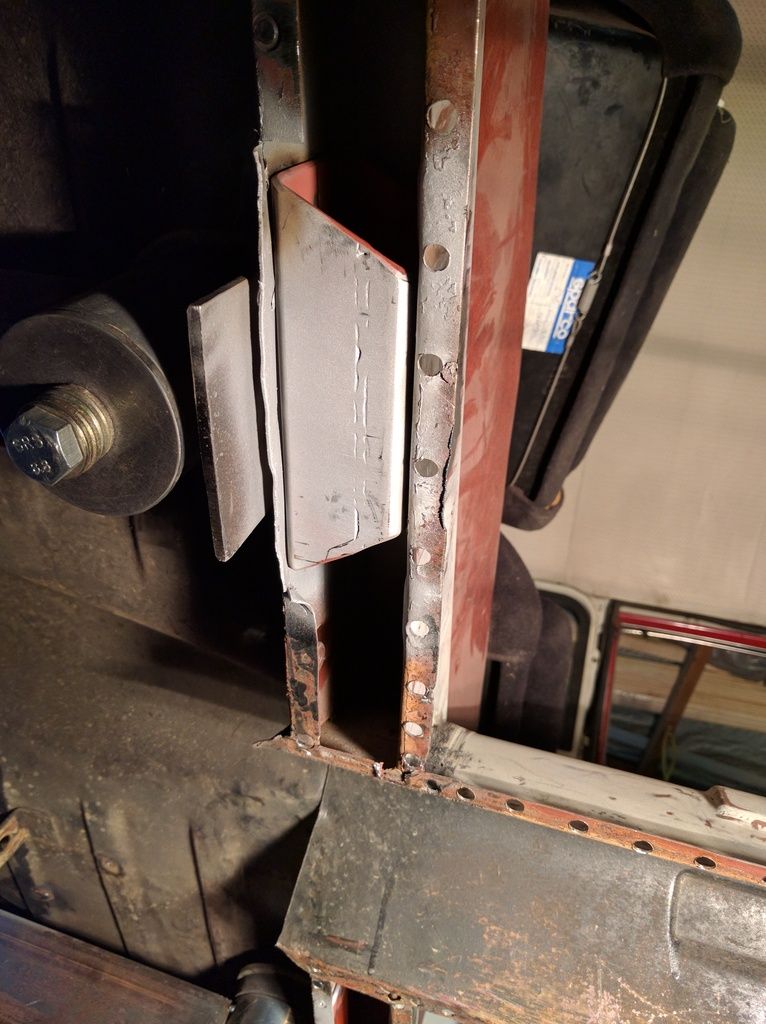
You'll note that there is a tube up inside the rear cross member now. I thought that would be best as I had it all apart anyway and it looked like it wanted to be reinforced. That tube was 2 X 3" 1/8" wall...but that wouldn't fit. So I had to section the tube and take 1/8" out of the width so it's now 1 7/8" X 3". Nothing is easy with this build. That took a night to work out and fabricate and prime.

Here it is all installed. That's weld through primer and the flange is flipped back down and welded up again. It's button welded on both sides. Not going anywhere.

Image

Image

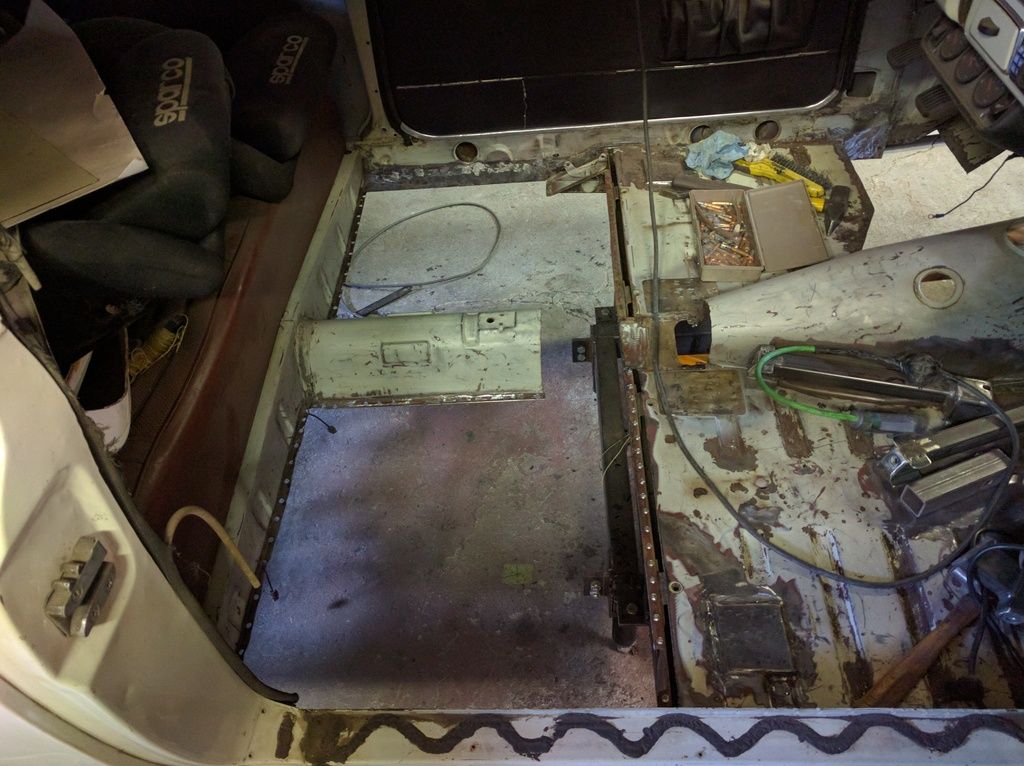
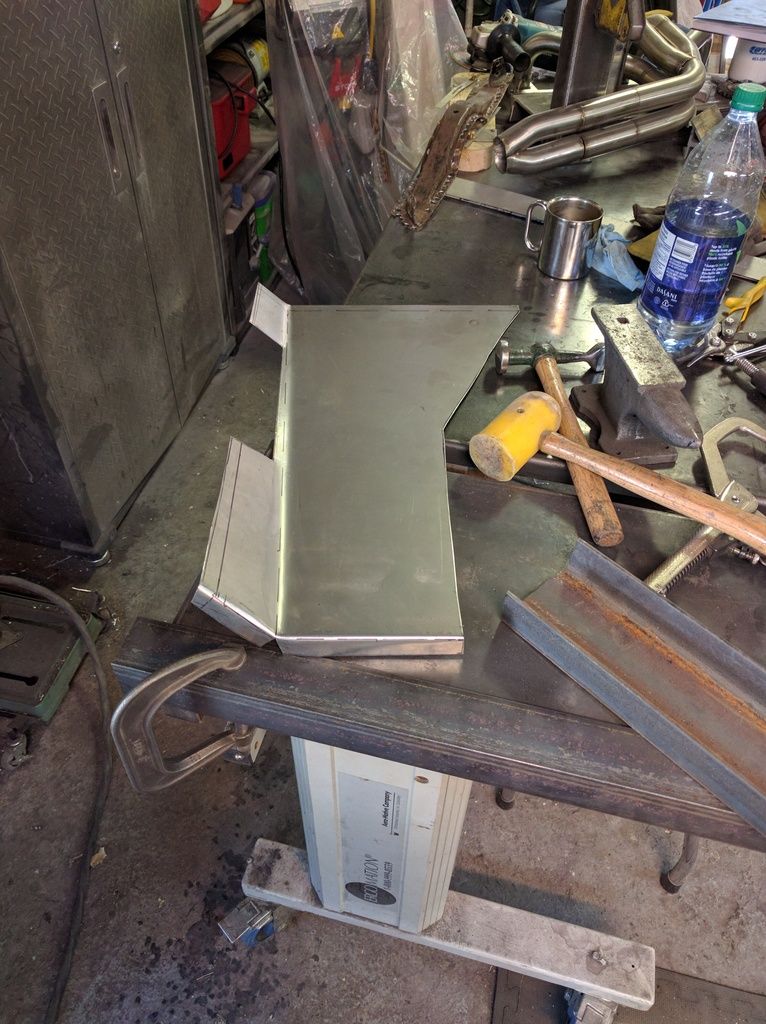
Next up on the list was the drivers floor repair. I hadn't settled in my head that everything was fine, so this was taking a while. I jumped it this morning and cut up a panel based on a pattern that I made.

Image

I think I could do this stuff all day. I love making new panels. It's so fiddly to get just right. Lately I've been scribing with a sharp tool instead of just marking with a sharpie. It's nice to see the fits are like puzzle pieces and it makes the weld seam go in really easy as there are NO big gaps to fill which causes much heat and distortion.

Image

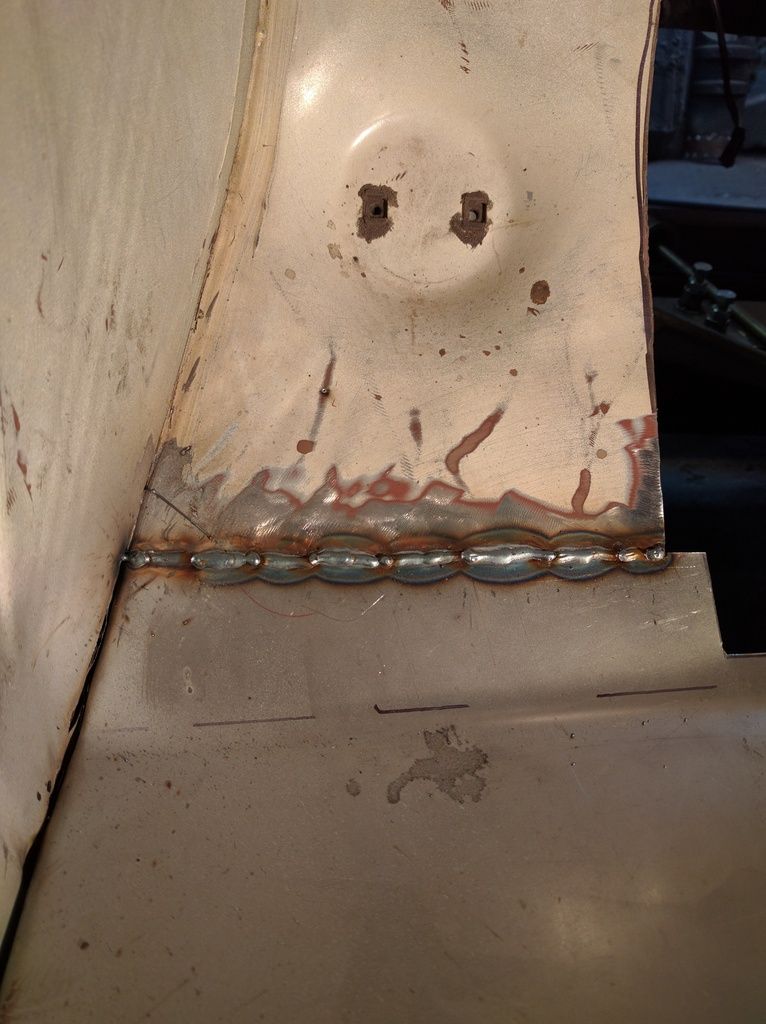
Here's a close up of the fit. This was taken from the back side showing the tack penetration.

Image

While this was the last weld, it worked really well. Stringers not tacks.

Image

By way of explaining how...I started at the rocker panel on the long seam to tack and worked towards the tunnel one tack at a time. That way if you get shrinking (which shuts up the gap) you can just tap the weld when cold and bring the gap back. It takes a long time to do it this way instead of jumping around like I used to do...but time spent here is time saved in how the panel turns out.

As I worked towards the tunnel, the panel needed to be ground down a little as it shrunk and wouldn't move back. It still had somewhere to move, so it didn't end up all wrinkly and warped. I just used my cut off wheel to grind my line back. It's amazing how much sheet metal will move. I was also cooling the tacks with compressed air to try to help.

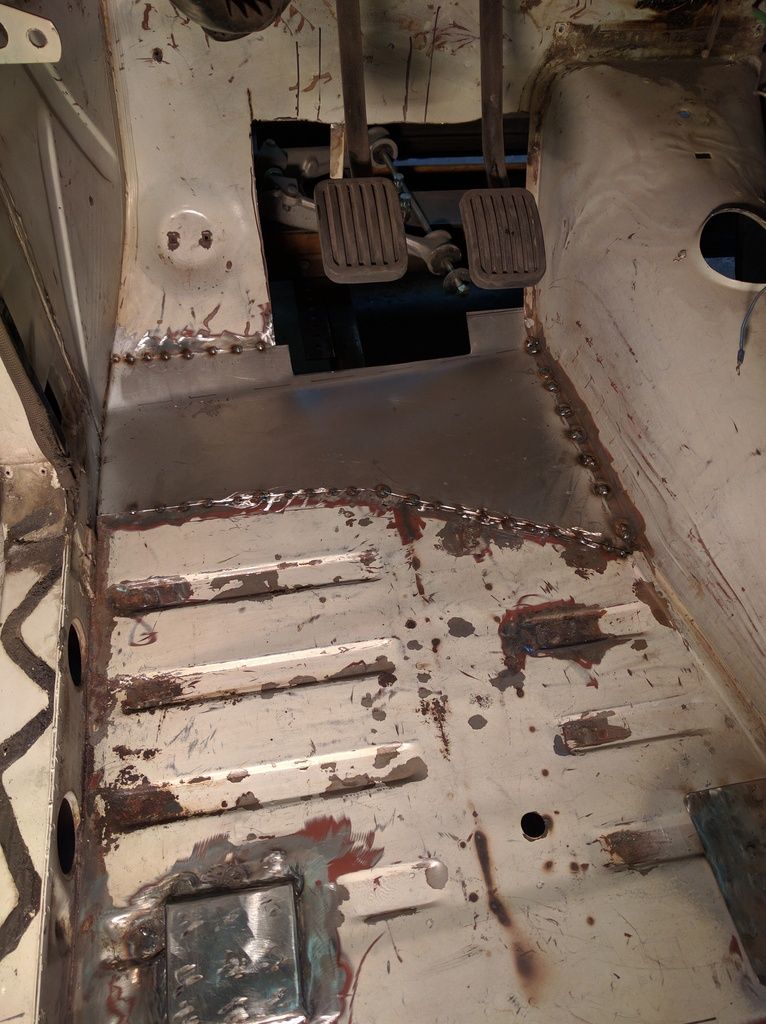
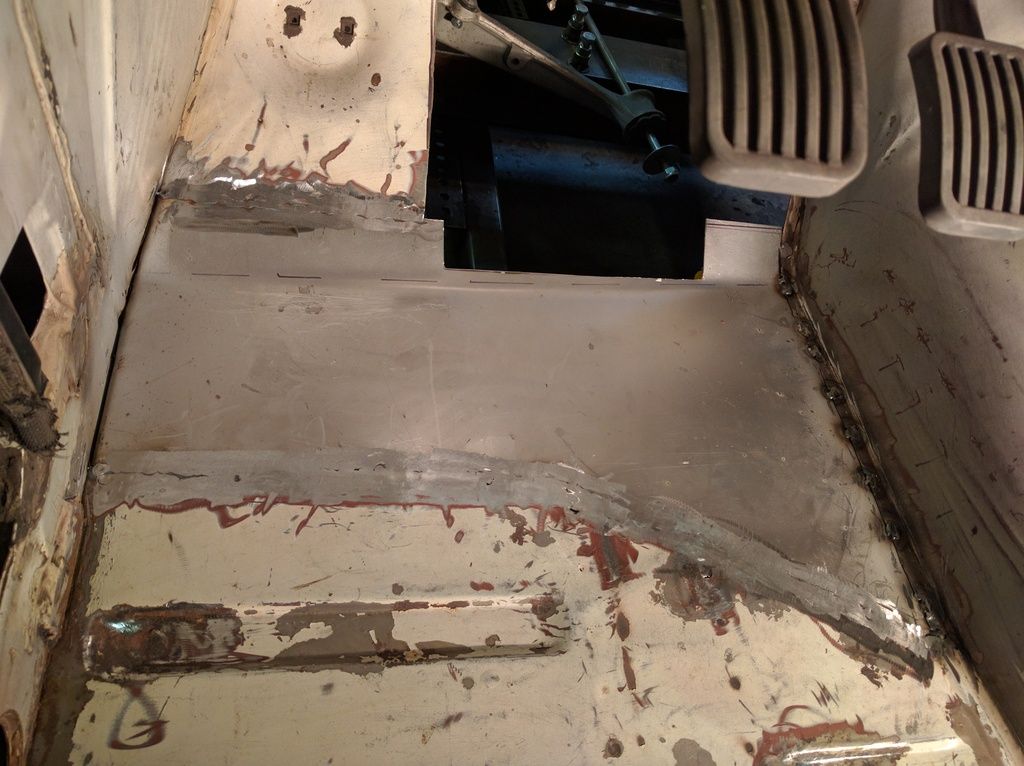
Anyway, it went in like butter and finished up really flat. I could metal work it to make it perfect - but I still have to put in the frame and things are going to move then. Here's the finished panel.

Image

The cut out in the firewall is to accommodate the pedal cluster which goes in next. There has to be a housing constructed and I have to settle on a final position for things so more to come.

_________________
Coburn Performance - OCD comes naturally.


Top
 Profile  
 
 Post subject: Re: Project Canuck - 1966 Canadian Build Thread ... Finally
PostPosted: Fri Jul 01, 2016 10:09 pm 
Canadian Tire Bolt ons
User avatar

Joined: Tue Aug 06, 2013 6:14 pm
Posts: 26
Location: NW Calgary
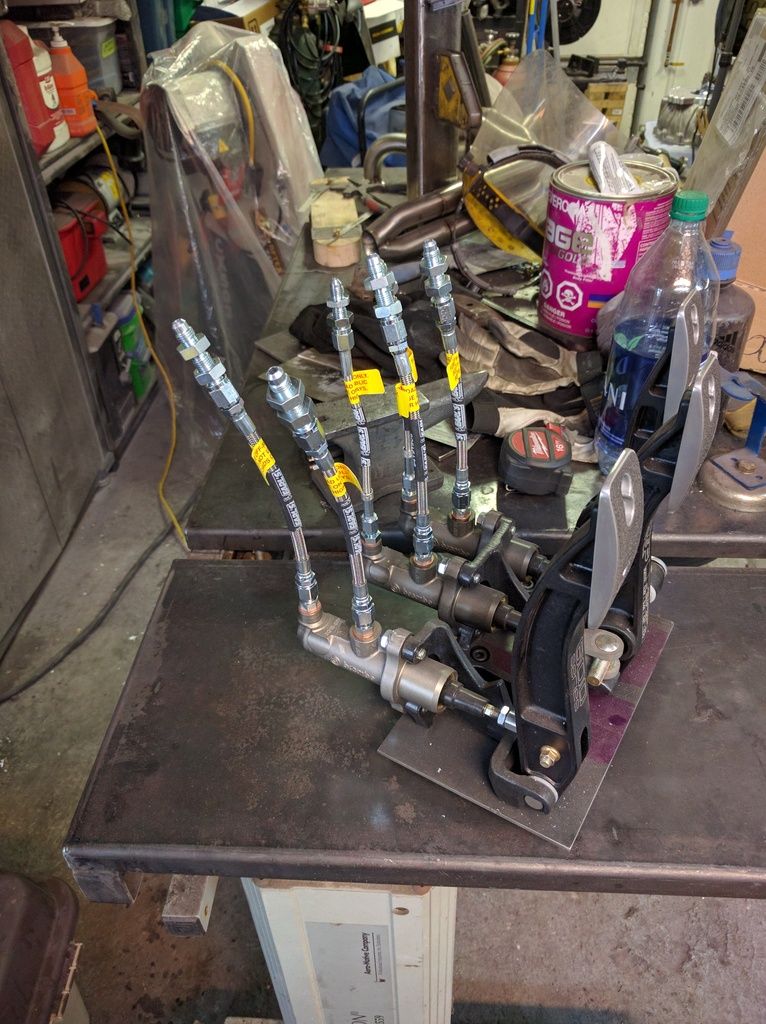
Man, if I was already cutting open the floor pan area I'd be tempted to move to a floor-hinged Tilton pedal setup or something. :twisted:


Top
 Profile  
 
 Post subject: Re: Project Canuck - 1966 Canadian Build Thread ... Finally
PostPosted: Fri Jul 01, 2016 10:37 pm 
Haha, I just built a W24 Octo-Turbo, now what?!
User avatar

Joined: Wed Jun 14, 2006 4:19 pm
Posts: 3131
Location: Lethbridge, AB
SeatSafetySwitch wrote:
Man, if I was already cutting open the floor pan area I'd be tempted to move to a floor-hinged Tilton pedal setup or something. :twisted:


What...like this?

Image

_________________
Coburn Performance - OCD comes naturally.


Top
 Profile  
 
Display posts from previous:  Sort by  
Post a new topicPost a reply Page 33 of 54   [ 801 posts ]
Go to page Previous  1 ... 30, 31, 32, 33, 34, 35, 36 ... 54  Next


Who is online

Users browsing this forum: No registered users and 0 guests


You cannot post new topics in this forum
You cannot reply to topics in this forum
You cannot edit your posts in this forum
You cannot delete your posts in this forum
You cannot post attachments in this forum

Jump to:  
cron


Powered by phpBB © 2000, 2002, 2005, 2007 phpBB Group
610nm Style by Daniel St. Jules of Gamexe.net